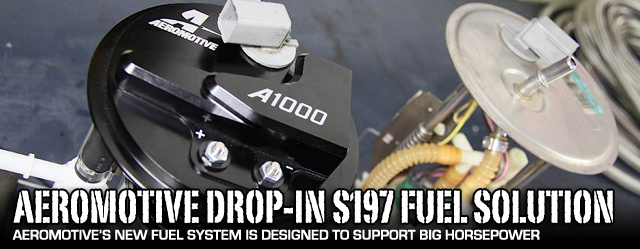
When the S197 Mustang platform went on sale for the 2005 model year, it brought a resurgence to the Mustang brand. People who weren’t interested in the car’s previous iteration suddenly wanted a Mustang of their own. That new platform brought some great technological and performance changes. More horsepower with the more potent 4.6 liter 3 valve engine, the reintroduction of the Shelby name to the Mustang for the first time in decades would also later follow.
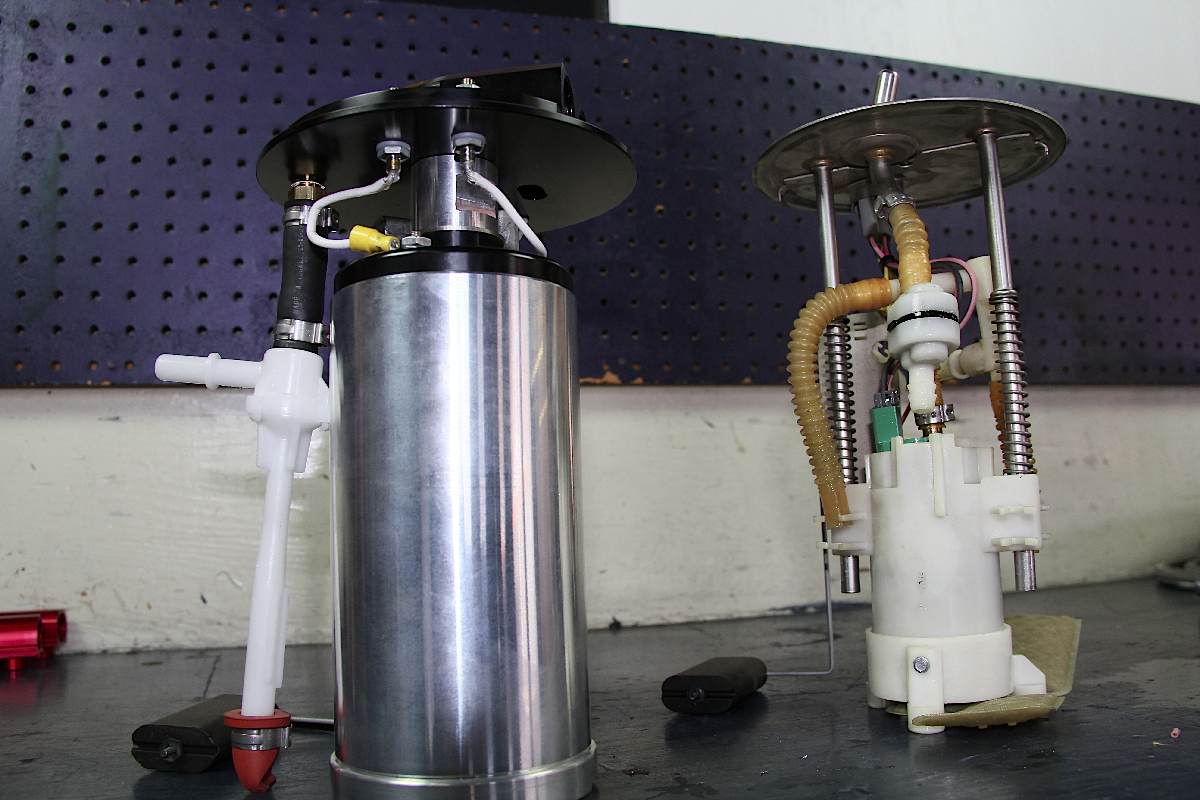
Aeromotive's new Stealth system for 05-09 Mustangs replaces the stock pump with no modification to the tank.
All of these changes were great, but there were also some challenges. Ford has been using a returnless fuel system on Mustangs since 1999, which make fueling a Mustang a little more complex. Everything from voltage boosters, running multiple pumps, to converting to a return style system were the only options if you wanted to make big power. The S197 presented its own set of challenges, namely the first Mustang with a saddle-style fuel tank. To help create a true “drop in” fuel system for 2005-2009 S197 Mustangs, Aeromotive has built a revolutionary new fuel hat that utilizes either an A1000 or Eliminator fuel pump.
Why More Fuel?
The 4.6 three valve engine in the 05-09 Mustang GT’s respond very well to modifications, especially if those modifications include boost. GT500’s of this era also respond extremely well to upgrades. That being said, with the stock fuel system or even with an upgrade in pump, there’s only so much the stock lines and fuel rails can handle.
The fuel tank in all S197 Mustangs straddles or “saddles” (much like a saddle on a horse) the car’s driveshaft. This means that there has to be a second fuel pickup or transfer tube in the tank to ensure that fuel can be drawn from both sides. Hacking up a factory tank is pretty much impossible since most models were plastic, and in many cases unsafe. Jesse Powell from Aeromotive tells us, “You can’t punch a hole in a tank or weld in a sump like you used to because they’re plastic tanks.” To get a ultra-high output fuel system, many were forced to ditch the stock tank in favor of a smaller trunk installed fuel cell…that is until now.
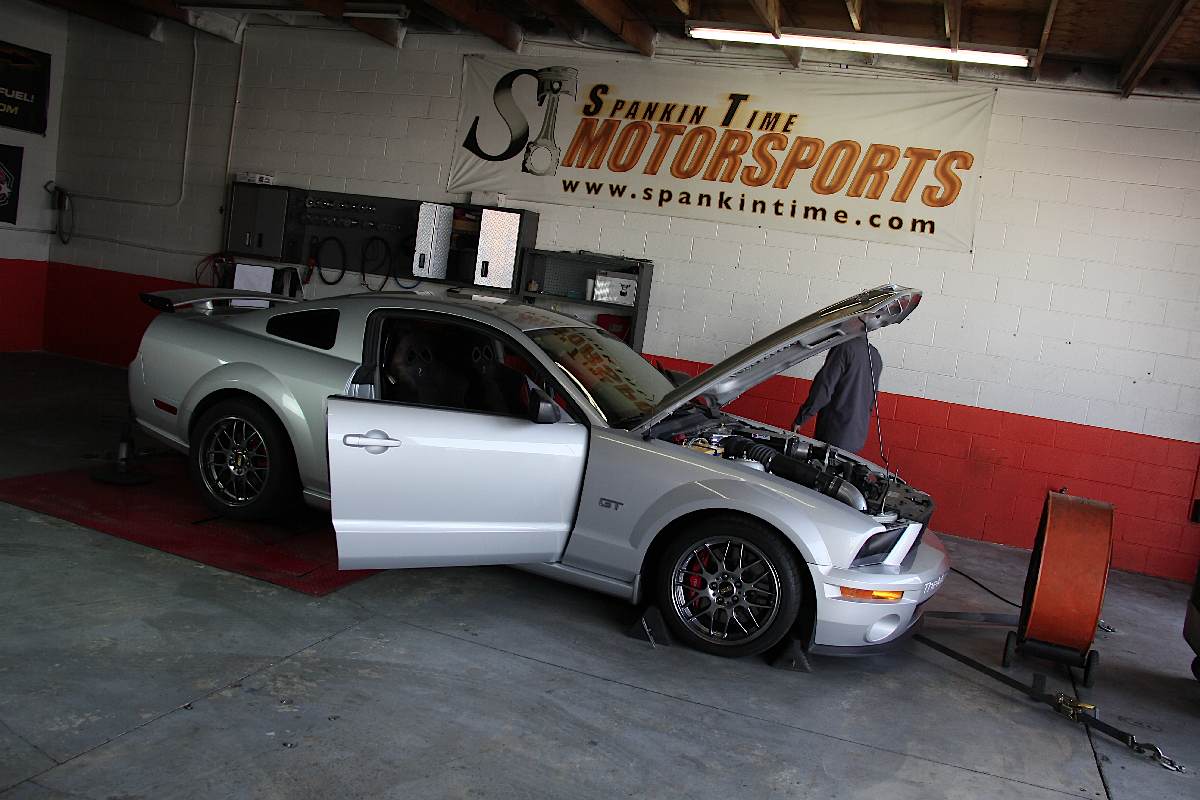
Our test subject was this '05 Mustang GT with a mildly built 3valve 4.6 and a Kenne Belle supercharger.
Voltage boosters and multiple pump hanger systems available on the market also do not address the issue of reliability. Voltage boosters can only do so much before you reach the actual limits of the stock pump. Running the pump at higher speeds than designed will tax it more which could shorten its service life.
Multi-pump systems have been popular since the New Edge cars first started getting boosted, though the problem with a multi-pump system is what happens if one pump fails? You won’t know until it’s too late. The car will most likely still run and drive, because it’s still supplying fuel to the engine at the correct pressure. The issue will be when you stand on the gas or put the engine under heavy load. It’s very likely you could lean out the engine and not realize it quickly enough, resulting in extreme, rapid detonation.
Proven Solution in a new Package
Saddle Friendly
Since 2005 Mustangs have a “saddle” style fuel tank, which straddles the driveshaft, Aeromotive actually repackaged the A1000 and Eliminator pumps with a custom hat to make them fit this application. Everything to use the factory siphon system is available as well to ensure the pump draws fuel from both sides of the tank.
The kit includes a single pump, either the A1000 or the Eliminator. Powell says, “We repackaged a proven system to make it fit the stock tank.” Other products are available to make this a truly complete solution including fuel line hoses, regulator, filter, fuel rails, and fittings.
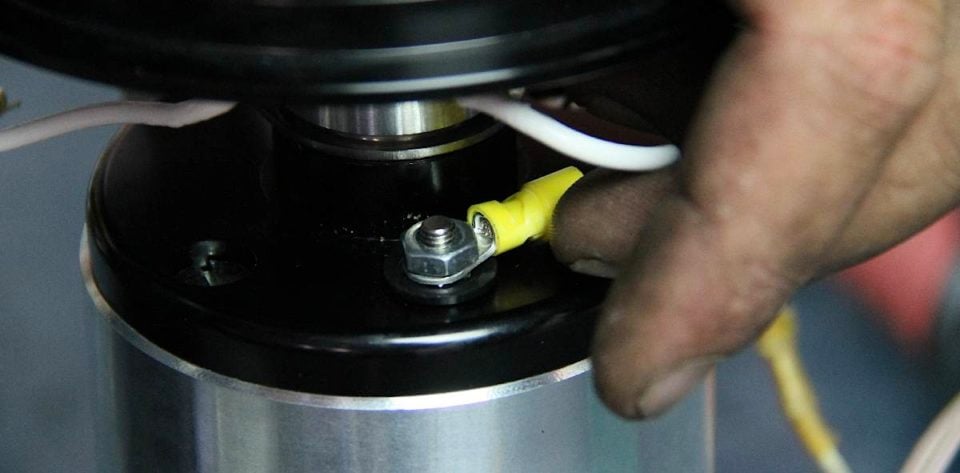
A really trick feature of this system is the quick release fittings that allow it to connect to the stock siphon system for the saddle tank design. “We had to make sure the siphon system still worked correctly,” says Powell. By doing this the pump correctly draws fuel from both sides of the tank ensuring you get to use all your OEM fuel capacity.
This system also utilizes the factory harness connections, O-ring tank seal and locking ring on top of the tank. Those features not only make the system easy to install but they also make it truly a “Stealth” system. Since there’s only one pump, if the pump should stop working the car is also going to stop running. Powell explained, “The other problem we saw with multi-pump systems is that if one pump fails, and they’re all prone to fail due to the high head pressures they have to run to keep up with demand. You’re counting on that other pump to be there because your engine needs it there.”
Complete Aeromotive Stealth Fuel System Part Numbers:
- 18676 A1000 Stealth Kit for 05-09 Mustang
- 12301 10 Micron Filter
- 12305 Billet Fuel Filter Bracket
- 13101 EFI Bypass Regulator
- 15633 EFI “dry” fuel pressure gauge
- 14116 Fuel Rails 4.6 3 valve
- 15674 Y-block
- 16301 Fuel pump wiring kit
- 15610 Reducer fitting (*5 required)
- 15649 Reverse port adapter
- 15607 Male flare fitting (*7 required)
- 15653 Straight -08 hose end (*8 required)
- 15654 45 degree -08 hose end (*6 required)
- 15655 90 degree -08 hose end (*10 required)
- 15663 180 degree -08 hose end (*2 required)
- AN-08 40′ roll of -08 line.
Installation
The truth of the matter is that when you’re making this kind of horsepower (650 rwhp and up), you need the right kind of fuel system
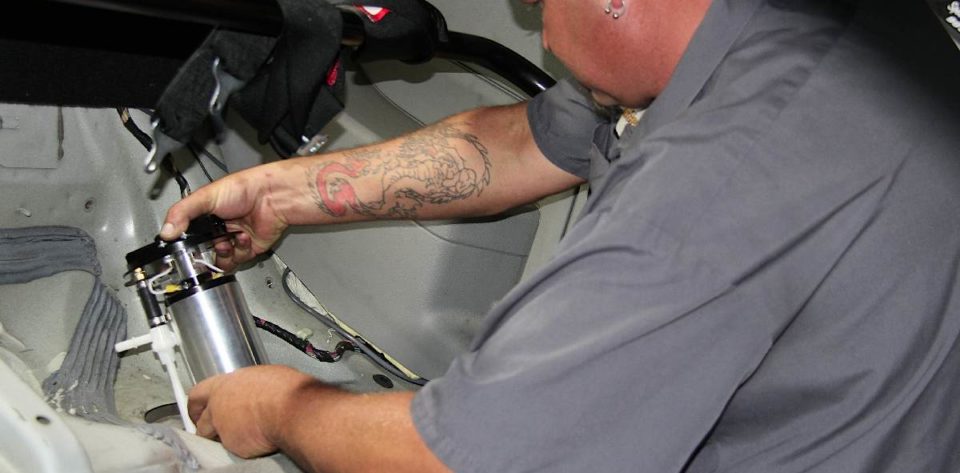
We got together with the guys at ST motorsports as they installed this system on a customer’s car. This ’05 Mustang has a mildly built 4.6-liter 3-valve engine and a Kenne Belle 2.8 liter supercharger. This car is going to use the Aeromotive 3-valve system with the A1000 pump, part #18676.
Pump
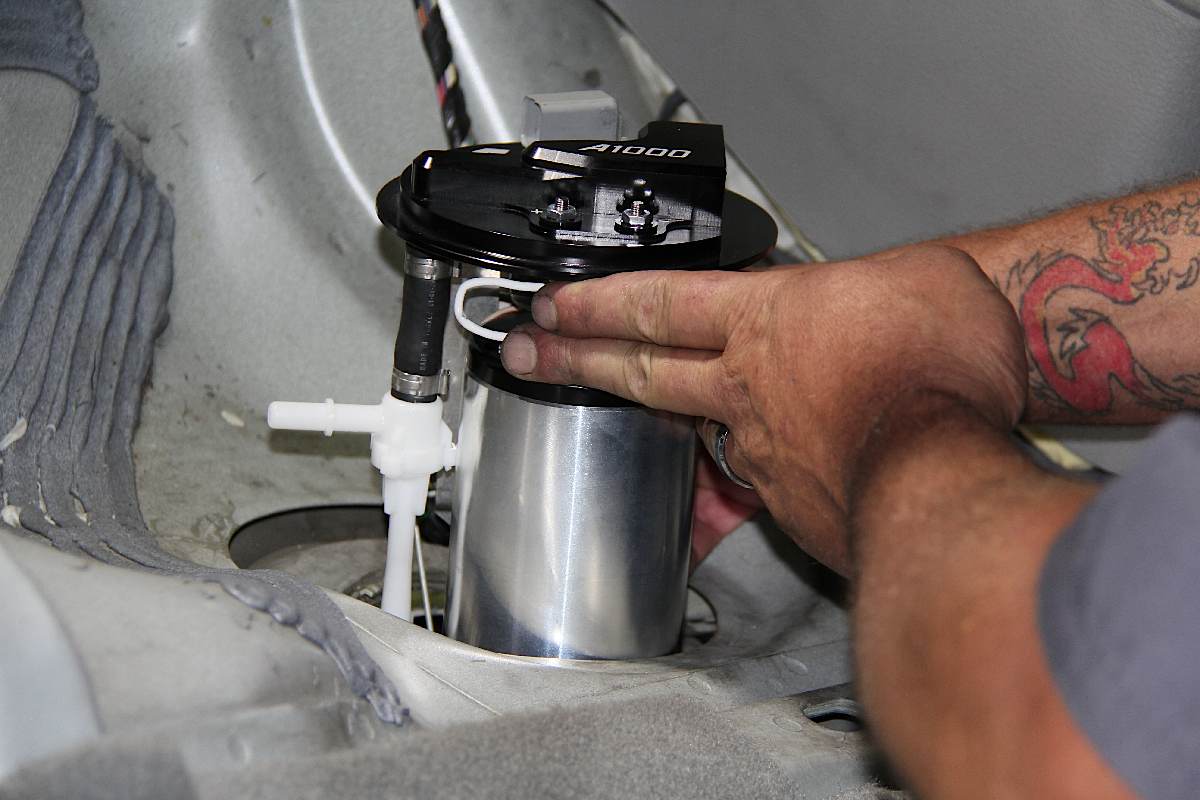
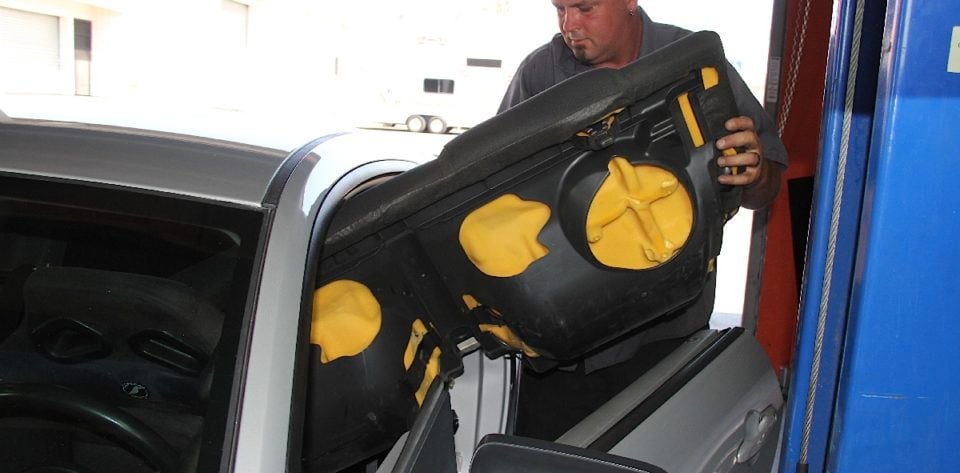
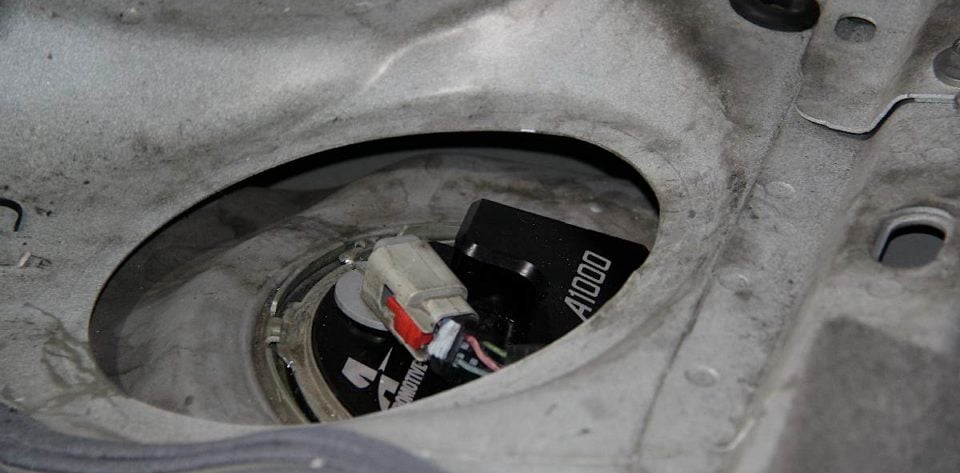
Ford did us all a huge favor with the fuel system design on the S197 platform; no dropping of the tank is needed. Simply remove the rear seat to gain access to the top of the tank and the pump via the factory access panel. Also be sure to disconnect the negative side of your battery to ensure the fuel system is powered down.
Once you’ve removed the rear seat be sure to disconnect the fuel line from the top of the pump as well as the electrical connector. It’s always a good idea when disconnecting the line to have a couple of shop rags handy to soak up any fuel that might run out of the line.
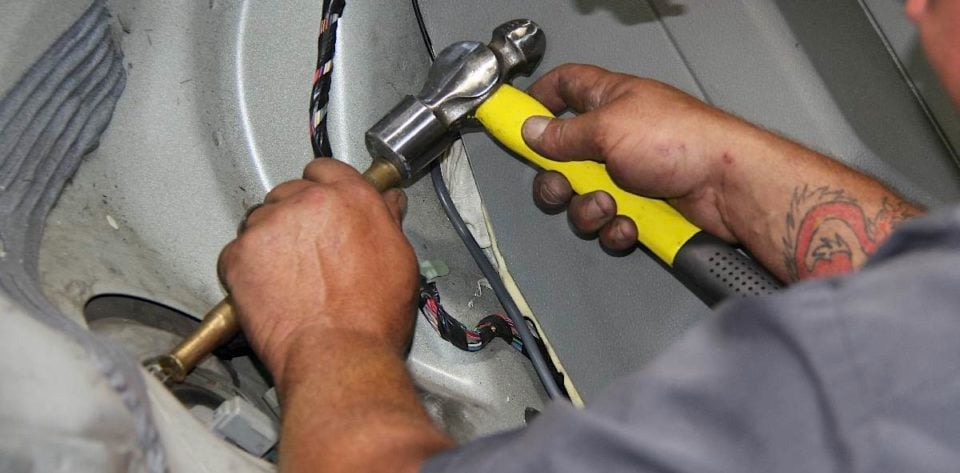
Removing the factory pump is a simple matter of using a wooden or brass drift (anything that won’t create a spark), and a plastic coated hammer or rubber mallet to carefully drive off the locking ring. If you’re locking ring is damaged, they are available over the counter at your local Ford dealer.
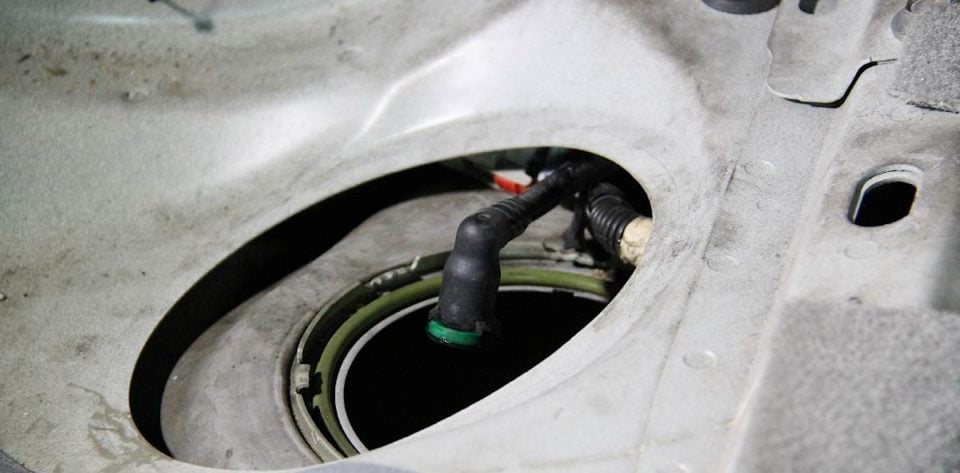
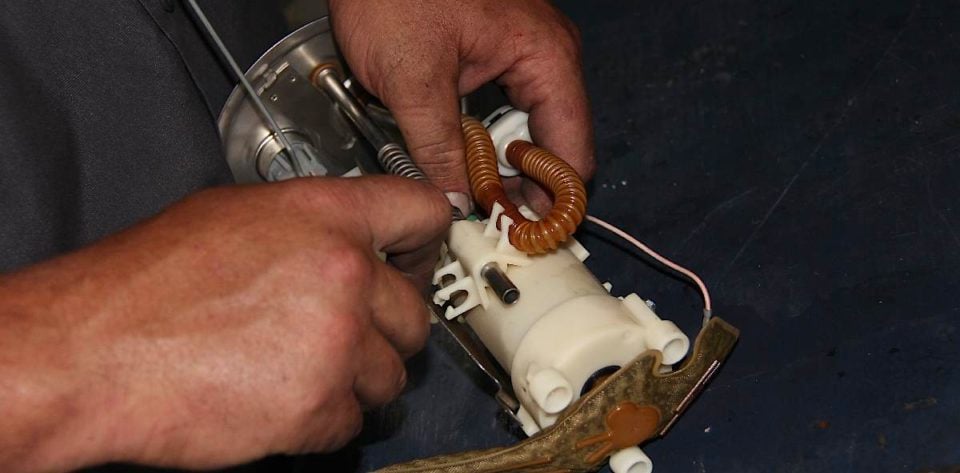
Carefully pull out the old pump, set it on a work bench and transfer the fuel level sending unit, and crossover tube to the new Aeromotive pump. Be careful with the level sender as to not bend, or stress it in any manner, this can cause inaccurate readings on your fuel gauge.
Now simply drop the new pump assembly with the transferred parts back into place (be sure to reconnect the transfer tube). You’ll use the factory lock ring to secure it in place and when you’re ready to run it even plugs into the factory connector.
Lines and Regulator
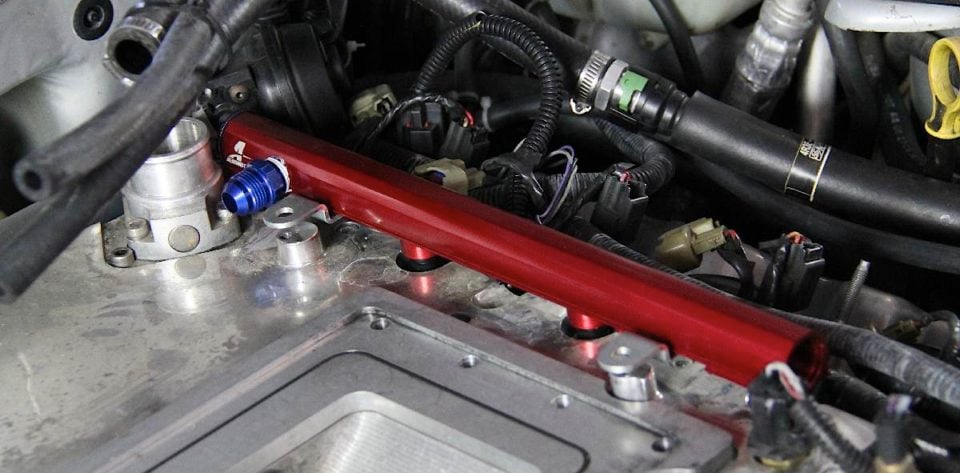
While Aeromotive does not yet offer a one part number line kit for this installation, they do offer a fuel rail installation kit for these cars, part# 14124. This kit allows you to add the required supply and return lines in the engine bay to adequately feed an engine making this kind of horsepower. Plumbing the Aeromotive system is pretty straight forward. We opted to custom assemble our line kit using -8 AN stainless steel braided lines and all the necessary -08 fittings and hose ends. We also installed a Y-block to ensure both fuel rails get fed equal amounts of fuel.
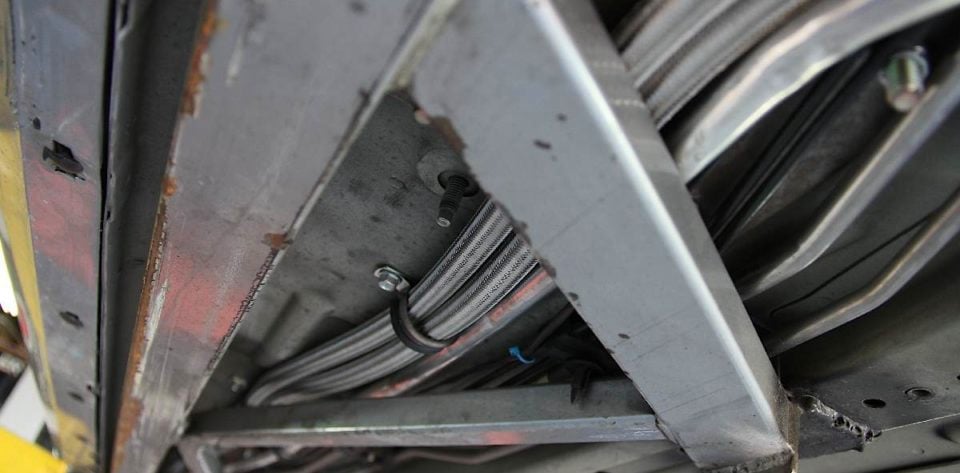
Routing the lines correctly is a time consuming but necessary task You’ll be routing both the supply and return lines. Be sure to secure them properly to the car’s body. (plastic zip ties are not considered securing the lines properly). This is also the time to install the in line fuel filter and bracket (filter part#: 12301 or 12321, bracket part#: 12305). Powell did tell us that in some cases. if you don’t want to run a new return line, you can order the proper fittings from Aeromotive to adapt the factory installed supply line to now become the system’s return line. You’ll need to consult your supplier, or Aeromotive about this should you choose this option.
We mounted the Y-block on the driver’s side inner fender, and the regulator on the passenger’s side fender. The Regulator we’re using is a rising rate design part# 13101. What this means is that the static fuel pressure cam be set, and run that pressure all the time, or a line can be attached to it for boost reference, and the regulator tuned to increase fuel pressure as demand rises.
Fuel Rails
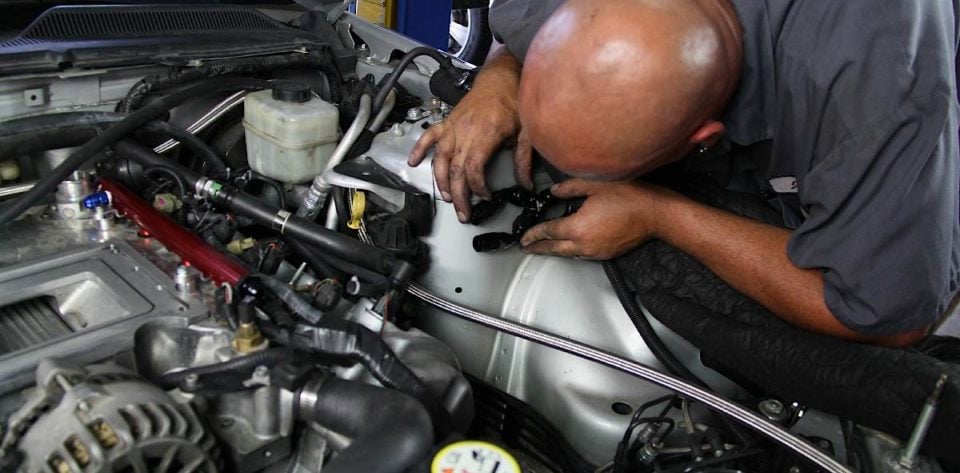
Fuel rail installation is pretty straight forward on this application, though with the Kenne Belle blower some modification was necessary. Disconnect the factor fuel rail pressure sensor. Disconnect the stock fuel lines, and move or remove any hoses, harnesses or other components out of the way. Remove the bolts that secure the stock rails to the car. Disconnect the injector connections at each injector. Lay a couple of shop rags around the injectors to catch any fuel that leaks out if an injector pulls out. Carefully pull up on the fuel rails, and move them out of the way, ideally with the injectors still in them.
On a surface where you can catch leaking fuel safely you will need to remove the injectors from the stock rails and install them back in the car with the new rails.
It is critical that the the siphon system still worked correctly.
You’re now ready to connect your pump, recheck all your fittings and check for leaks. Cycle the key a few times to build pressure in the system and make sure you don’t have a leak. You want to locate any leaks now instead of later. Once you’re sure there’s no leaks you can reinstall the back seat button things up and now you’re ready to set your fuel pressure and perform any tuning.
More Power
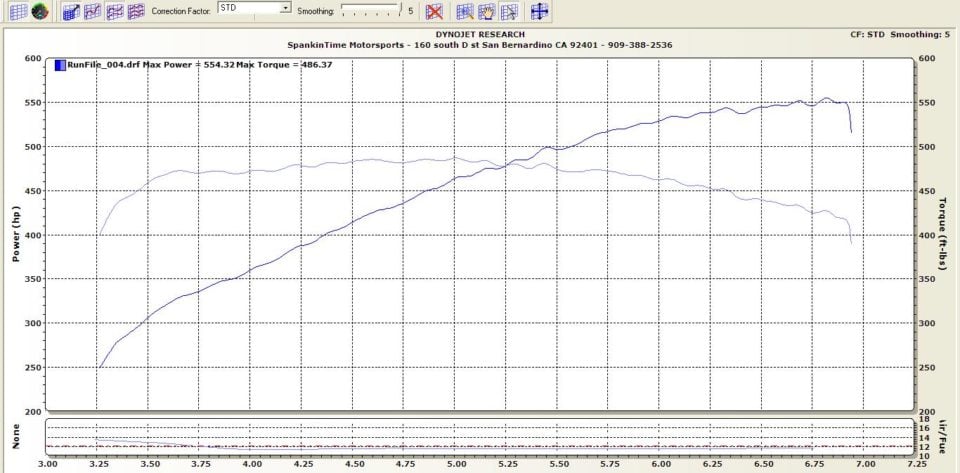
Our test car owner also chose to up the boost on his application, since the fuel system upgrade will allow him to safely make more power. A smaller diameter blower pulley was installed on the car by the guys at ST, to increase boost output from 19 to 25 psi. The original baseline dyno before all work was performed was 514 rwhp and 447 rwtq at the tires.
Tuning requires a tuner to set the car’s computer to not compensate for fuel pressure changes because the fuel pressure regulator is now performing that task instead of the computer doing it. This is a critical step to make sure that the Aeromotive pump receives proper voltage and operates correctly.
The dyno sheets, Left: Stock fuel system: Center Aeromotive fuel system and blower upgrade 91 octane tune, Right: Upgrades with racing fuel.
With the new fuel system installed and a proper tune, the car picked almost 40 rwhp and 44 rwtq. Remember the car’s original base line was 514 rwhp and 442 rwtq. On 91 octane pump gas, the Aeromotive fuel system installed and the proper tune, the car made 554 rwhp and 486 rwtq, to the tires. After the pulley change (19 psi to 25 psi) and anther tune, 715 rwhp and 635 rwtq at the rear tires. This substantial increase may have been possible with another system but would not have necessarily been as reliable, again going back to what we said before about a multi-pump system where a single pump fails. The owner can safely drive this car on the street or track with little worry regarding this type of failure.