There is no arguing that the Boss 302 is a race-bread monster straight from the factory, but after a while, even the factory 440 horsepower just isn’t enough for us speed freaks. So it was time to start performing a few mods to the 2012 Boss 302 with bolt-on parts, with an eye on naturally aspirated power. A blower just didn’t feel right as the Boss’ longtime appeal is that it has always been a high-winding, naturally aspirated screamer. We are kicking off the modifications to our 2012 Boss 302 with the addition a Steeda cold air intake, Dynatech headers, Flowmaster axle back and a dyno tune using SCT software.
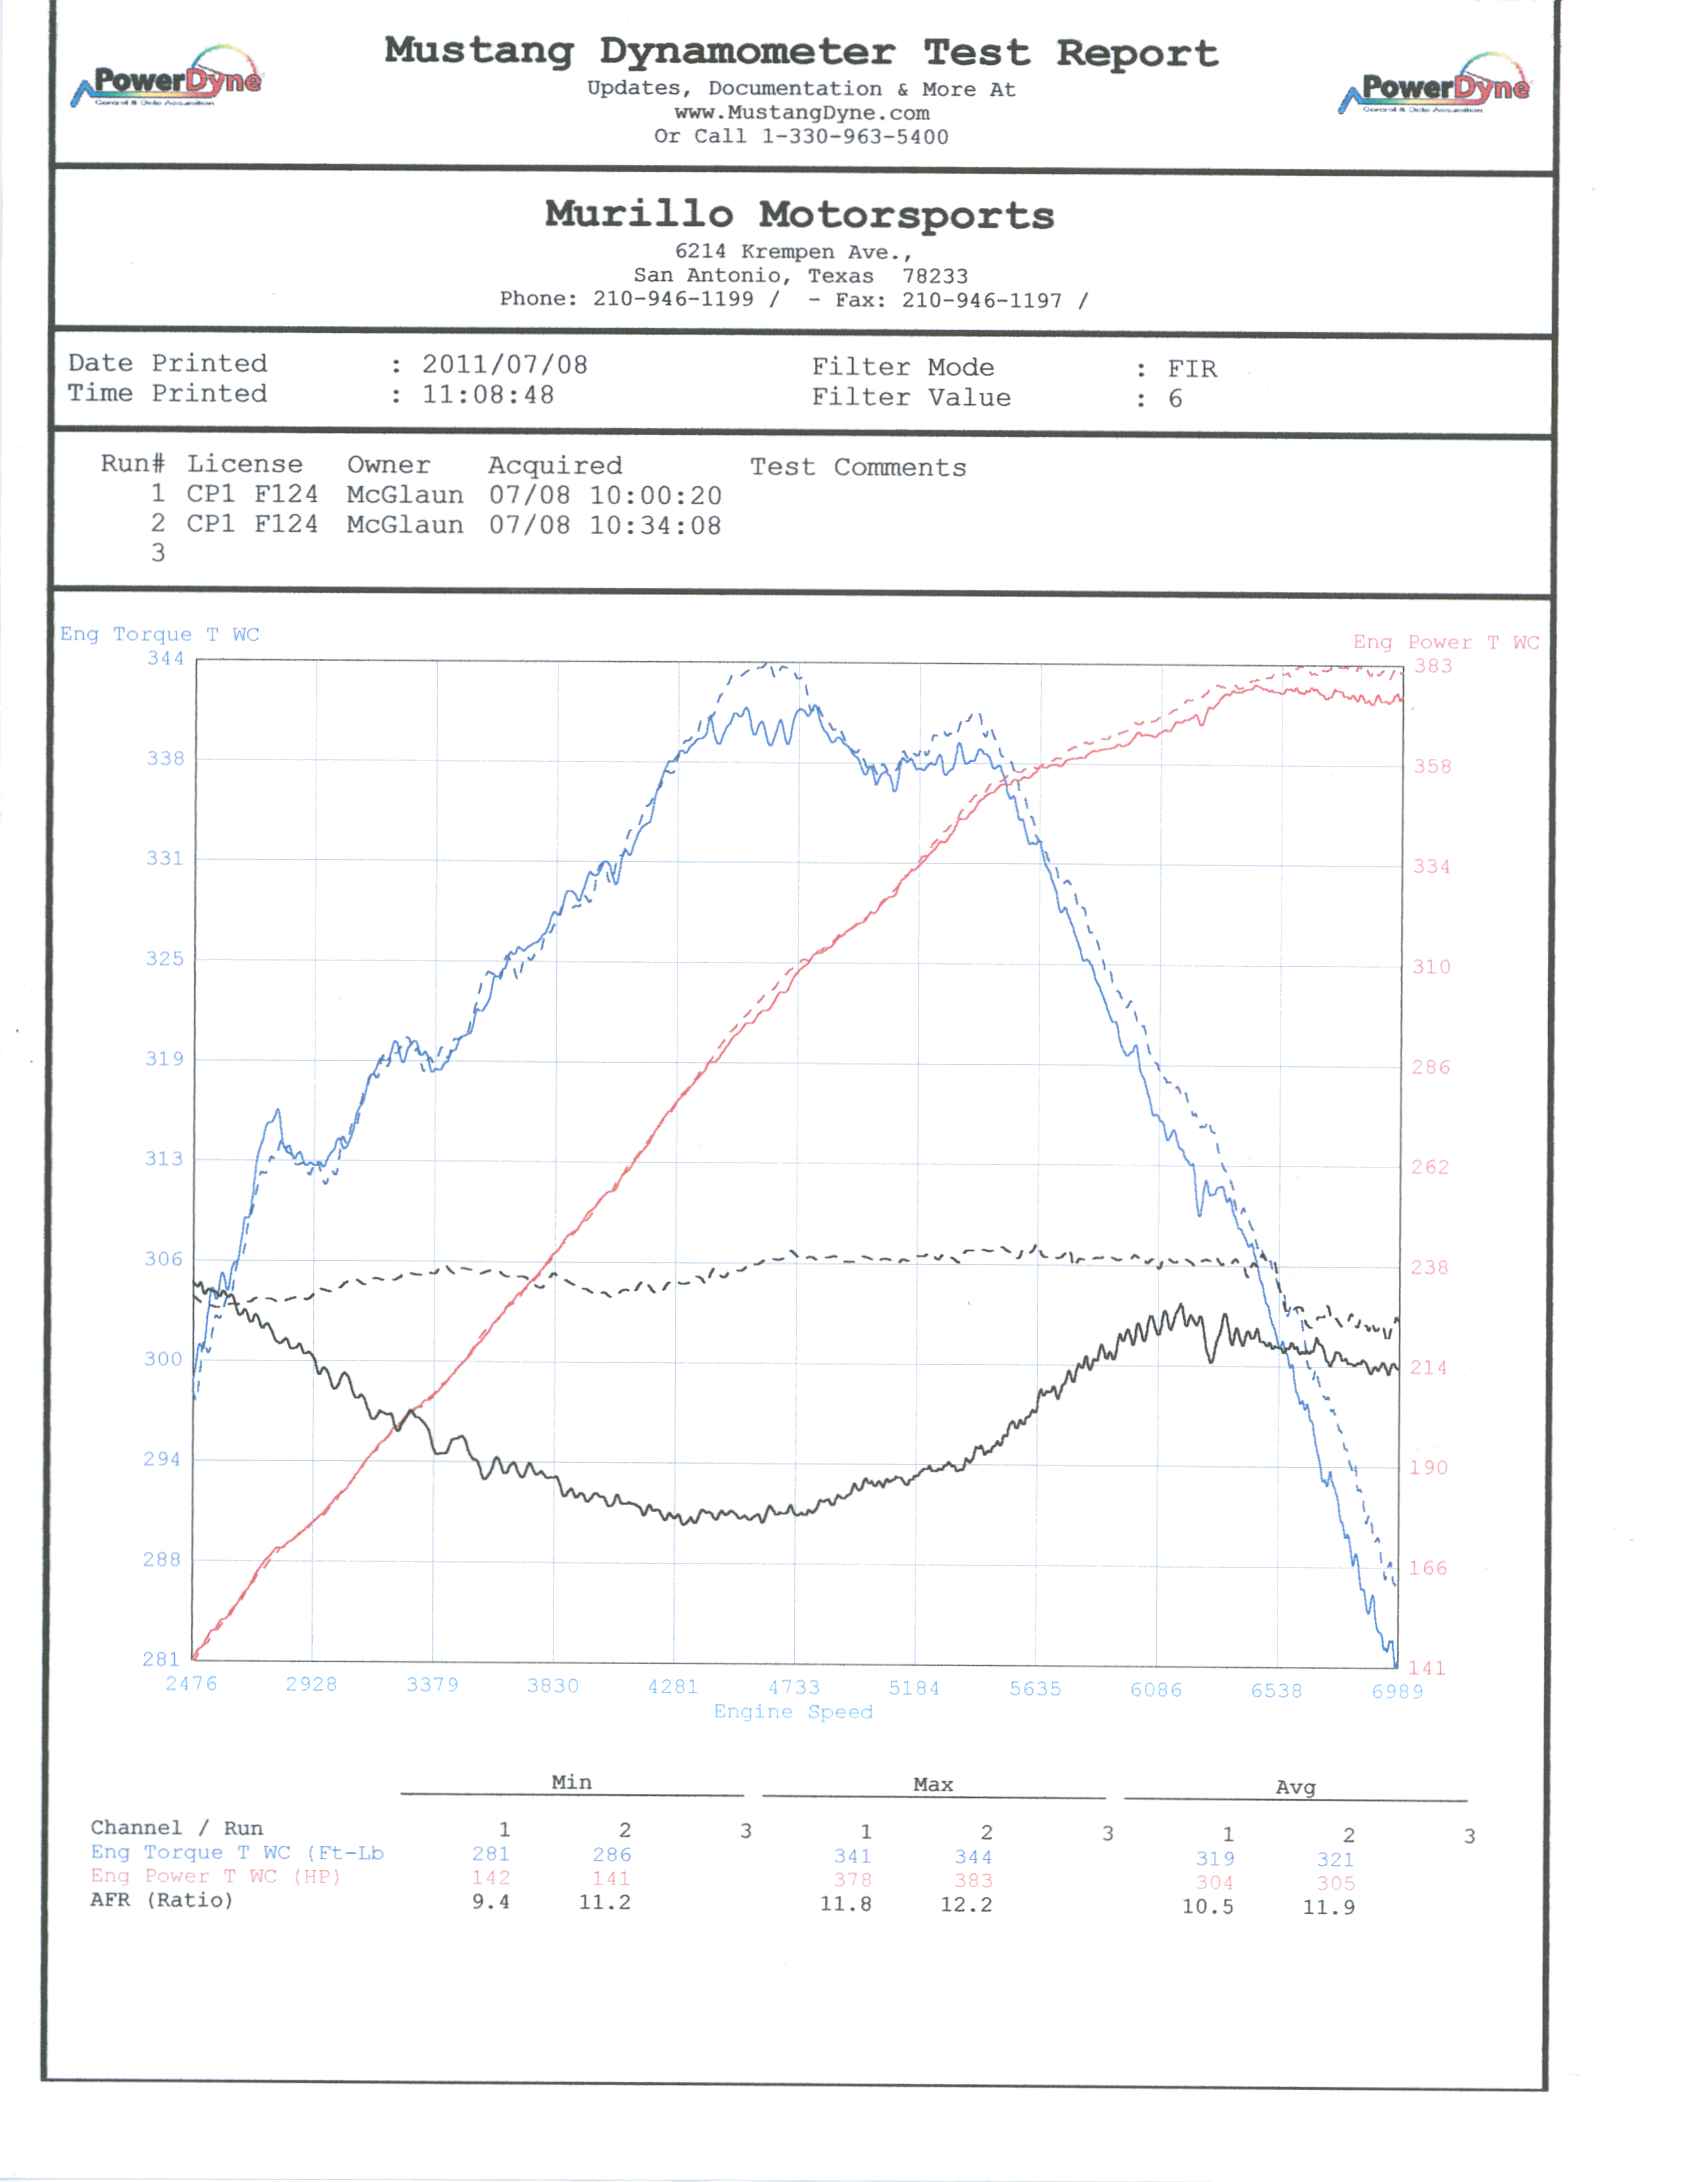
Base Dyno Runs
This is where the numbers might get confusing, so read closely. The first thing we did was toss the Boss 302 onto the Mustang dyno rollers at Murillo Motorsports for some baseline numbers. The only thing we did was remove the restrictors from the side-exit exhaust, and the car put down 378.1 rwhp and 341.3 rwtq. Mike Murillo did full dyno tuning on the Boss 302, but an issue with the dyno software prevented him from revving the engine above 6,800 rpm, at which point the car was still gaining power.
Obviously, we wanted to run the engine as high as we could to more accurately gauge the power increase from the bolt-ons. Murillo went ahead with the installation of the Dynatech headers and Flowmaster mufflers, after which we took the car to Dallas Mustang and strapped it to the company’s DynoJet dyno for a post-exhaust baseline run. So working slightly backwards here, we are going to start with the exhaust portion.
Dynatech Headers and Flowmaster Axle Back
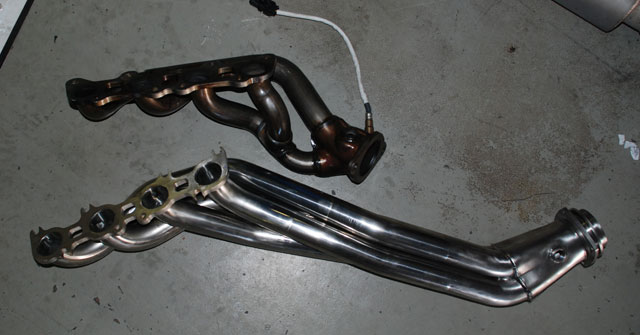
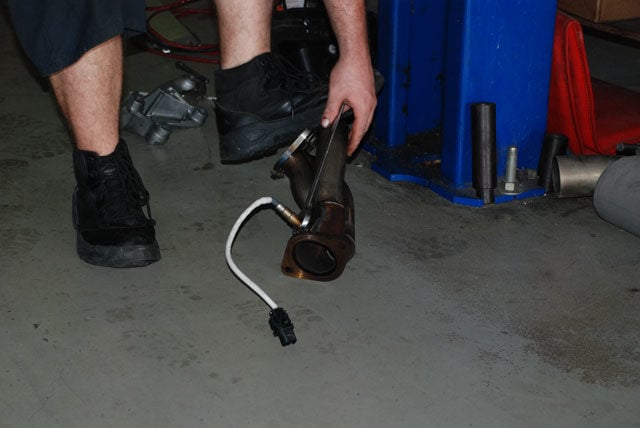
The Boss 302 is a beast from the factory, but getting it to breathe better is going to help us run faster lap times on the road course and drag strip. To help us accomplish that, we replaced the factory shorties with a set of Dynatech SuperMAXX headers and a catted X-pipe (PN 722-74310 and 722-74320). The exhaust work was capped with a set of Flowmaster Hushpower mufflers. The factory BOSS 302 over axle pipes were retained.
The only downside to using this system on the Boss 302 is that we will lose the factory mid-pipe that has the side pipes attached. The Dynatech headers have 1-7/8″ primaries, a 3-inch collector, 3-inch system tube, and are made of stainless steel.
You can get optional ceramic coating but our headers do not have that. The Dynatech headers do come with quality metal gaskets, the needed O2 sensor extenders, and the hardware to attach the headers to the cylinder heads.
Out of the box, the build quality of the Dynatech headers are awesome. The bends in the tubing are mandrel bent and the design allows for easy fitment, plus the welds are all hand welded TIG. We know many people think that the 5.0 engines use headers from the factory, but the primaries on the factory set up are tiny and they are more akin to shorty headers than long tubes. The Dynatech catted X-pipe was a must because we wanted the car to remain as legal as possible while also not worrying about check engine lights.
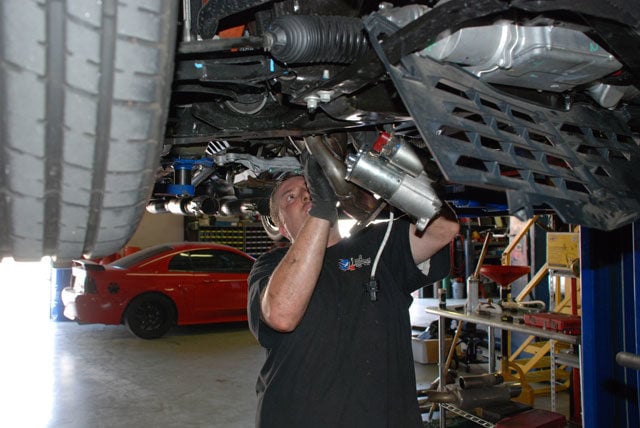
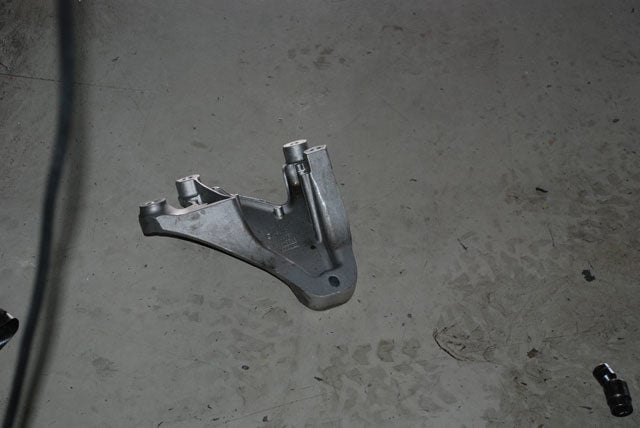
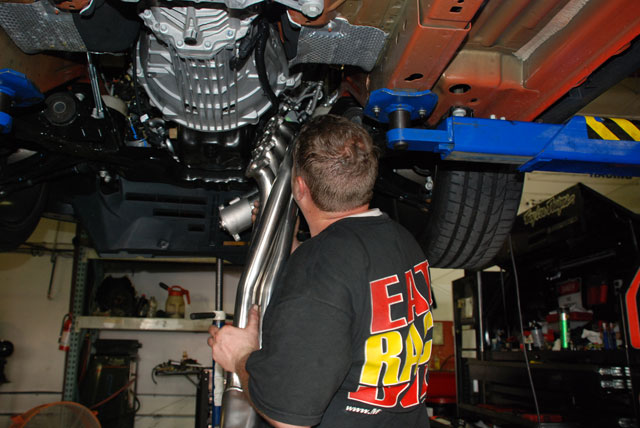
Installing long tube headers on a S197 is best done on a lift. You will need remove an engine mount bracket, raise the engine up slightly, disconnect the steering shaft and starter to get the headers installed properly. Also the factory O2 sensors will need to be transferred.
The installation of the headers was done by Murillo Motorsports. Anyone that has been under the hood of a late model Mustang knows that there is very little space under the hood to work in. This is what makes the installation of headers on a 5.0 such a time consuming process, as it must be done from the bottom. The gang at Murillo had all the tools to make the job simple.
The first thing was to remove the factory strut tower brace from the Boss 302 along with the cold air intake and set them aside. While the car was on the ground, the Murillo used a long extension to reach the engine bay-accessible header bolts and collector to the bolts on the factory collectors. After those were loose, the Boss went on the lift and into the air to allow easy access under the car for the removal of the factory side pipes and mid-pipe.
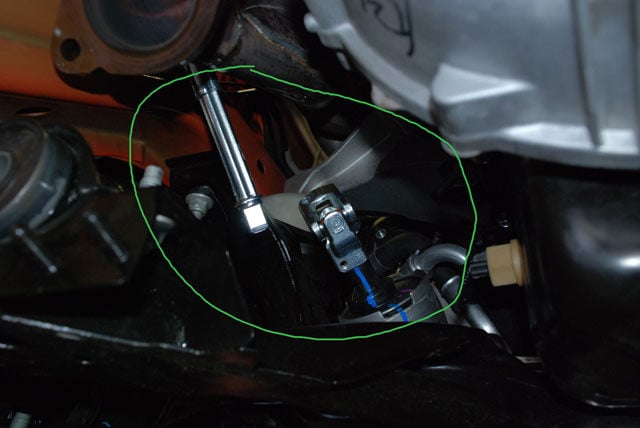
We also removed the factory steering shaft for more clearance on the driver’s side, loosened the motor mounts and physically jacked the engine up a few inches to get the needed space to reach the bolts for the factory manifolds and to get the clearance needed to remove the manifolds and slip the headers into place.
The headers will need some twisting and coaxing to get them fitted into place. Once we secured the header bolts, we began to reassemble the bottom of the Mustang.
Mounting the SuperMAXX headers was basically the reverse of the removal process for the factory manifolds. Again, the front two nuts on the passenger side of the car were the time consuming monsters for the install of the headers. Another four hours of shoving hands into the tight confines of the engine bay saw the sexy headers mounted up and we dropped the engine back into place, bolted the motor mounts back up, and reinstalled the steering shaft. We were then ready to move onto the install of the new Dynatech X-pipe with cats.
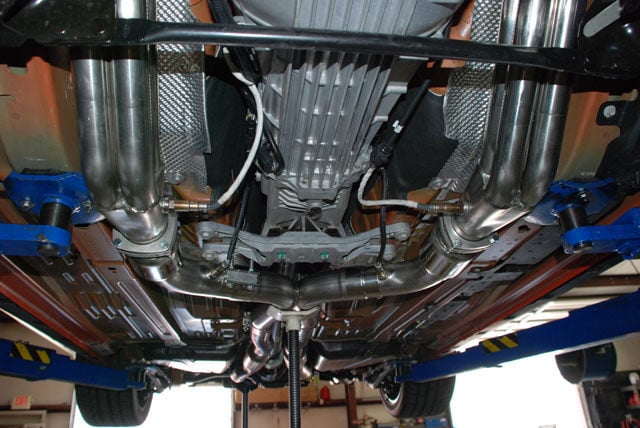
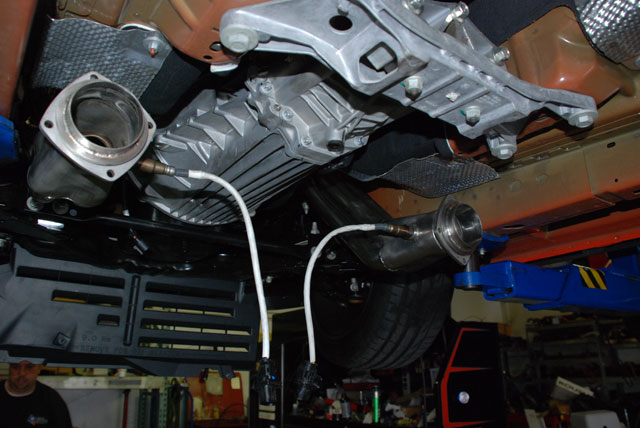
We installed the O2 extenders so it would reach the relocated factory 02 sensors. The cats on the Dynatech X-pipe are smaller, though better flowing internally than the factory parts. The Dynatech cats are also much farther back than the factory cats were, but don’t worry, the new 5.0 Mustangs do not require a retune to compensate for the transfer delay function.
You do have to use the Dynatech X-pipe in catted or off-road style with these headers. The X-pipe we used bolted right up to the headers and the factory over axle pipes with no issues at all and was the easiest and fastest part of the entire install process.
The awesome Dynatech catted X-pipe will bolt directly to the factory over axle tubes.
No Problems With Moving O2 Sensors
In some cases, previous generation Mustangs would require a tune if an exhaust install moved the placement of the factory O2 sensors. The PCM simply didn’t recognize they were moved and couldn’t compensate for the additional delay time before seeing the spent exhaust. The Coyote Mustangs have a built in learn function that will automatically pick up on this change, not requiring you to have a custom tune with a long tube installation.
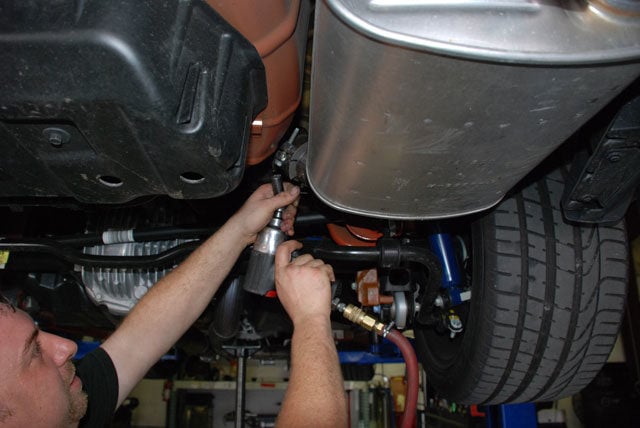
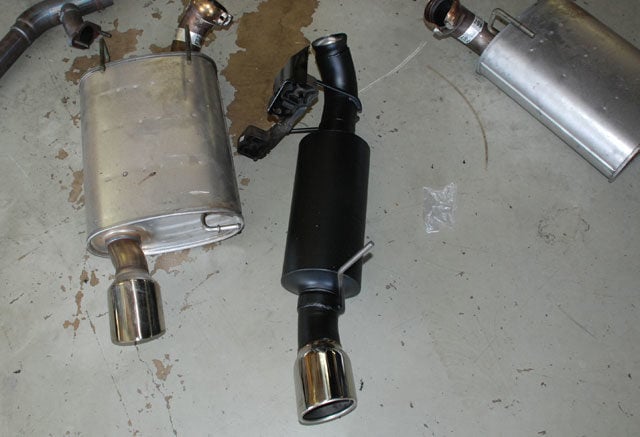
The first step here was to remove the nuts from the brackets that hold the factory mufflers onto the frame of the car. Once both of the factory mufflers and brackets were removed from the car we took the brackets and attached the hangers to the Hushpower mufflers off the car. We then bolted the factory brackets back onto the car, hooked the mufflers to the stock over axle pipes, and aligned the tips of the mufflers in the rear valance. Once the tips were aligned, we tightened the entire exhaust system. The install process for us was a solid 12-hour process thanks to the delay with the header hardware.
The next step was to drop the lift, fire the car up, then lift the car back up to check for exhaust leaks. Once we were buttoned up and had no exhaust leaks, we took the car over to the dyno.
The Flowmaster Hushpower mufflers are a direct replacement axle back exhaust. They utilize the factory exhaust hangers and over-axle clamps. A very simple upgrade anyone can do in their driveway.
With the Dynatech headers and Flowmaster axle back installed, the Boss laid down 410.4 rwhp and 364.3 rwtq. This is a rough gain of 34.8 rwhp and 26.6 rwtq.
The base run with the CAI and SCT tune was 400.1 rwhp and 353.3 rwtq. After putting the headers and Flowmaster mufflers on the car, it put down 421.2 rwhp and 364.1 rwtq.
After all the parts were installed, the Hushpower mufflers live up to their name. At idle the car sounds slightly deeper than stock with the headers, X-pipe and Hushpower mufflers installed. In fact, the Hushpower mufflers drone less than the factory exhaust did with the restrictors out of the side pipes. We can lug the car all the way down to 1,000 RPM and anywhere in between and there is simply drone.
On the DynoJet at Dallas Mustang, with the headers, catted X-pipe, and Flowmaster Hushpower mufflers already installed, but with the factory air box, paper filter, and stock Ford tune the Boss 302 put down 410.4 rwhp and 364.3 rwtq.
Dallas Mustang had run a completely stock Boss 302 on their dyno the week before our car showed up, and that car recorded 375.6 rwhp and 337.7 rwtq—pretty close to Murillo’s stock numbers. Note again that the box stock Boss 302 pull from DM is not our project car, but it is a good example of a stock Boss 302 run on the same dyno.
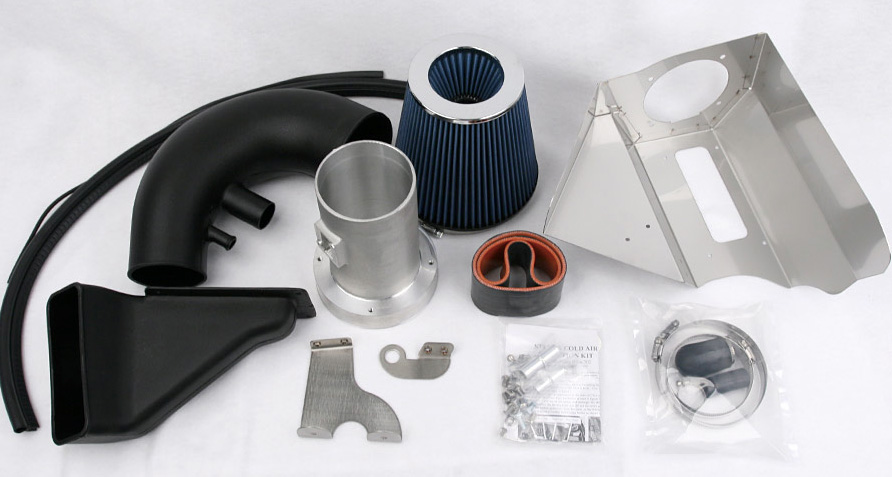
Steeda CAI and Dyno Tune
The next thing we did was remove the mass airflow sensor from the factory intake tube by removing the two Allen-headed screws that attach it, and transferred it to the Steeda tube. We then removed the sound induction tube and the other tube connected to the factory intake, and then loosened the hose clamps, removed the bolts in the bottom of the factory airbox that hold it to the car, and pulled the factory box off the car.
Take care to keep the rubber stoppers that are on the bottom of the airbox, as you will need those to keep the Steeda CAI from squeaking. You also reuse the factory hardware for mounting the Steeda CAI. You have to remove the factory intake snorkel part from the bottom of the stock air box and use the factory hardware to attach it to the bottom of the aluminum Steeda filter surround to connect to the grill intake.
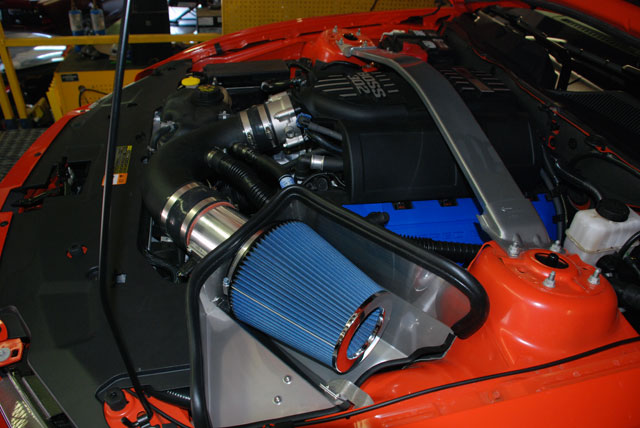
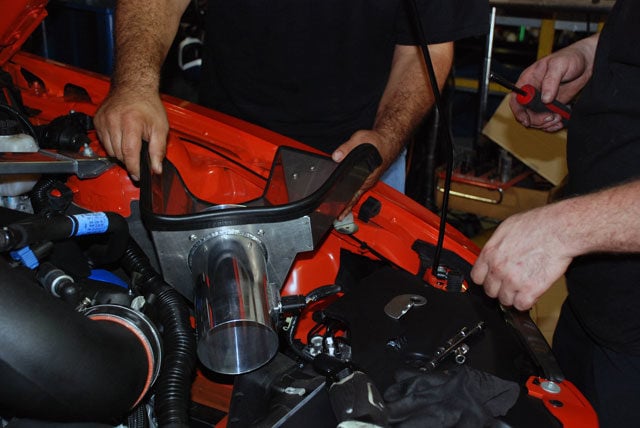
After the factory airbox is out, you simply reattach the Steeda CAI using the reverse of the factory airbox removal process. We bolted in the brushed aluminum air filter surround using the factory rubber stoppers and bolts.
We then pushed the Steeda intake tube through the hole in the aluminum filter surround. We then connected the intake tube to the throttle body using the silicone coupler and two supplied hose clamps, leaving enough free play to adjust the intake tube for proper fit. Then we put the conical air filter on the airbox side of the intake tube, tightened the clamp to keep it on the tube, and then tightened all the other clamps for tight fit. A loose clamp will cause the car to run poorly thanks to unmetered air making its way into the engine, so be sure to tighten them all.
After tightening all the hose clamps we went back and reconnected the sound induction tube and the other tube that connects right below that sound induction tube, and we were finished. It you don’t want to use the sound induction tube, the Steeda CAI kit comes with a cap to close that off. You would need to plug the sound induction tube on the firewall as well. The kit comes with a hose clamp to hold the sound induction tube on the intake tube.The installation process for the CAI takes only 30 minutes or so, even for the first timer.
The Steeda airbox attaches to the car with the stock fasteners, and the intake tube replaces the stock tube. Not shown here but required is the removal of the factory mass airflow sensor, which is then bolted to the Steeda tube with the factory screws. Leave the tube clamps (supplied with the kit) loose until the tub is connected to both the airbox and the throttle body, then once everything is aligned properly, tighten the clamps.
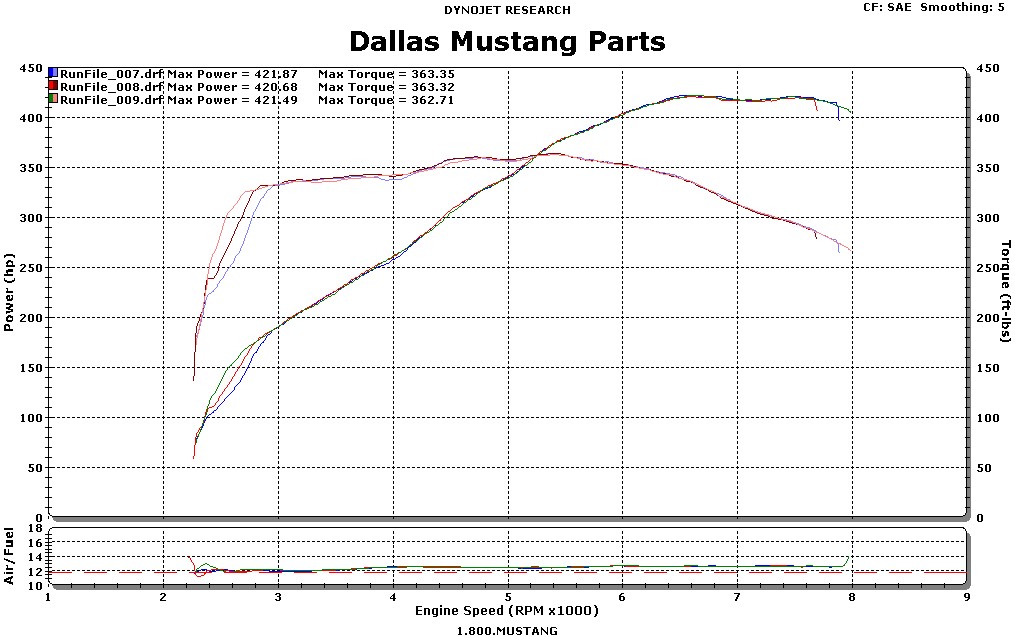
After adding the Steeda CAI to the Boss 302 Archie went back to work tuning the car for the new-found airflow. After three pulls, the best was 421.8 rwhp and 363.3 rwtq, for a respectable gain of 11 horsepower and no gain in torque.
The redline in all the custom tunes are bumped up to 7,800 rpm with peak power coming at roughly 7,700 rpm. The Steeda CAI also gives the car a nice “swoosh” sound when you get on and off the throttle, and it also dresses up the engine compartment. The filter is cleanable as well, so it may well be the last filter you have to buy for the car.
Ideally, after the custom tune on the Steeda CAI, we would have added the exhaust components and offered up a nice three-tiered set of dyno numbers. Sometimes things don’t work out as planned despite our best efforts, but with a total gain of 46.1 rwhp and 25.6 rwtq, there is nothing to be sad about here.