There was a lot of adapting that was forced onto Mustang enthusiasts as push rods disappeared in the mid 1990’s. Most only knew of over head cams because the kid next door had them in their Civic. It was a steep learning curve and many went kicking and screaming. Nearly a decade and a half later things have become easier, processes have evolved, and many that resisted have since caved in. The inherent problem is that working on mod motors in a lot of aspects is more difficult than their pushrod pals. But our friends at Anderson Motorsports are always looking to make things easier when it comes to the hassle of swapping mod motor cams. “The main step you got to remember is to make sure to have the other cam there when it comes to actually swapping out the cams,” said Rick Anderson of Anderson Motorsports. “There is higher chance of the gear slipping off the chain, and that will mess up your timing if you are off a tooth.”
Anderson Motorsports has come up with a method that allows the average mechanic to swap their 2005-2009 Mustang modular cams in four hours, or around three if you are an experienced mechanic. Anderson also sells a tool for 2-valves as well, and that part number is below. Though we should mention, this process is designed for street cams that will operate without the need for stronger valve springs. This method is a modified version of the factory protocol on removing modular camshafts at the dealership, and Anderson Motorsports and honed their skills on the process by the extensive cam testing and design they perform on them.
In addition to the cam swap technique, Anderson Motorsports carries their own cam line for modular motors, called Hi Intensity and Hi Rev Cams. They have found were certain aspects of controlled engine operation that, with the correct cam profile, would allow the ECU to function without misreading the cam and causing a drivability problem. AFM designs their cams to increase the “rate of acceleration”, a term used by cam designers to describe the speed at which the cam lobe begins to open the valve, and similar design characteristics in closing the valve as well. Finally, after all the research and design of the AFM cams, they then dyno test them to make sure they are performing as they were designed. A wide variety of applications can be found for both forced induction and naturally aspirated camshafts.
Outside your basic tool set and a torque wrench, you will need the following tools from Ford:
Three-Valve
• Ford SPX-303-1039 – $131.88 – Valve Spring Compressor
• Ford SPX-303-1175 – $96.00 – Timing Chain Wedge
Two-Valve
• AF-0602 – Anderson Cam Chain Retention Tool for 2-valves
* Anderson Motorsports stocks these tools and you can purchase from them directly.
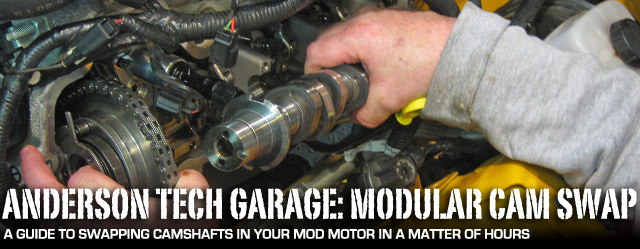
First order of business is to remove the battery and battery tray. Mainly because it is easier working in the engine bay with it out and secondly it is safer. The next order of business is to remove both of the mod motor's valve covers
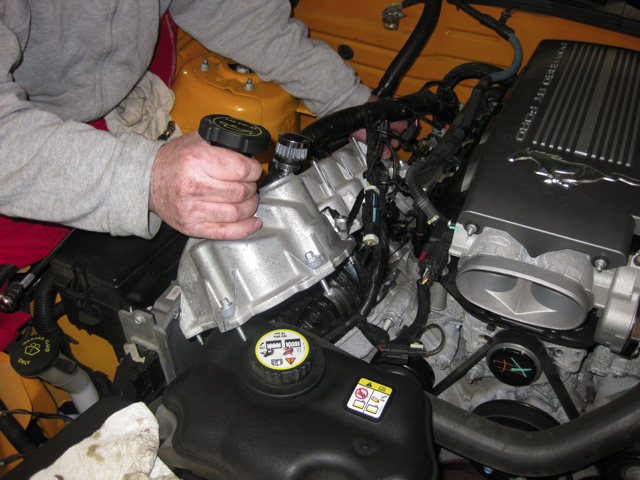
Using the valve spring compressor tool, remove the cam followers on number six and seven from the exhaust driver's side. Next remove the cam followers on the passenger's side number one and four, again on the exhaust.
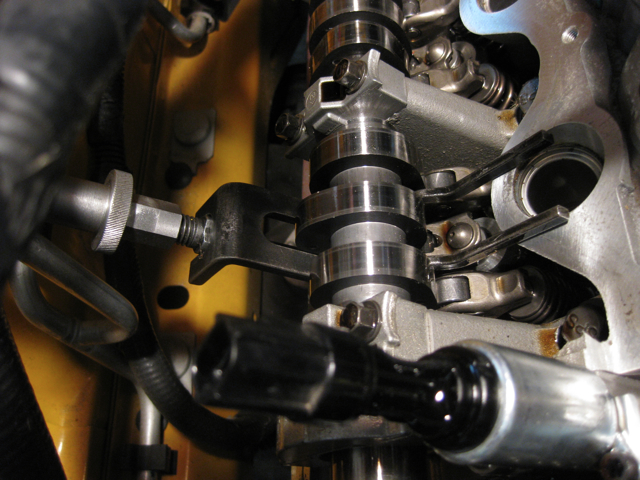
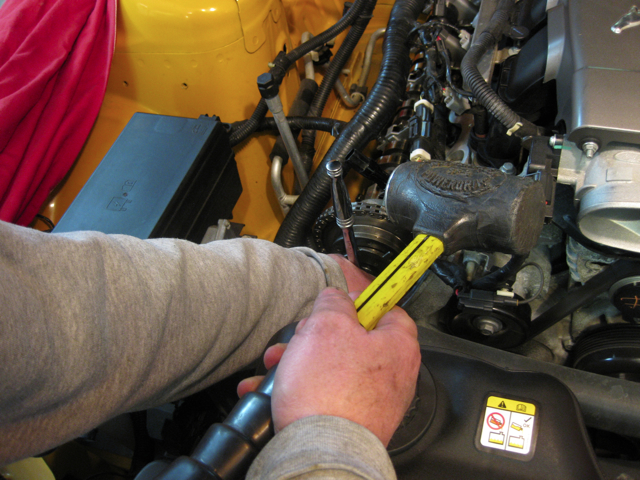
The timing chain wedge is just what it implies, a basic-looking wedge that is designed to keep your chain from slipping while exchanging the cams. Wedge the tool in between the passenger side chain and tensioner.
Break the bolts on the cam gears loose but do not remove them. A drive and socket with a little persuasion from a dead-blow hammer might aid in the process. Moving onto the cam caps, loosen but do not remove the caps just yet.
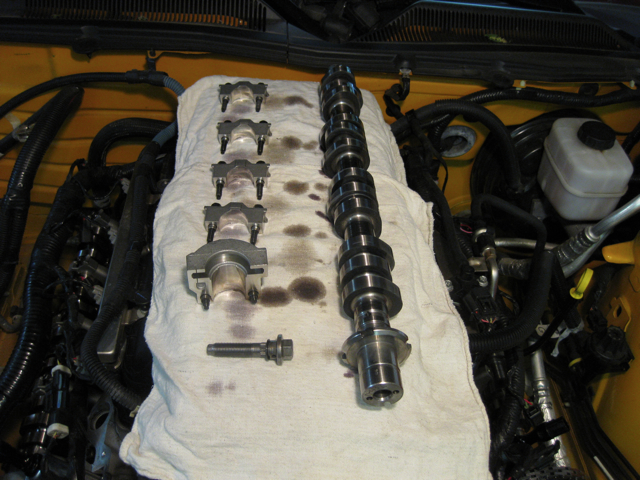
At this point you want to prep both cams on a spare table. Give a good bath to both the cams with engine oil or assembly lube. Virtually every part of the cam is a working piece, so don't miss any spots. Get a towel and fold it over a few times to lay it on top of the intake manifold. Place the new cam on top. First remove the cam caps and bolts, laying them on the towel in order in which they are installed on the engine.
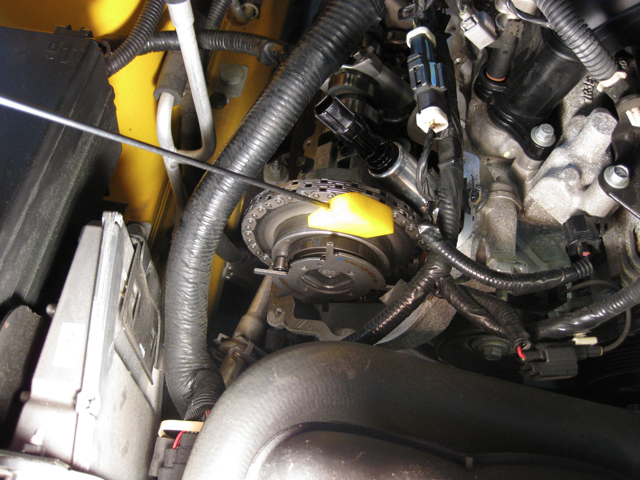
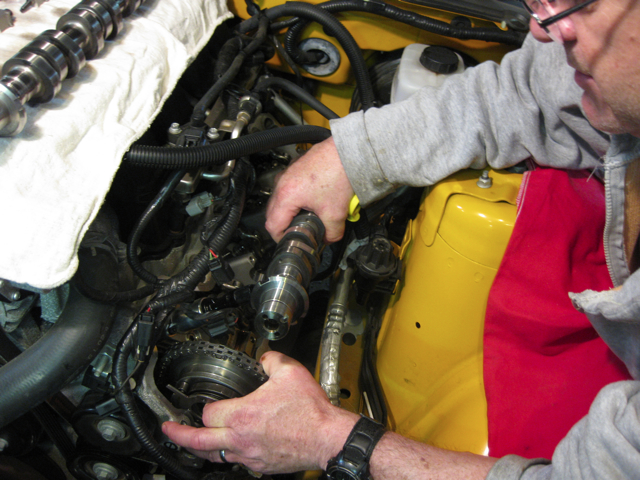
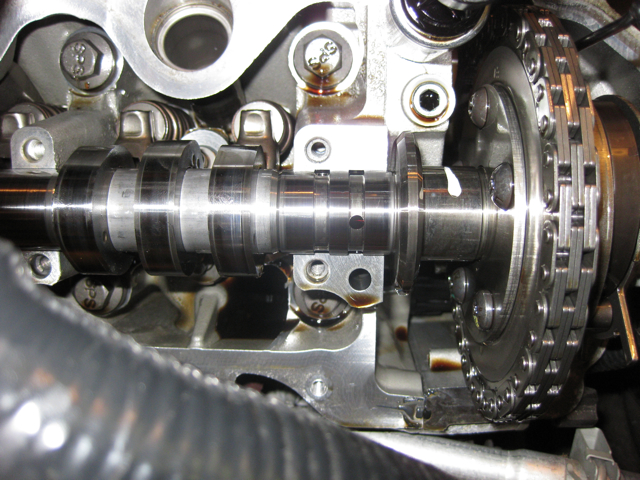
Remove the cam gear bolt while holding onto the cam gear. Slide out the old cam and then then replace it with the new one while still holding the gear. Immediately line the dowel from the cam onto the cam gear and thread the cam gear bolt with thread sealant onto the end of the camshaft. Then lay it back down into the cam cap bores.
Replace the cam caps in the same order and torque to 97-inch pounds. Repeat on the other side. Once both cams are torqued via the caps, remove the wedge tool and tighten the cam gears down to 70 foot pounds. Lastly install the cam followers on each side and re-install the valve covers. You are done!
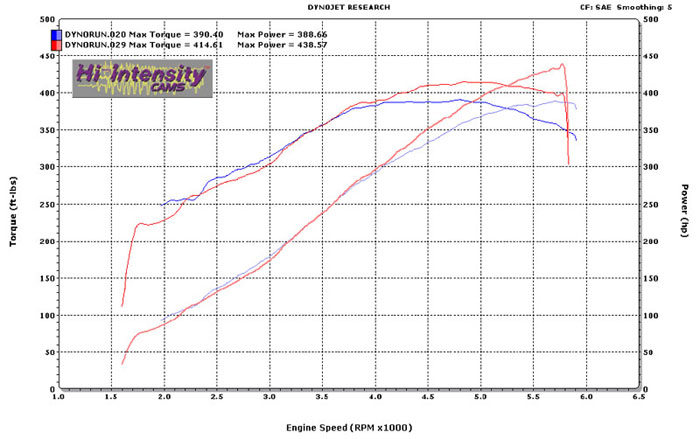
The dyno doesn't lie. The graph above is a S197 Mustang with a ProCharger P-1SC-1 before and after dynos that utilize the AFM F-42 Hi-Intensity cams.
As you can see, swapping camshafts in a modular powered vehicle might even be easier than traditional cam swap in early-model Mustang. The process is fairly simple and straight forward when you have all the proper tools to do the job – it just requires a little time and patience. Anderson Motorsports is in the midst of testing a line of street cams designed for a variety of applications on your mod motor and we will be doing a tech segment on them during our next Anderson Tech Garage segment!