During much of the first Fox body craze of the mid to late 1990s, AOD transmissions were often discarded and replaced with either a manual transmission, or in some cases, a C4 automatic. This was mainly due to some flaws in the AOD design from Ford, making it better suited for smooth shifting in Lincoln Town Cars and Crown Vics, than for high powered runs in a 5.0 equipped Mustang.
The TCI StreetFighter AOD offers a host of features that make it a hardcore AOD, not to be confused with a rebuilt or remanufactured unit.
It didn’t take long, however, for some enterprising companies to come up with ways to improve the AOD. Today, an AOD can be built to be nearly as stout as a C4, and offer street going cars from Fox body Mustangs to hot rods and other muscle cars all the benefits of an overdrive transmission with strength to hold a lot of power. “The AOD is an ideal package for a variety of applications because it offers a lightweight overdrive transmission without the need for computer or other complex electrical controls,” says TCI’s Scott Miller. TCI Transmission is one of the companies expert at building AOD transmissions, and we turned to them for help with our Project Rehab.
A Matter of Time
The AOD is an ideal package for a variety of applications because it offers a lightweight overdrive transmission without the need for computer or other complex electrical controls. -Scott Miller, TCI
We were concerned that while Rehab’s AOD showed less than 80,000 miles on the odometer, our planned upgrades, coupled with the 25-plus years of abuse might cause it to fail sooner rather than later. We had no maintenance records on the car’s existing transmission, and no way of determining when its last service or evaluation were at the hands of someone with real transmission experience.
There’s also the matter of age. Friction material is bonded to the surface of the internal clutches or frictions in an automatic transmission and torque converter. Eventually, that friction material will either wear out or begin to lose adhesion, thus leading to transmission slip or fluid starvation issues by clogging the transmission filter. Both are bad enough that they can leave the car stranded and immobile, requiring either an overhaul or replacement of the transmission.
With 25 years under its belt, and plans for a lot more horsepower for our future project, we felt it was time to upgrade our AOD.
There’s also the matter of our planned upgrades. Project Rehab is our street/strip Fox body. We are setting out to build a weekend cruiser that is oriented towards hitting the drag strip, and competing in street car style classes. To meet our goals we’ll need to generate more than double the factory horsepower, and that alone is a recipe for the stock AOD to fail.
TCI Solutions
TCI builds all of their AODs using transmission cores. When the cores come into the TCI facility they are disassembled, thoroughly cleaned and inspected for damage. This damage can be cracks or holes in the case, stripped bolt holes, damage to the bellhousing, or even catastrophic internal parts failure. From there the parts which are reused (including the transmission case) are also cleaned, evaluated, and refurbished.
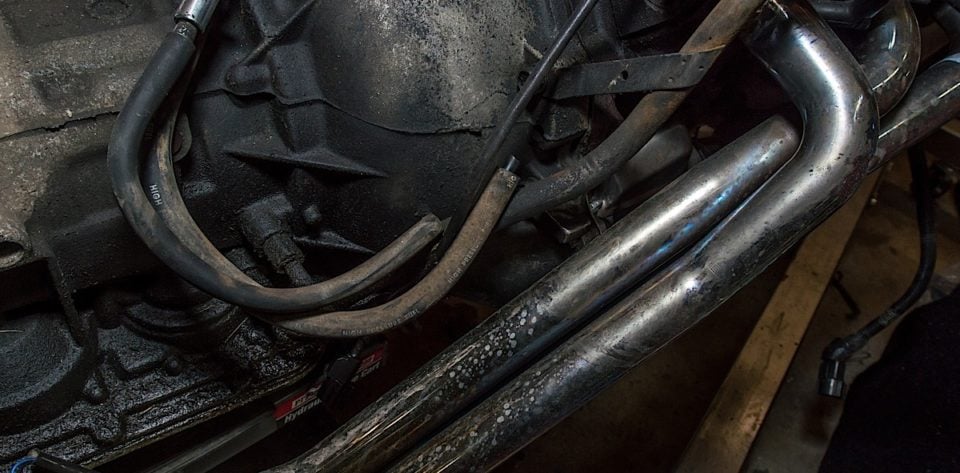
Left: We disconnected our transmission cooler lines at the case. Right: We also had to remove our long-tube headers to separate the old engine and transmission. The starter was also removed.
TCI employs a team of talented transmission builders. After transmission cores are cleaned and disassembled, these builders go to work on an individual transmission, building only one at at time. There is no assembly line, and while TCI has certain standards they set, according to Miller, it is ultimately up to the transmission technician to say when a transmission has satisfied all of TCI’s criteria. Each builder signs the build sheet that the customer receives with their transmission, adding an extra level of accountability and personal pride to each unit before its shipped to a customer.
Eliminating The Weak Link
The weak link in the AOD has always been the lockup shaft. Miller tells us, “The stock input shaft is really weak, and when you start adding power, that’s usually when failures occur, so we replace it with one of our stronger pieces.” In our lockup StreetFighter AOD, the input shaft is constructed from Vasco 300 high strength steel. It also features an increased diameter for improved strength over the stock unit, as well as better lubrication.
Valve Body
The stock input shaft is really weak, and when you start adding power, that’s usually when failures occur, so we replace it with one of our stronger pieces. -Scott Miller
Valve bodies are sent to a separate area for inspection and modification. These modifications improve the shifting characteristics of the transmission and will add to its longevity. Some parts in the valve body are replaced, others are refurbished after careful inspection. TCI installs their own shift-improvement kit as well as a new separator plate.
Additionally the valve-body receives a TCI proprietary constant pressure modification. “Instead of the throttle-valve controlling both line pressure and shifting, we set up the valve body to run at constant pressure around 170-180 psi,” says Miller. This leaves the throttle valve only controlling the shifts. Having a constant pressure valve body also means that the AOD is less finicky with setting up the TV cable, and there’s less chance that an owner will accidentally damage the transmission by incorrectly adjusting the cable. Constant pressure also improves shift quality, and improves transmission life.
Each valve body is also handled by a single technician from start to finish. When this specialist is satisfied with the valve body, it is tested on an in-house valve body dyno to ensure proper performance.
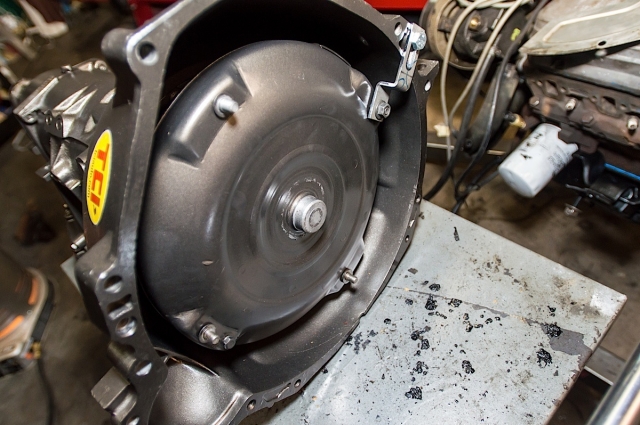
With the inspection cover removed the four nuts that connect the torque converter to the flexplate can be removed.
Wear Parts
All of the old friction material, rubber seals, gaskets, anything that is a “wear part” is discarded and replaced or upgraded appropriately. Upgraded clutches/frictions from Raybestos or Alto are used throughout the transmission. “There are no stock clutches in the transmission; it’s all aftermarket, performance parts,” Miller says. These upgraded clutches feature more aggressive friction material design, as well as greater holding capacity. Miller says that clutches are selected based on their intended use. For example, one specific type of clutch may be better suited for shifting duty while the other may be better suited for apply.
The stock bands are replaced with Kevlar lined pieces. There are two in an AOD and TCI replaces both of them with a heavy duty Kevlar lined units. The transmission pan is replaced with a finned design, which will ensure better cooling.
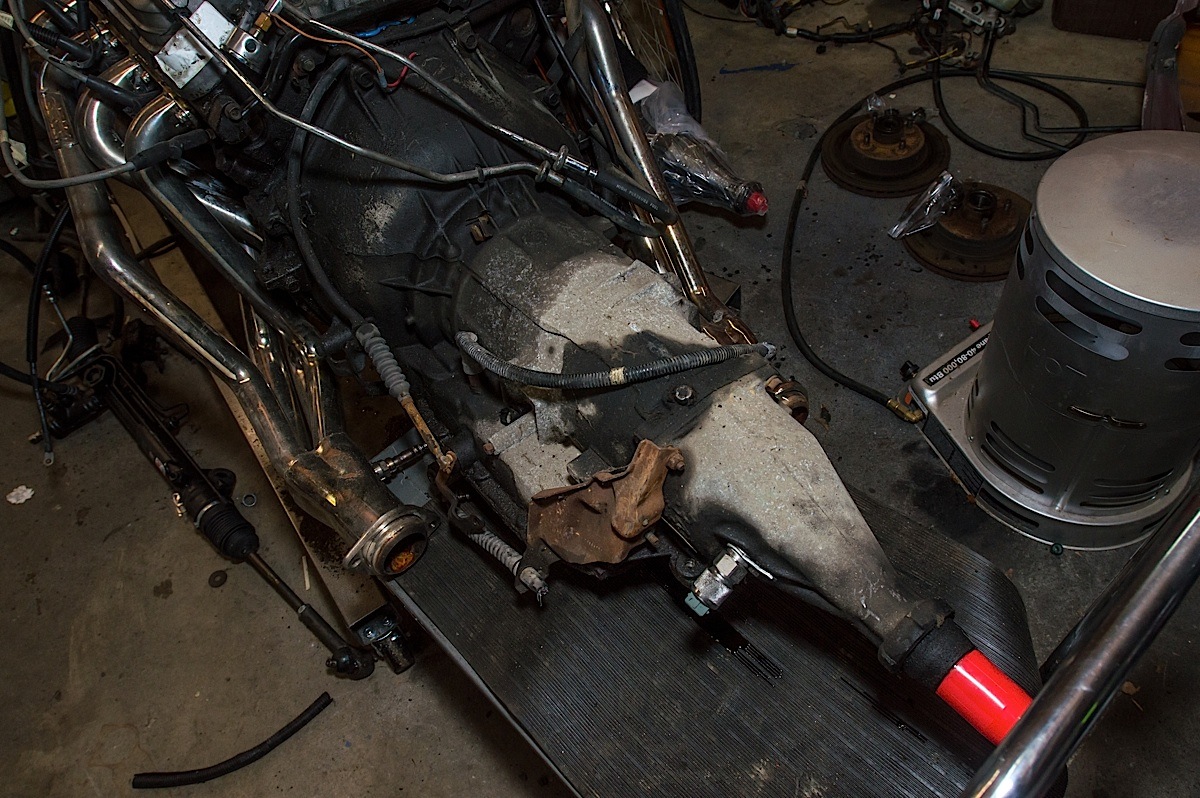
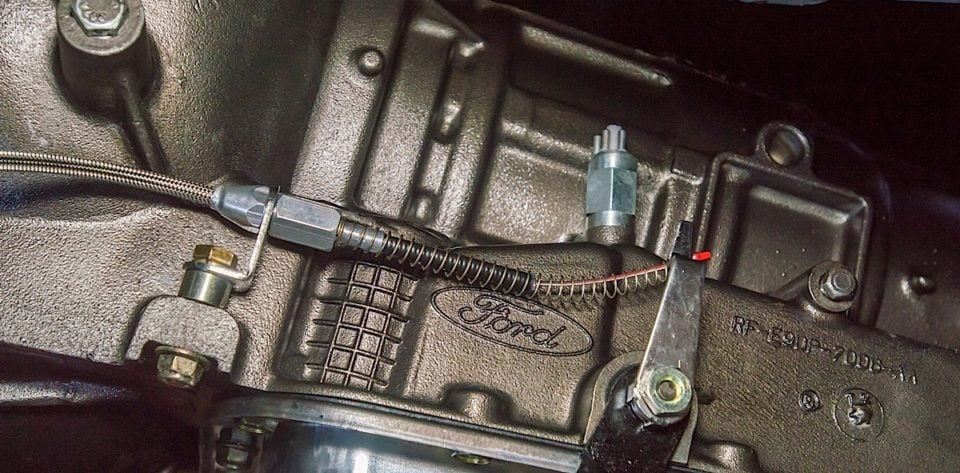
The speedometer sensor (or speedometer cable) will need to be disconnected from the transmission prior to removal. The large rusty bracket in this photo is the retaining bracket for the stock transmission cable and must be removed and transferred if reusing the stock shifter.
Each transmission is thoroughly tested before heading to the shipping department. TCI performs a hydraulic dyno first to test the transmission separate of the valve body. They then install the valve-body and perform a second test. The entire process is computer controlled and tests manual and automatic shifting, as well as pressure and several other parameters in every gear.
The StreetFighter
Trick Converter
Our TCI StreetFighter converter is a cool piece of transmission technology. This fully furnace brazed lockup converter feature a 10-inch top, stator, and turbine allowing it to stall to 3,000 rpm. However, it also retains a 12-inch lockup plate which allows for a stronger lockup converter with a high stall.
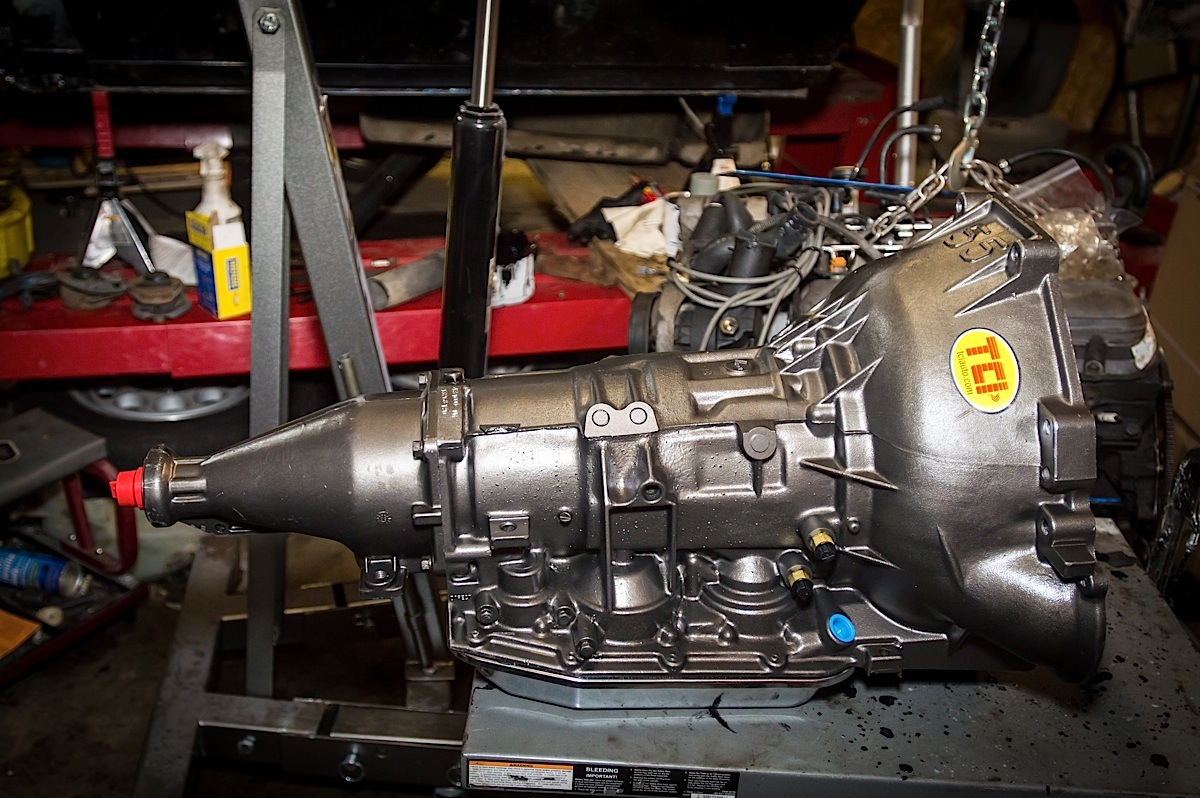
We ordered a TCI StreetFighter AOD package, part number 431000P1. This package included our new TCI StreetFighter AOD and StreetFighter torque converter. This converter should stall 3,000 rpm, giving us a little more punch off the starting line.
With the upgrades installed, and the proper torque converter and cooling system in place this combination is good for up to 575 hp. Thats good enough to get many cars into the 10 second zone on the quarter mile, while still letting them cruise with overdrive on the ride to and from the track.
Also included in the kit is a new transmission cooler, new adjustable throttle-valve cable kit, and new dipstick and dipstick tube.
Installation
Since the engine was out of the original Project Rehab was to be transferred to the chassis that replaced the first car, we opted to go ahead and bolt the new transmission to it while it was on the shop floor, then install the two as an assembly. The steps are similar whether performing this job in or out of the car.
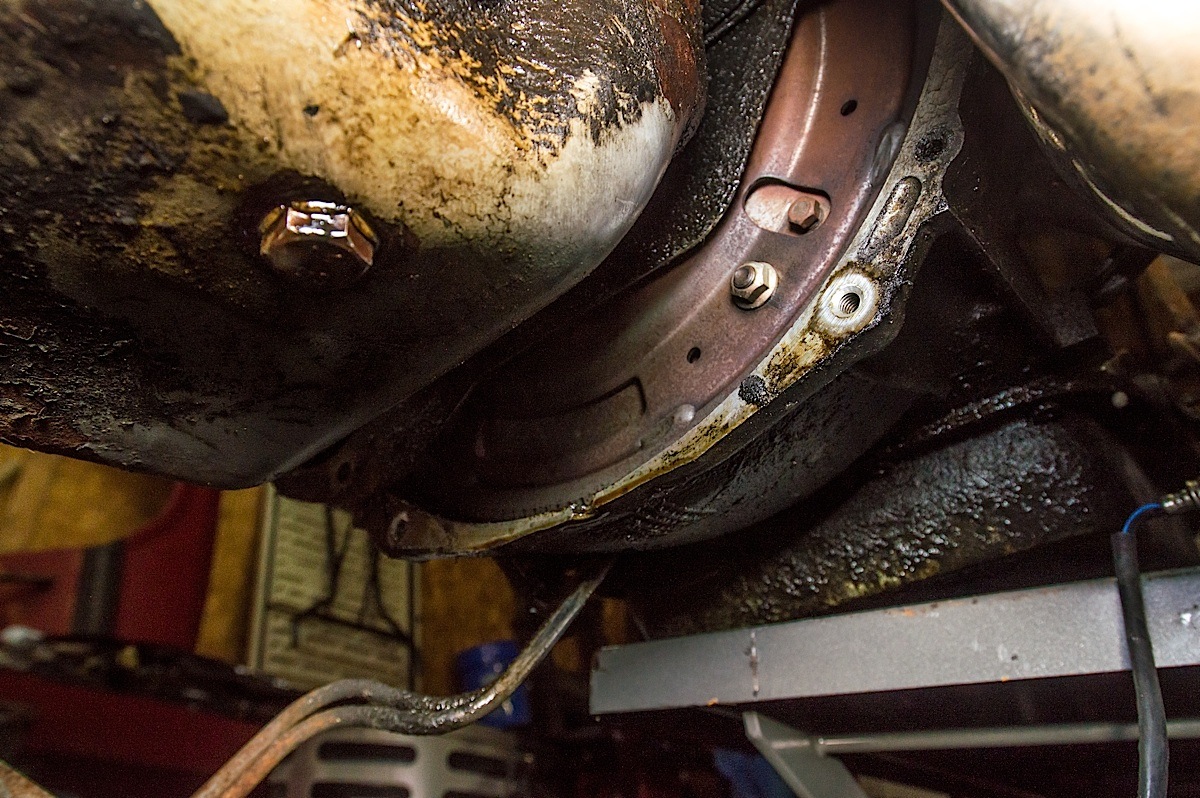
With the car raised, or the engine on the ground, replacement can begin. Whether this job is done in or out of the car, the process to disassemble starts with the exhaust. The mid-pipe must be remove and if a car is equipped with long-tube headers, those will need to come out as well. From here, the starter can be removed as well as the inspection cover on the bottom of the bellhousing.
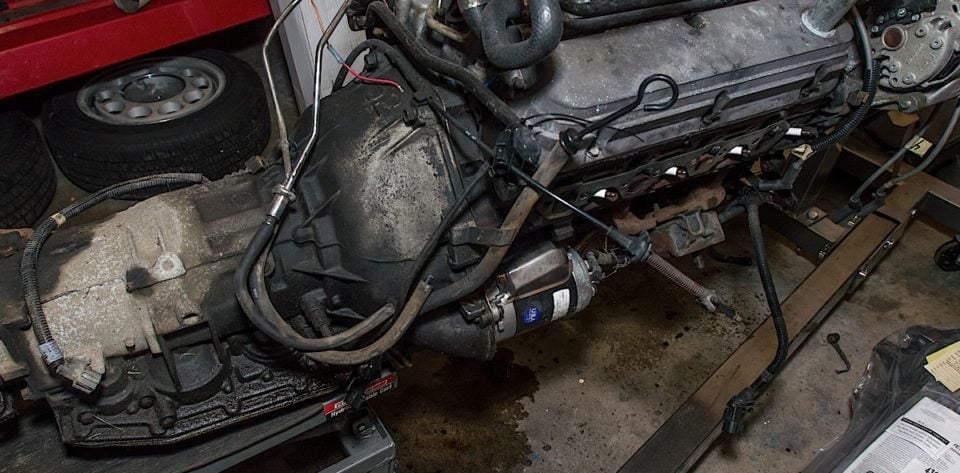
With our old transmission stripped and detached from the engine we can now reverse the process and install our new StreetFighter AOD.
At the rear differential, the flange and the driveshaft are marked so they can be lined up together properly and the four driveshaft bolts are removed. A drain pan is placed under the rear of the transmission to catch fluid draining out when the driveshaft is pulled out. We used a plastic tail-shaft plug to stop this flow of fluid; these can be bought at most parts stores for a few dollars.
It is not necessary to drain the transmission fluid or even remove the pan, but it is advisable to drain the torque converter. With the ignition coil, and the battery disconnected, the engine is rotated by hand until the converter drain plug is located, then removed. This will prevent making a mess with a large spill if the converter separates from the transmission during removal.
Also, you do not need to remove the pan to remove the transmission, and that step can make more of a mess than be of help. Rotating the engine we located the first of the four torque converter studs and nuts. Each nut was then removed to disconnect the torque converter from the engine.
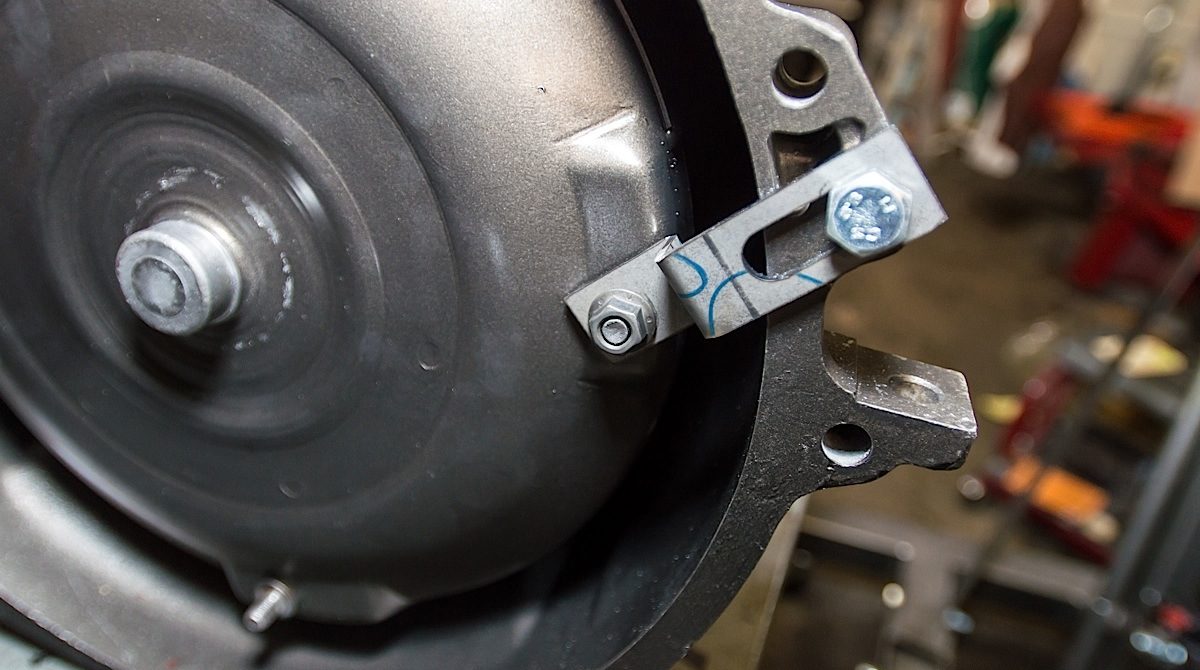
Top Row: Left: TCI ships the StreetFighter AOD with the converter already filled and installed. The retaining bracket for the converter must be removed. Center and Right: Since TCI dyno tests their transmissions prior to shipping they block off all fluid passages before shipping. We saved these plugs for use in capping the old transmission. Bottom Row: Left: Our old transmission mount had deteriorated and was literally falling apart as we removed it. Center: The metal on our transmission cross-member was so deteriorated that it sounded like crumpling paper when we probed it with a screw driver. Right: To remedy this we're installing a new cross-member and polyurethane mount. Do not use a solid transmission mount as the transmission case is not strong enough to withstand the torquing forces and will crack, or break.
Under the hood, the TV cable is disconnected form the throttle body and separated from the throttle brackets. We snaked this out with the old transmission and TCI included a replacement. From here, we also disconnected the shift linkage. This involves prying off the old bushing. If you plan to reuse the stock cable and linkage, be sure to note how it all goes together. Snapping a picture with a smartphone or camera is a good idea here. We disconnected the electrical connector, and inspected it’s condition; if yours is damaged there are replacements available.
The speedometer cable is next. This requires a box wrench to disconnect and remove the speedometer sensor or gear from the transmission. On the opposite side of the transmission, the two cooler lines are also disconnected.
With all of these connections removed, the next step is dropping the transmission cross member. Using a jack to support the transmission,we carefully remove the nuts and bolts that secure the cross-member. We then lowered the transmission jack to let the transmission sit at an angle. We left the cross-member attached for now and removed it once the transmission was out of the car.
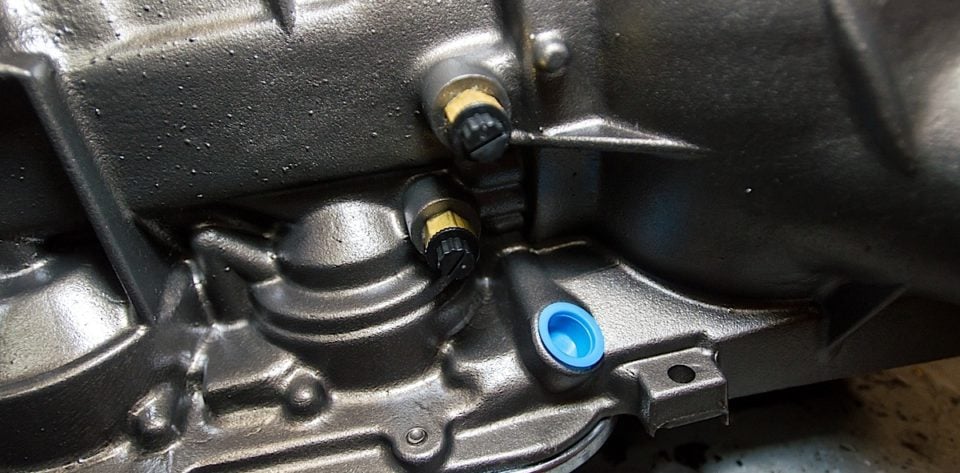
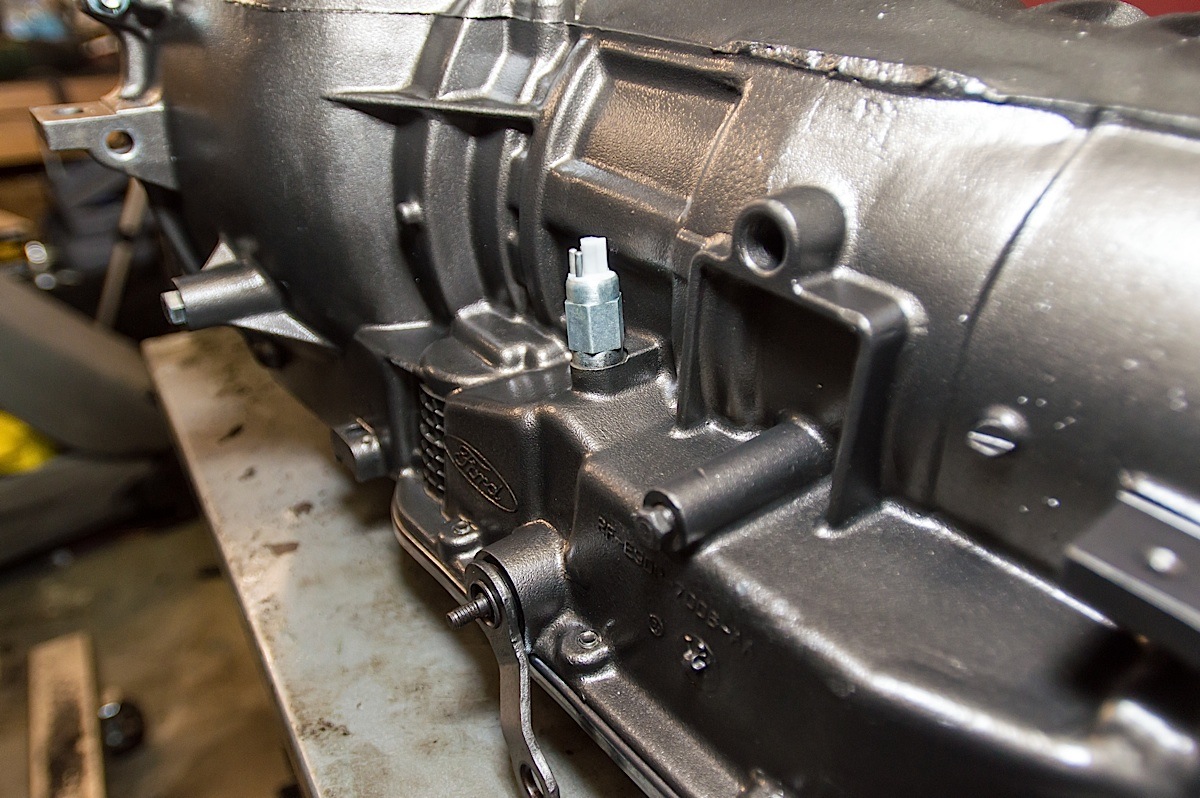
Included with the StreetFighter AOD is the shift arm for a stock shifter. TCI also includes a new reverse light sensor already installed into the case.
At the tailshaft of the transmission, there is a bracket that retains the stock shifter cable. This bracket must be removed to get the shift cable off the transmission. It will be attached to the new transmission if a shifter that utilizes a stock cable is going to be utilized. With the transmission and engine now at an angle, a transmission jack is placed under the transmission pan, and the bell housing bolts are removed. Using a prybar, and some elbow grease we worked the transmission off the two engine block dowels to get it free of the engine.
Getting the new AOD in is fairly easy, and pretty much the reverse of removal. TCI provided in their StreetFighter Kit a new set of converter nuts for securing the converter to the flywheel, as well as a new dipstick and tube.
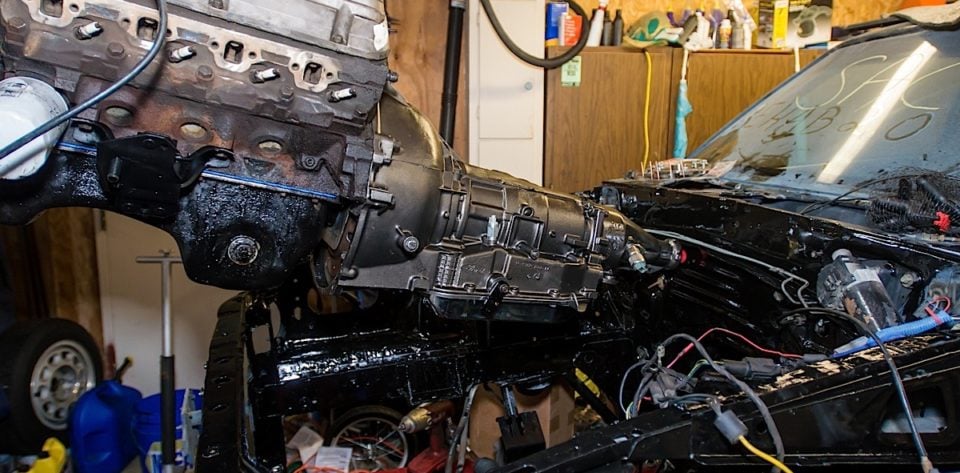
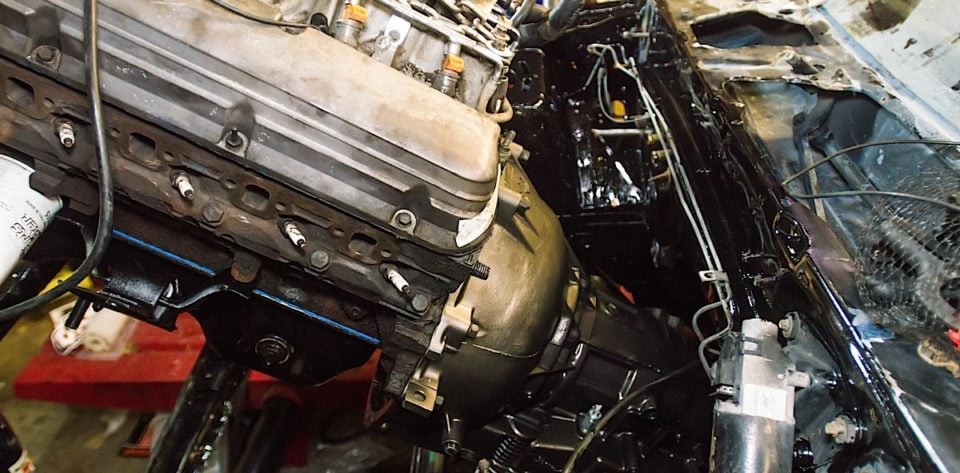
With our hoist and some work over and under the car, we lowered the engine and transmission into the car as an assembly.
Some tips for installation include:
- Line up the new torque converter studs with the holes in the flex-plate. We like to rotate the engine so the flex plate holes are at 3,6,9, and 12 o’clock positions, then do the same on the converter.
- Check the engine’s rear main seal for signs of a leak. Replace it now if its more than a few years old, or is leaking.
- Clean everything that is being reused to make installation easier.
- Inspect the bell housing bolts for any damage and replace as needed.
- Inspect the starter. Now is a good time to upgrade or replace it if necessary.
- Check the flex-plate teeth. Look for signs of grinding from the starter, chipped, or broken teeth. If there’s damage, replace the flex-plate.
- Inspect the transmission mount and the cross member bushings. We recommend replacing these at this time.
- Flush the cooler lines. If reusing the stock cooler lines, get a can of cooler line flushing solution at the local parts store. Do not use brake clean.
Setting Up TV
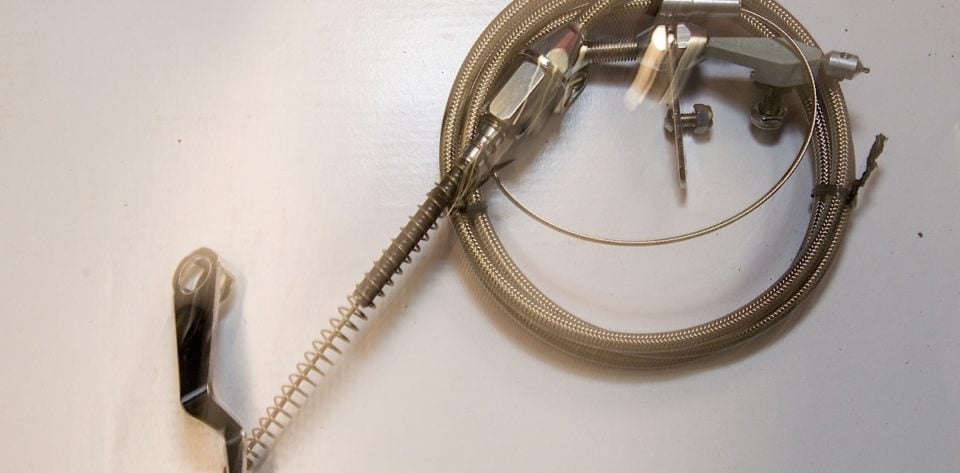
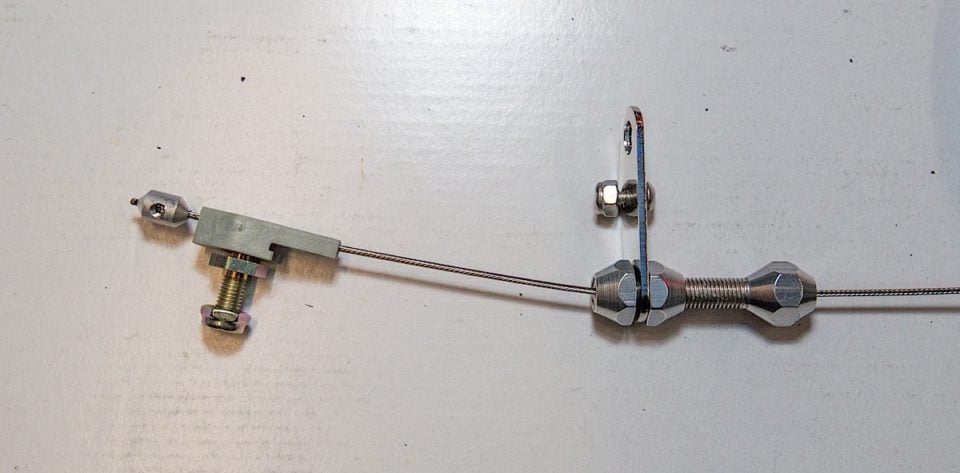
The throttle-valve (TV) cable is the link between what your right foot is demanding of the engine and what is communicated to the AOD transmission. TCI includes a new cable in the StreetFighter package. This new cable includes hardware to connect it to a carburetor or EFI application. Since the StreetFighter AOD uses a constant pressure valve-body, the TV cable only controls shift points. This should take some of the jitters out of getting the TV cable setup properly the first time.
Left: The StreetFighter package includes this adjustable throttle-valve (TV) cable. Center: This end of the TV cable connects to the throttle body. Right: We installed our TV cable with the lever pointing up. This was necessary because we also installed a lever for an aftermarket shifter; the two interfere with each other with the TV lever pointed down (stock position).
With the installation complete and the AOD secured in it’s mount, including the cross member, TV can be set by doing the following:
Make sure the TV cable is connected to the throttle body and the adjusting nuts loose. With the engine shut off, have someone hold the accelerator pedal to the floor. Tug firmly on the TV cable to pull it to it’s maximum position. Now take the slack out of the cable and tighten the adjusting nuts so that, with the accelerator floored, the TV cable is at it’s maximum position.
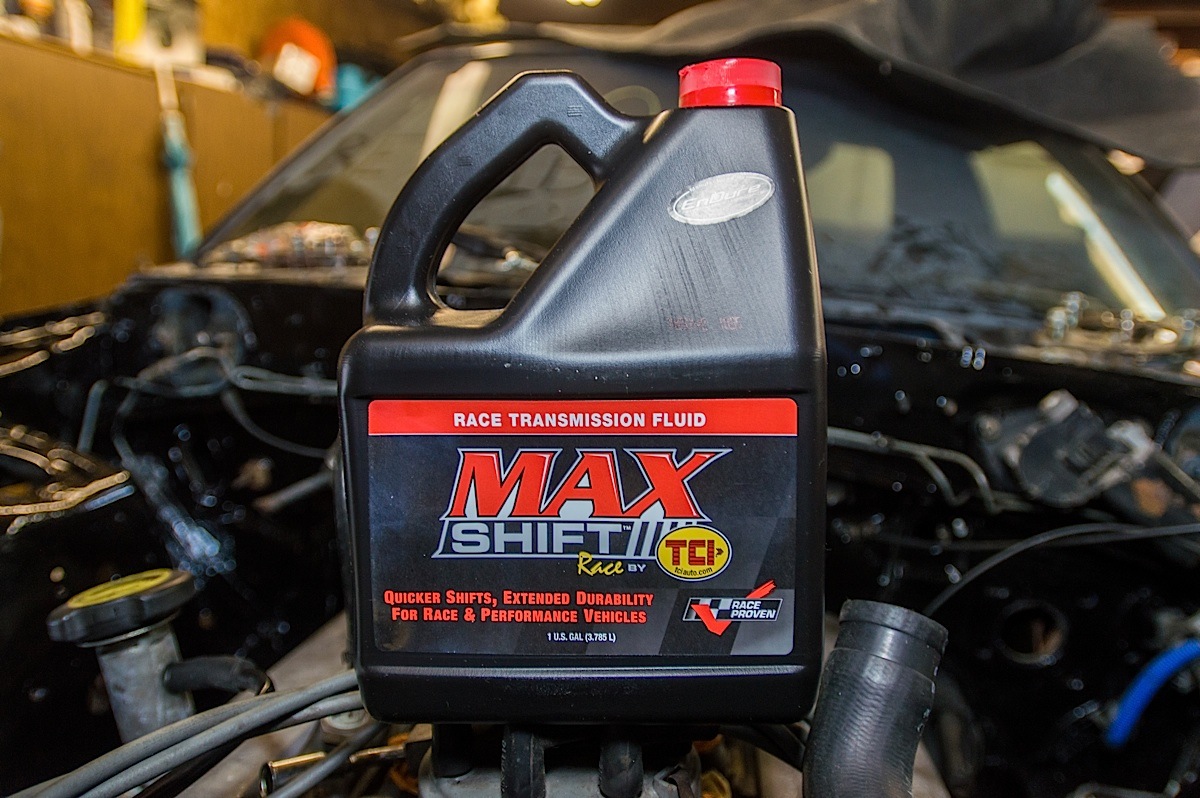
TCI’s Max Shift transmission fluid exceeds Dexron-Mercon standards. It contains anti-foaming agents as well as extreme heat additives. We finished our installation by adding four quarts of this fluid, and then we will check the fluid level with the transmission running in park.
With the engine still off get under the car and have someone floor the accelerator to make sure the TV cable is moving to the maximum position when the throttle is floored. Once this is verified, test drive the car and adjust accordingly for the shift points. If shifting problems exist adjust the cable accordingly, or consult TCI tech support.
With our AOD installed, and the broken and worn mounts and cross-member replaced, we’re on our way to getting Project Rehab back on the streets and track, and we can’t wait to feel how this transmission shifts going down the road.