Things are getting serious now. The battle is underway. The first installment of Horsepower Wars began with baseline testing of our 2017 Mustang GT and its Brand X rival in Pony Wars. Given the results of that testing, it looks like our first-gen S550 has some ground to make up as we start modding the two pony cars, and we have assembled our first batch of parts to make that happen.
As a refresher, this competition pits two pony cars of the same model year in a battle across two build phases and four performance competitions — braking, chassis dyno testing, drag racing, and road racing. Using Summit Racing’s pricing as our guide, we have to stay under $5,000 for our first phase and step up with another $15,000 for the second phase.
These parts are all starting blocks for serious track use.— Glen Vitale, Steeda
To help assemble a potent package, we consulted with Fred Cook at Evolution Performance, which is known for building some of the quickest and fastest Mustangs around. We also worked with Vice President of Operations, Glen Vitale, and Scott Boda at Steeda with a particular eye toward refining the S550 suspension for the drag strip and road course.
As you know from reading our introductory stories, we are entering the Pony Wars battle with a lightly optioned 2017 Mustang GT, which provides a blank canvas to make use of the robust aftermarket support this platform enjoys. The trick is making the most of our $5,000 Summit Racing budget.
“Some of the weaknesses the Mustang as compared to the Camaro is the lack of horsepower and torque. The Camaro makes 20 more horsepower and 55 more lb-ft of torque than the Mustang. The Camaro is also lighter,” Fred Cook of Evolution Performance explained. “However, the strength the Mustang has over the Camaro is the chassis. The S550 chassis is excellent for both drag racing and the road course and is easily upgradable for improved performance.”
Of course, the budget and the variety of performance venues presents a formidable challenge, as we quickly learned that $5,000 isn’t as much money as it seems when you are trying to improve every aspect of a vehicle. Since our competitor has an advantage on the road course, courtesy of an active suspension and lighter weight, we decided to focus on upgrades that would favorably influence the outcomes on the drag strip and the dyno in our first phase.
Bolt-On Power
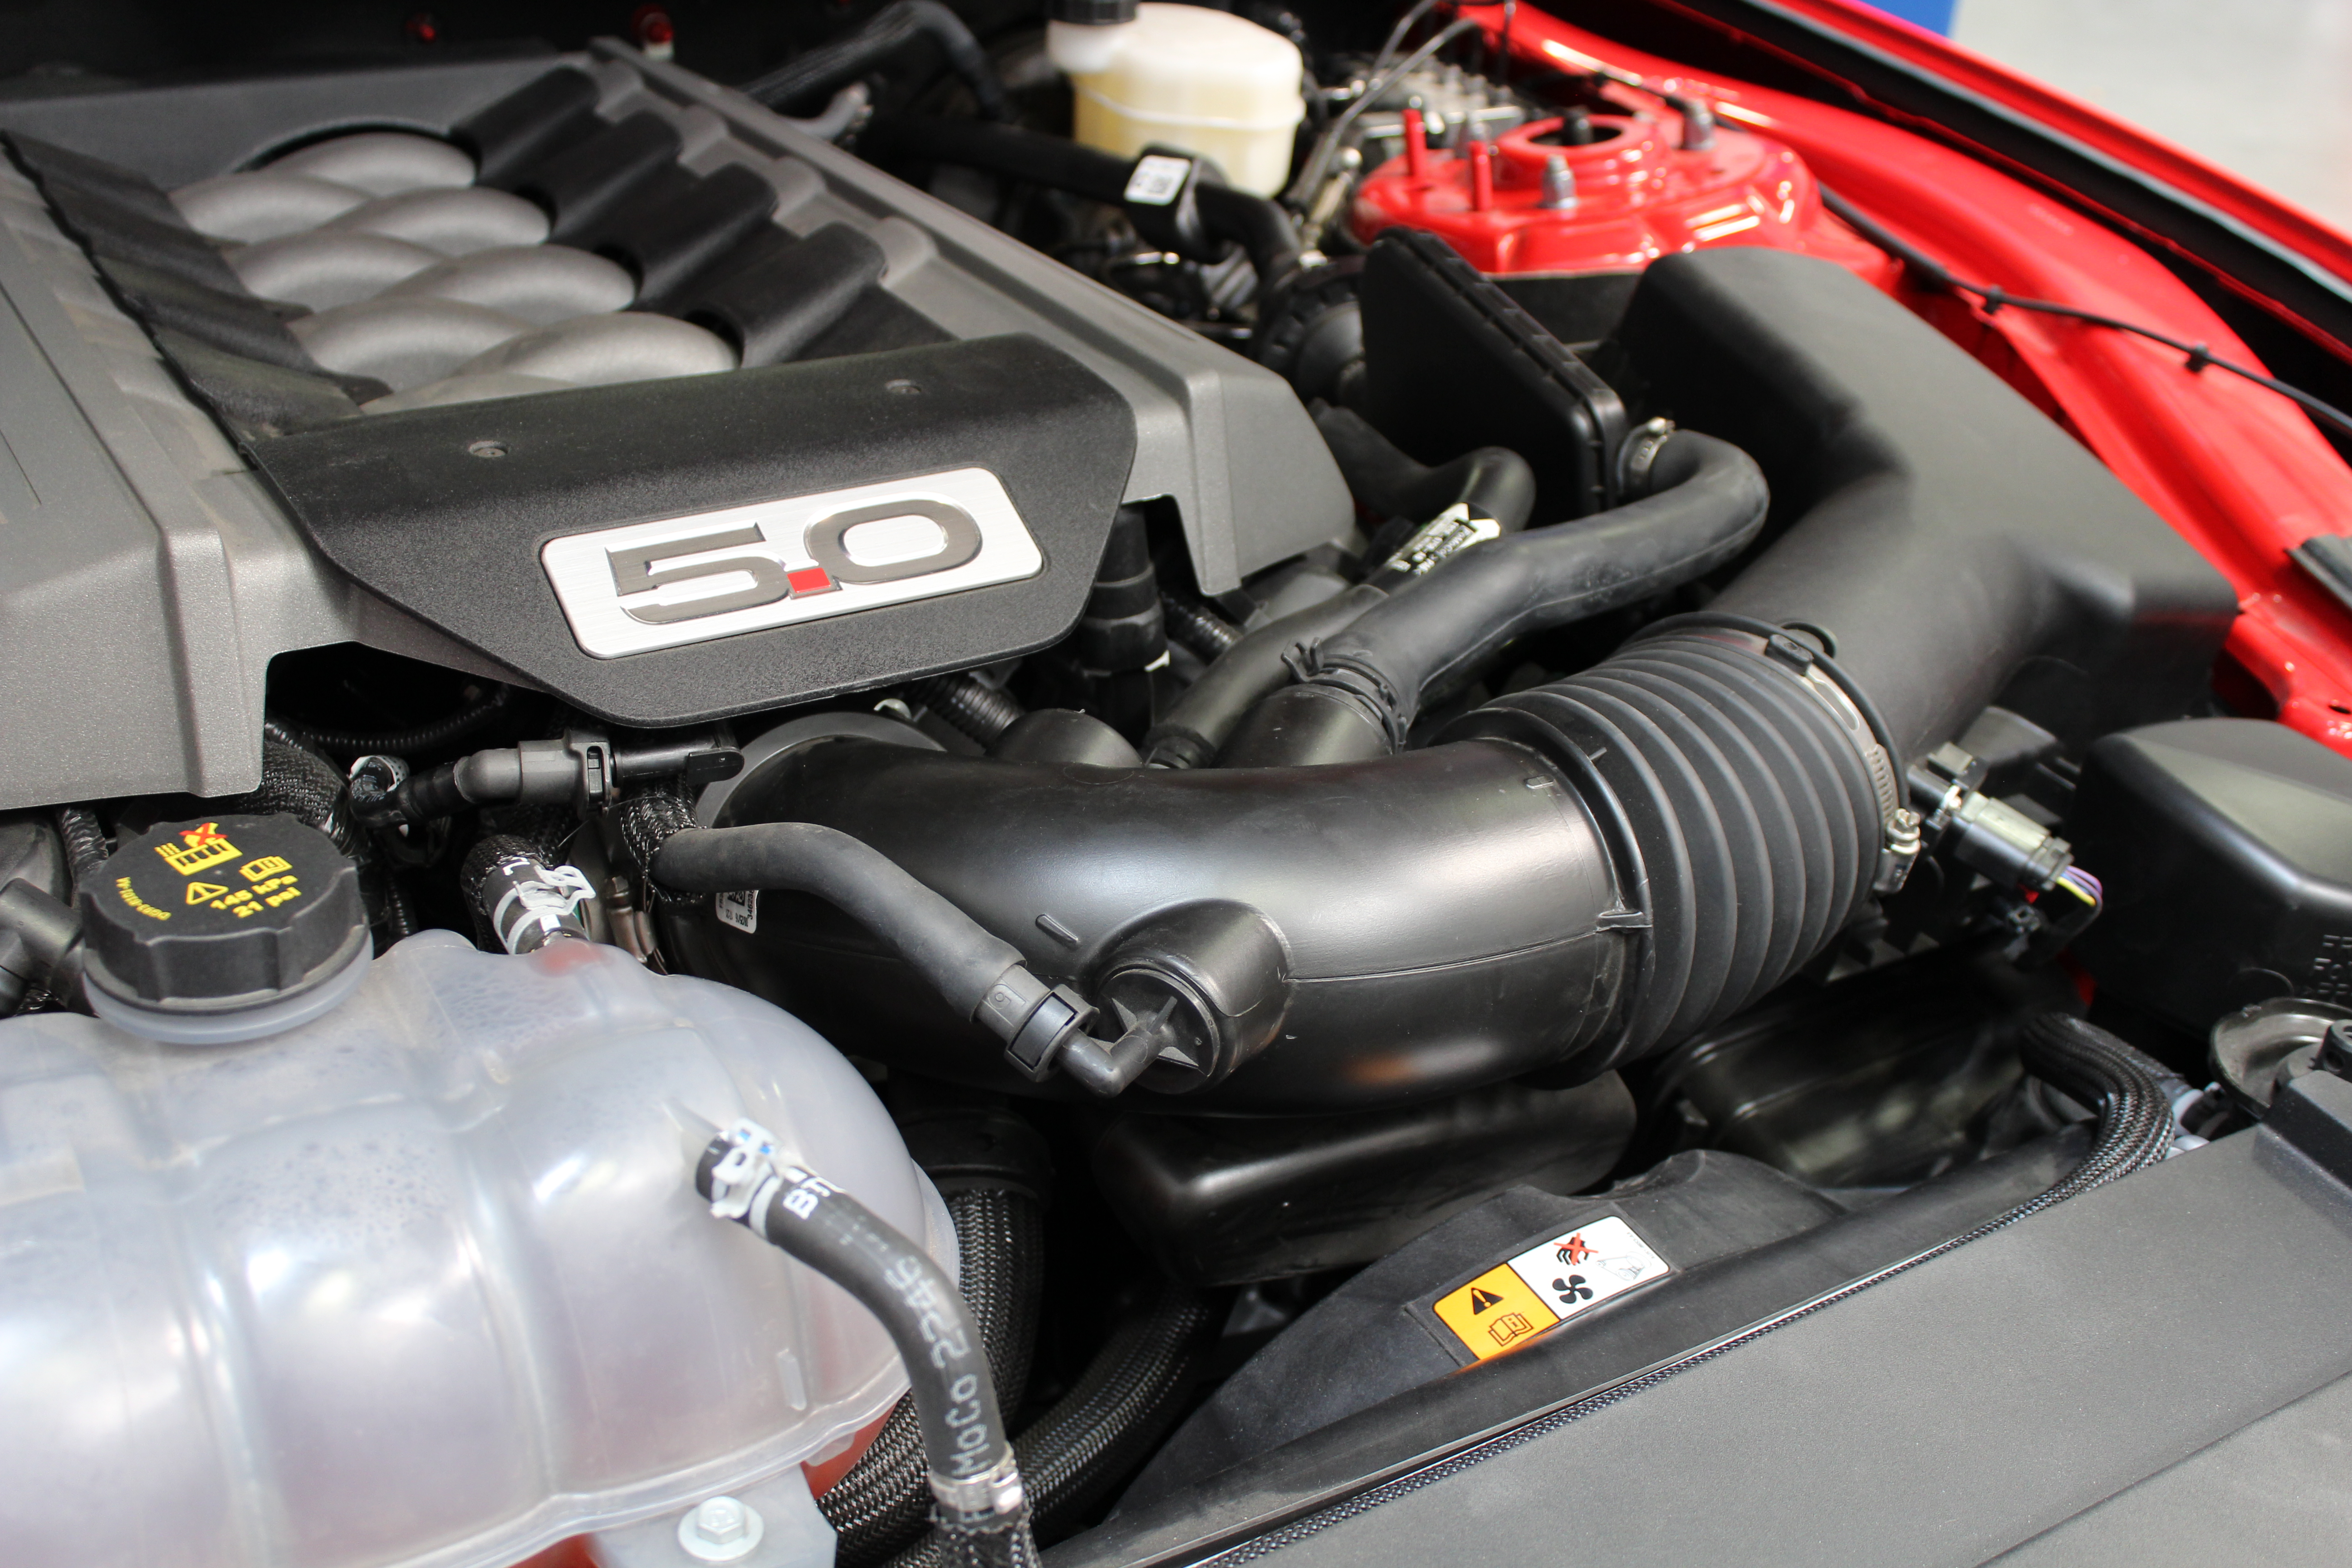
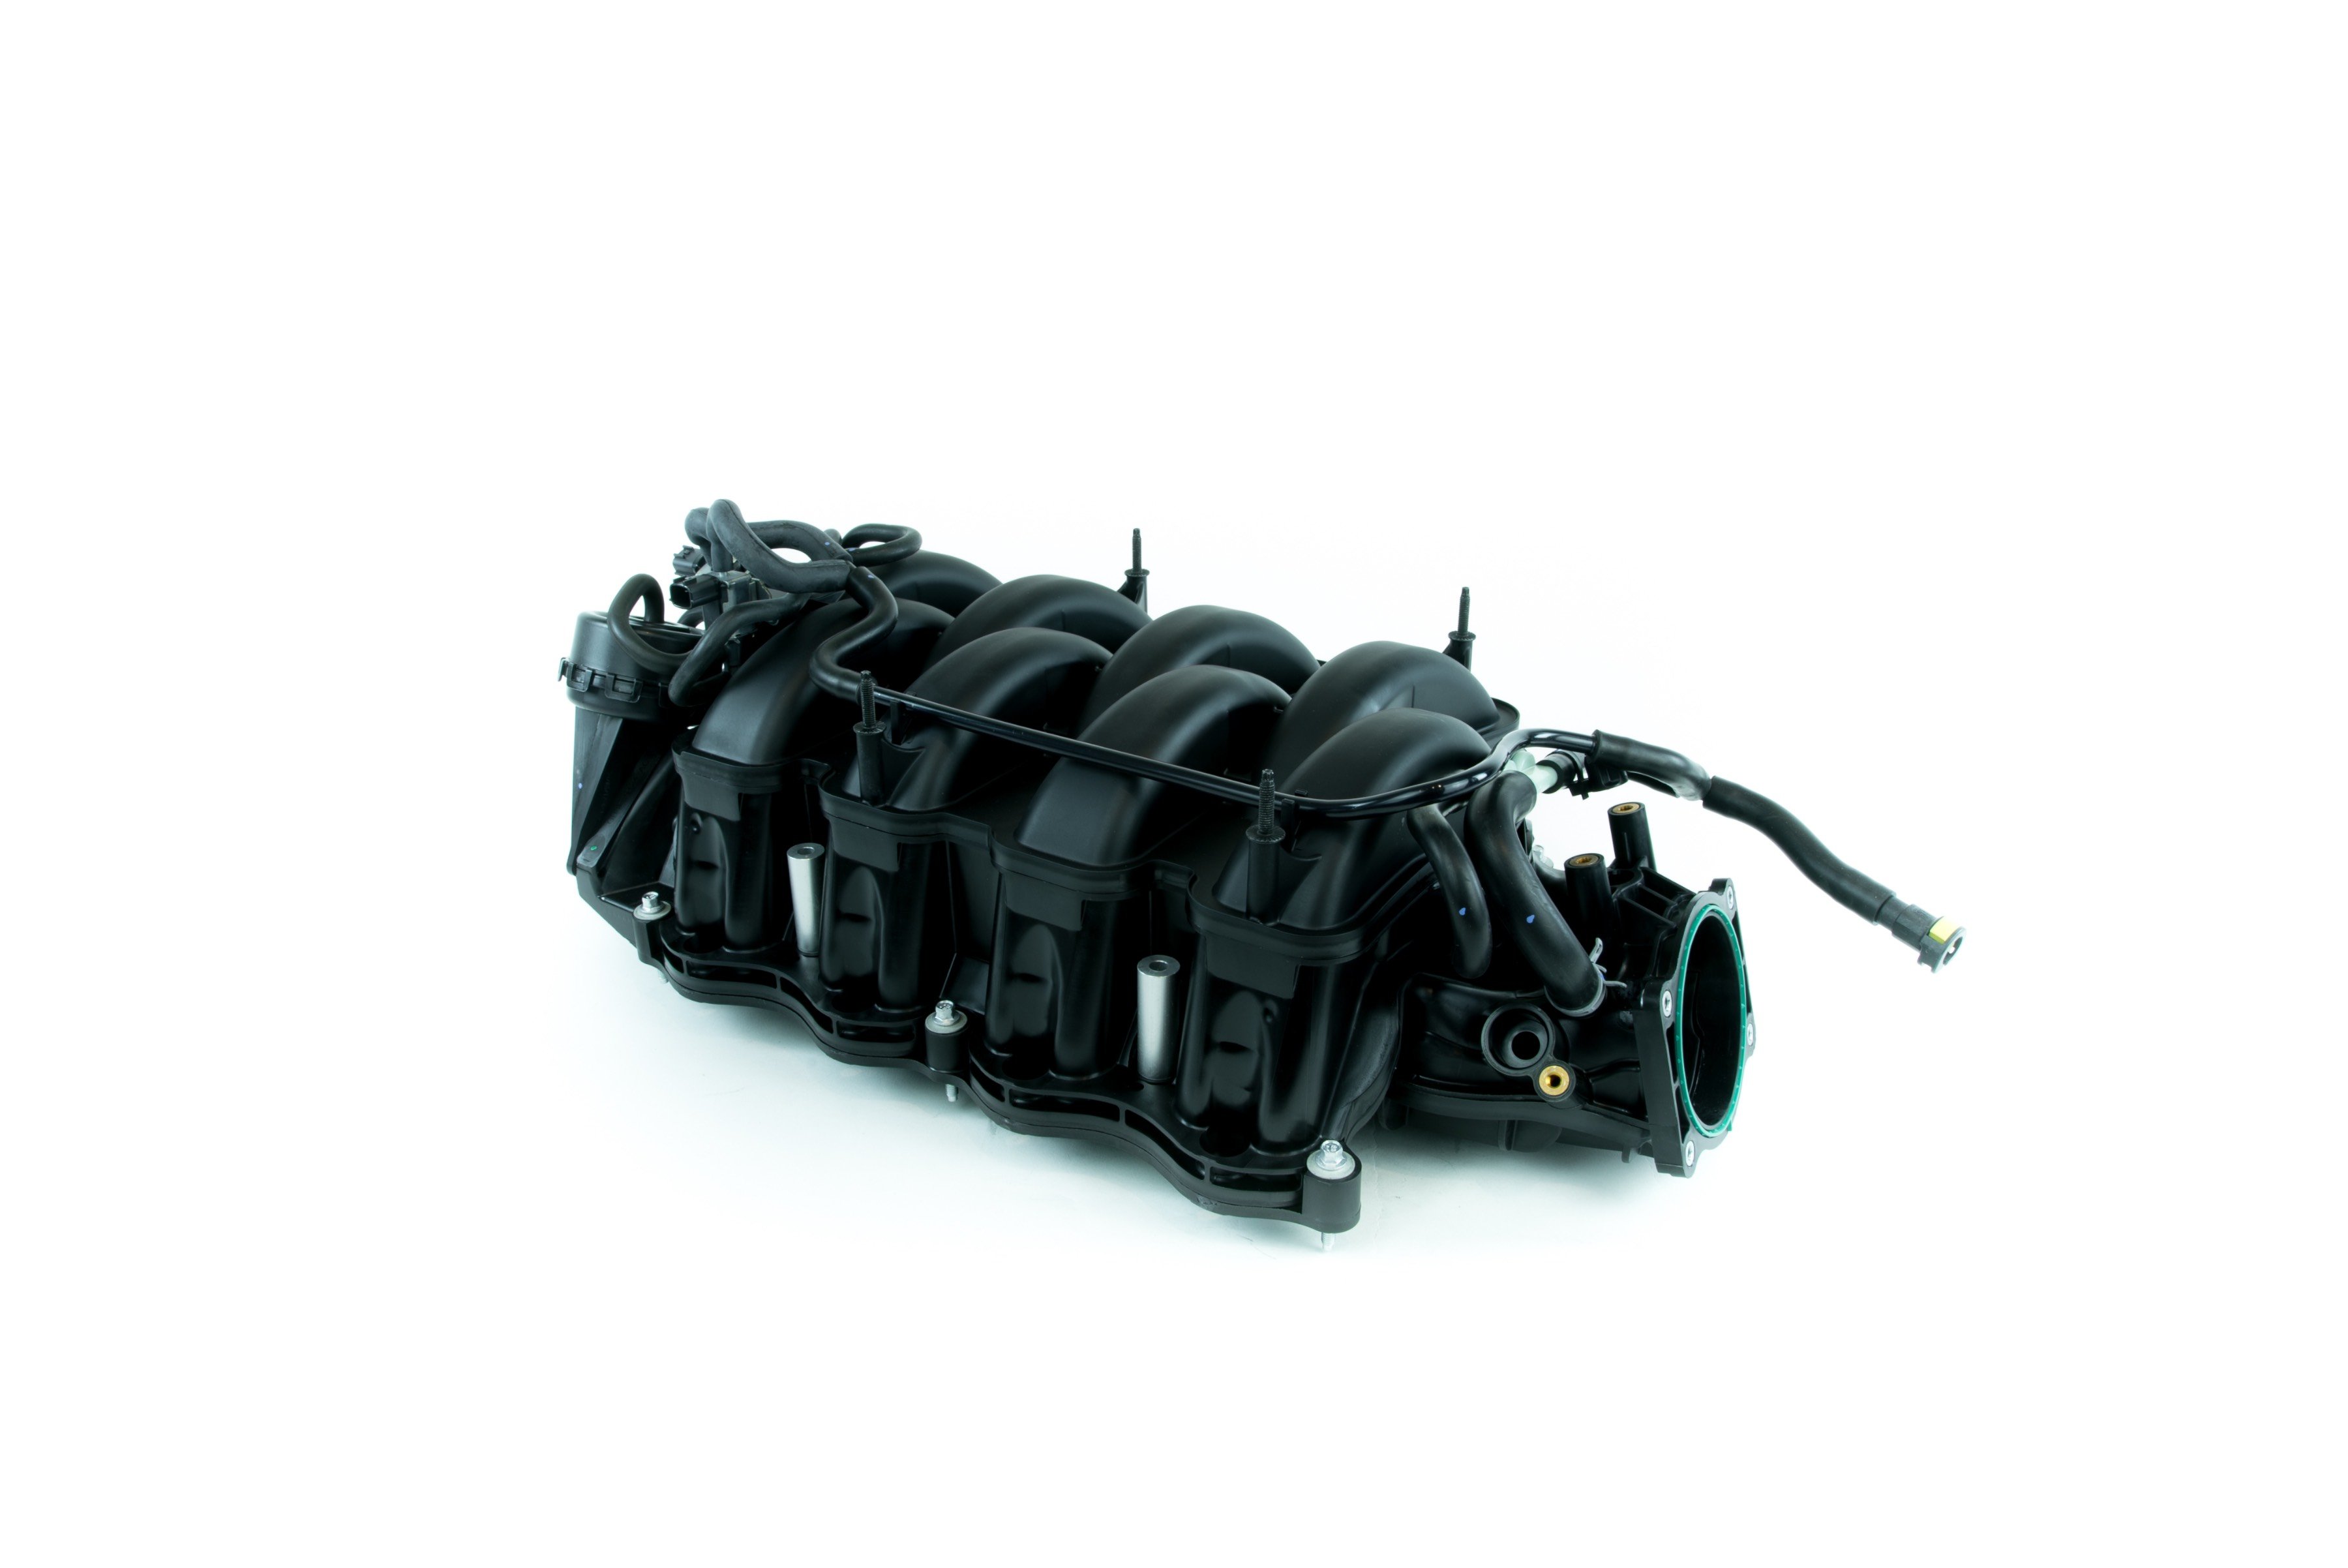
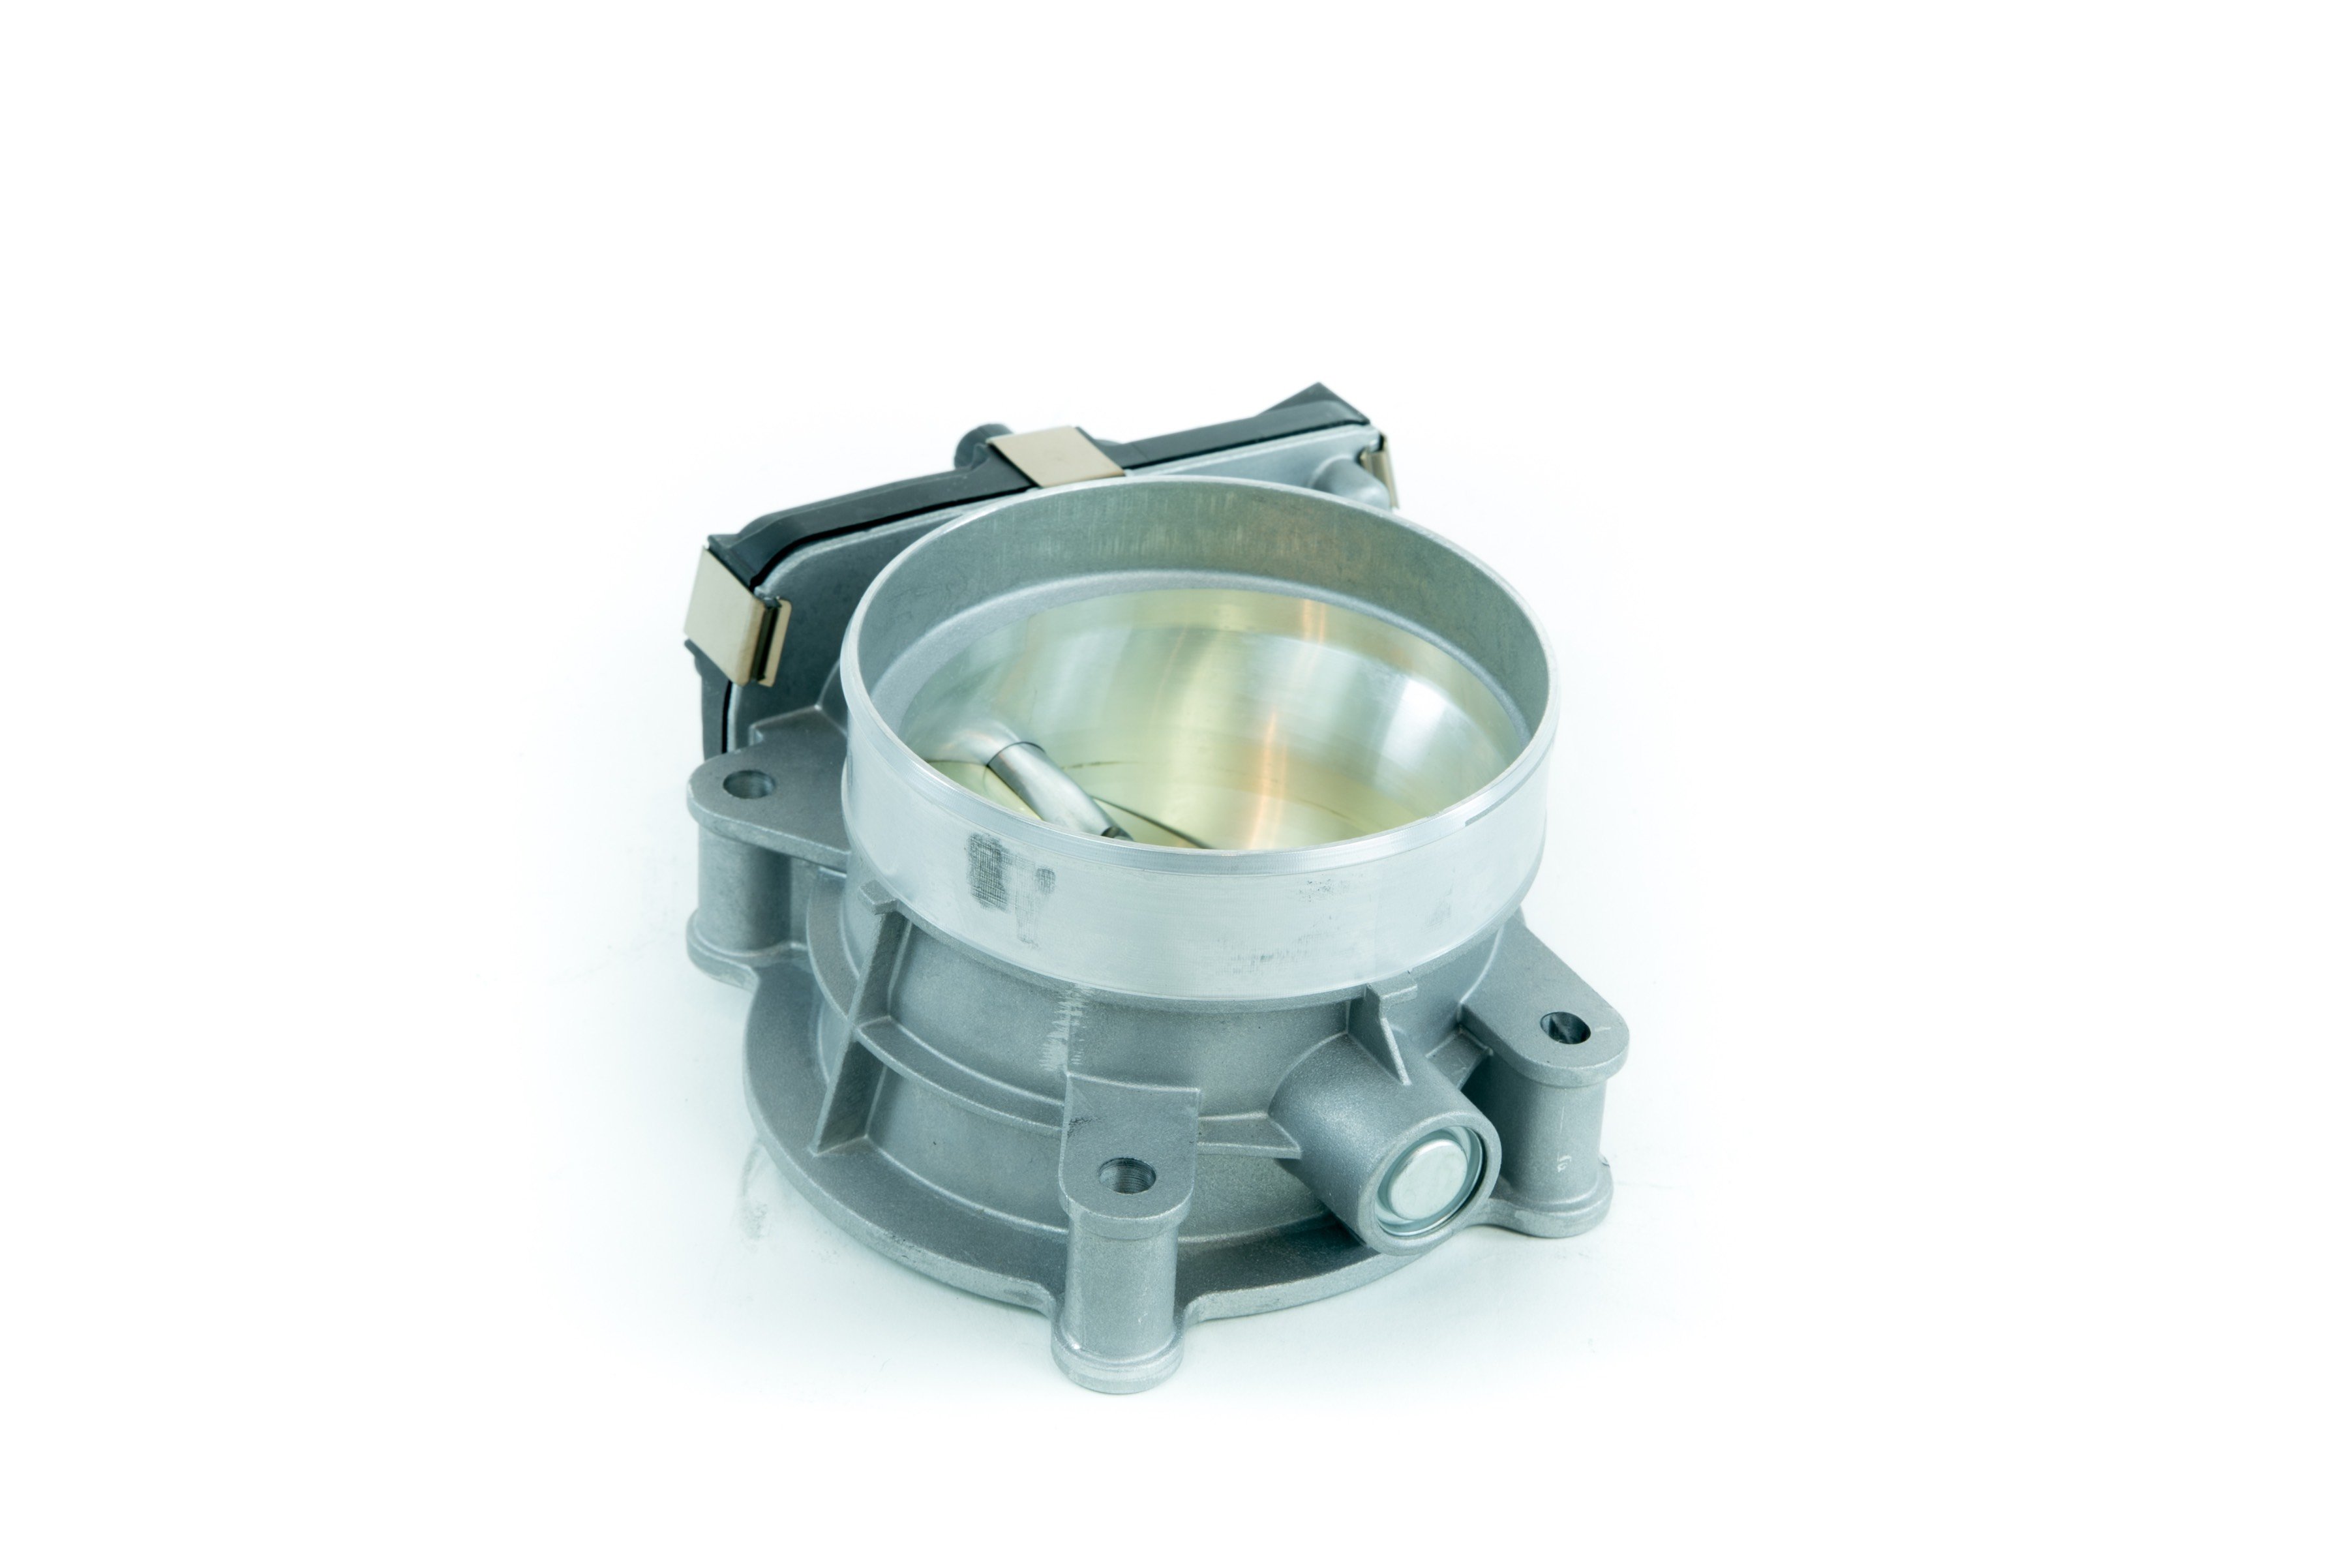
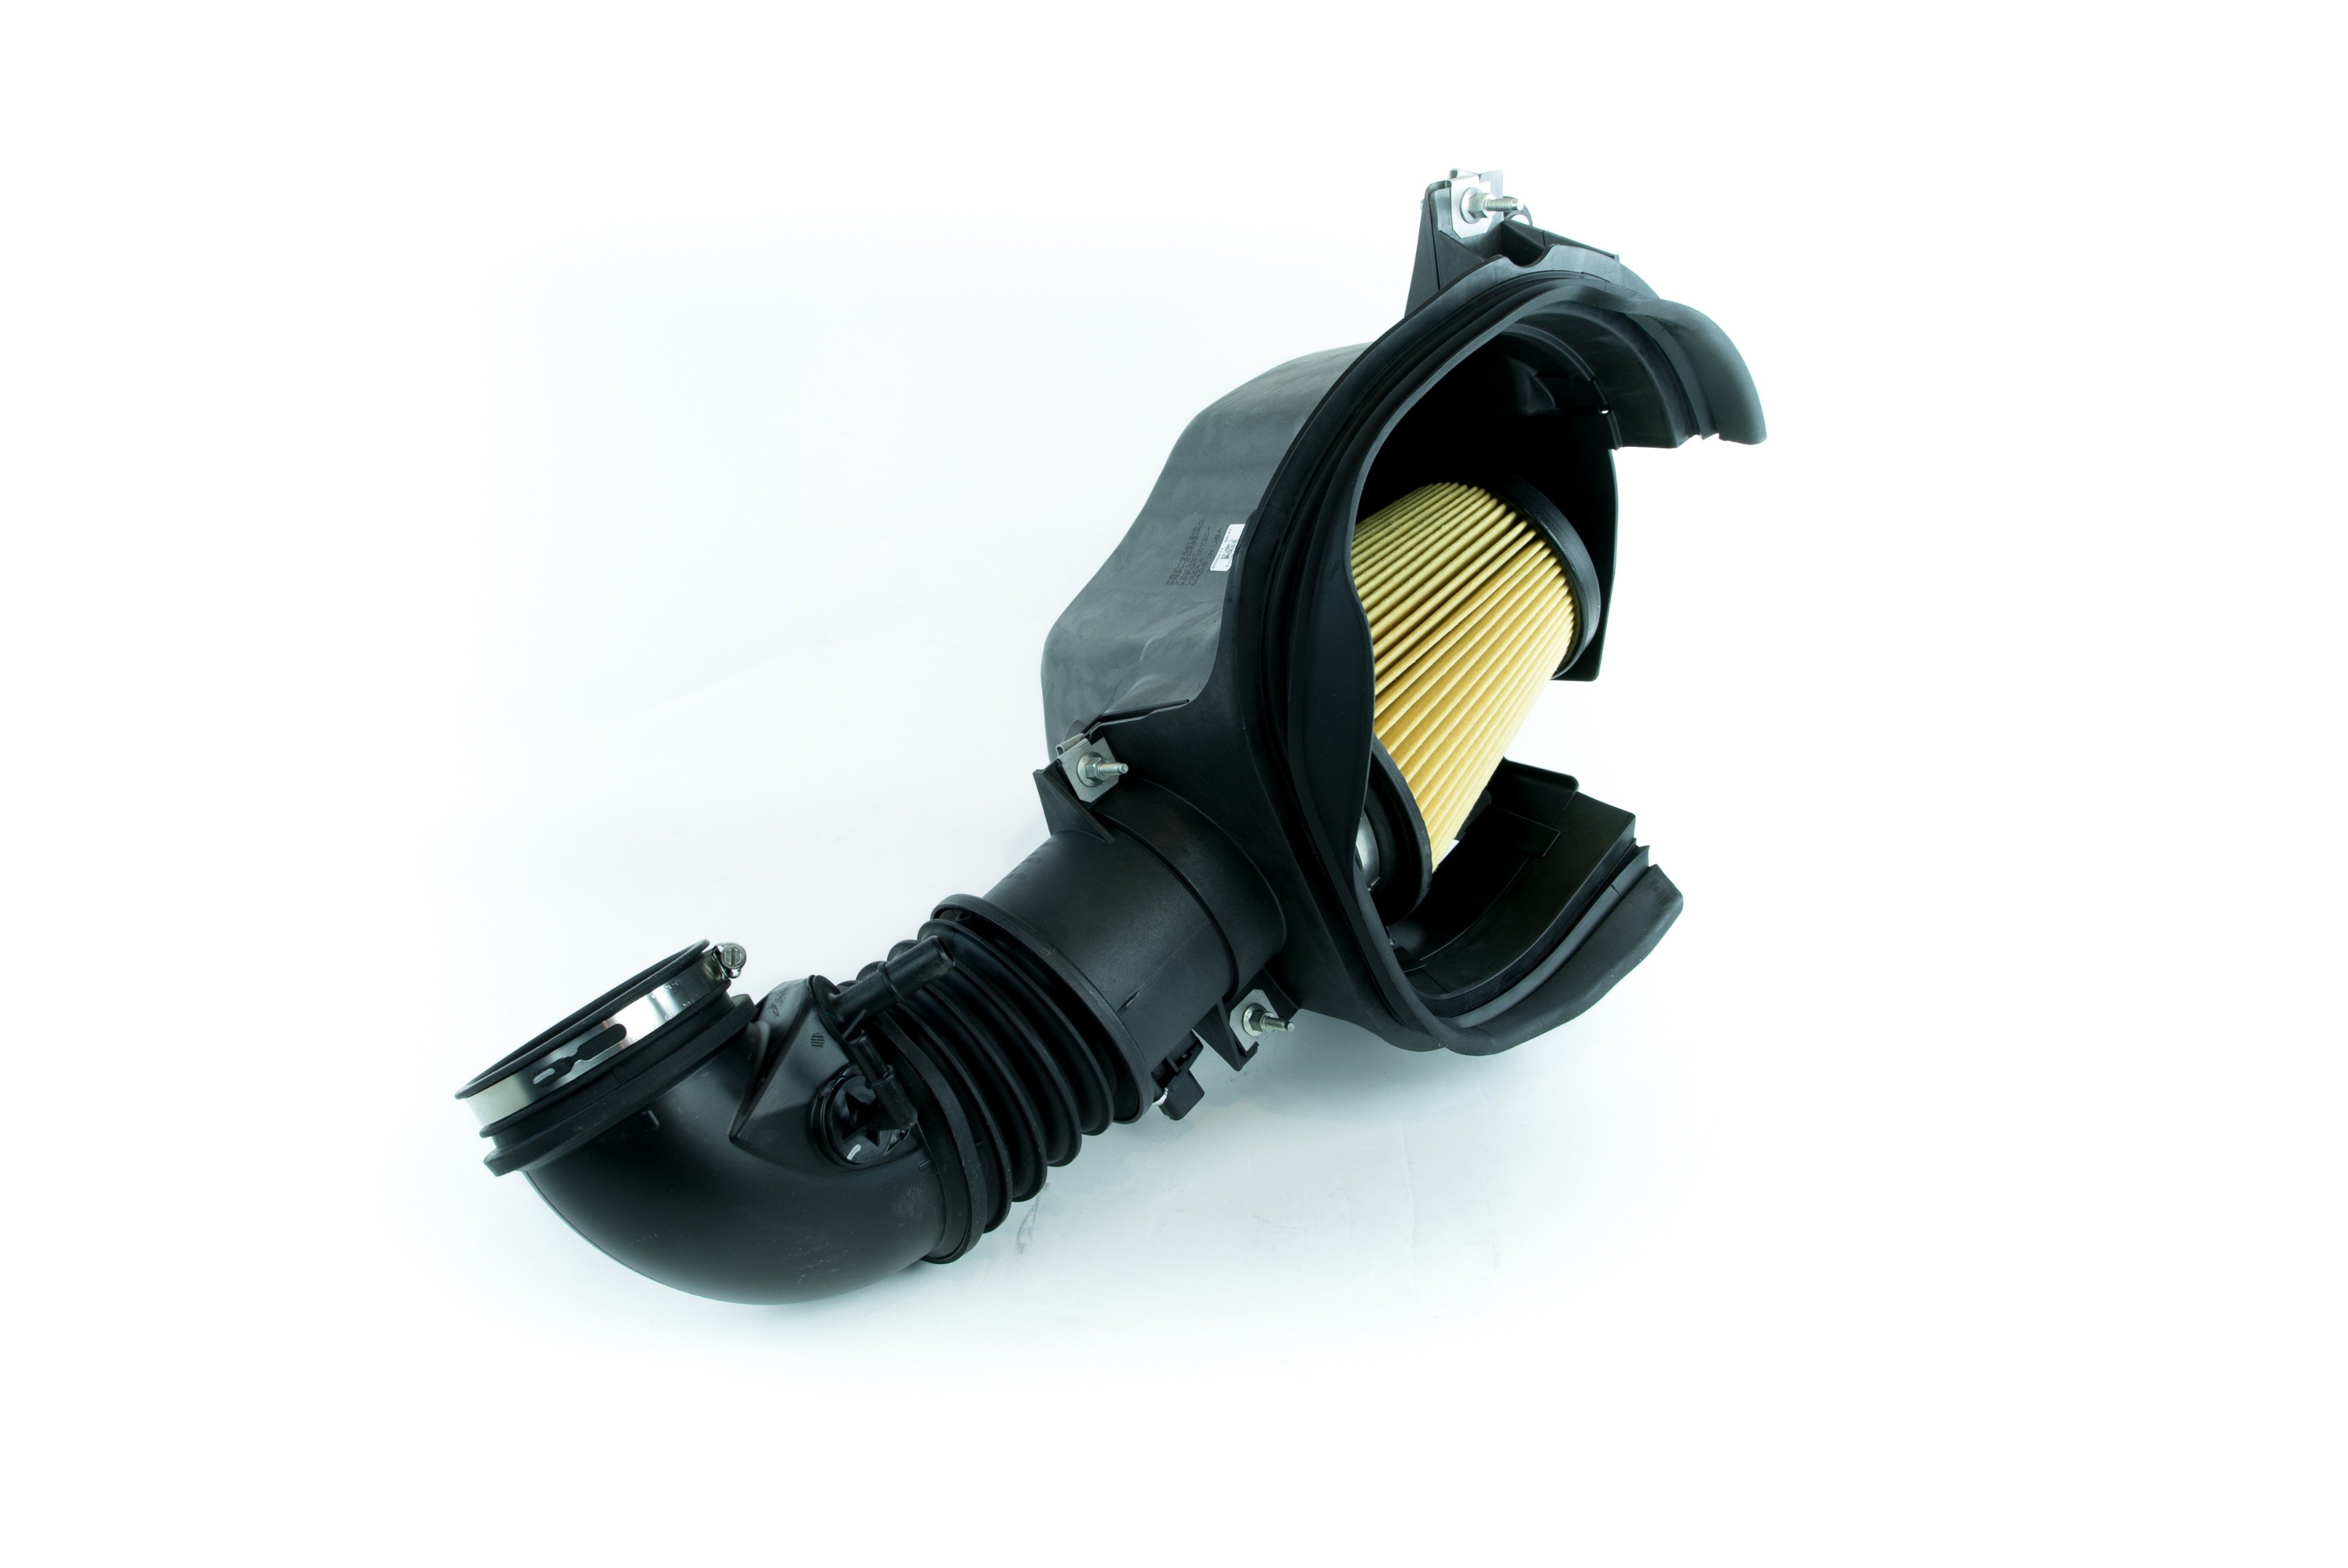
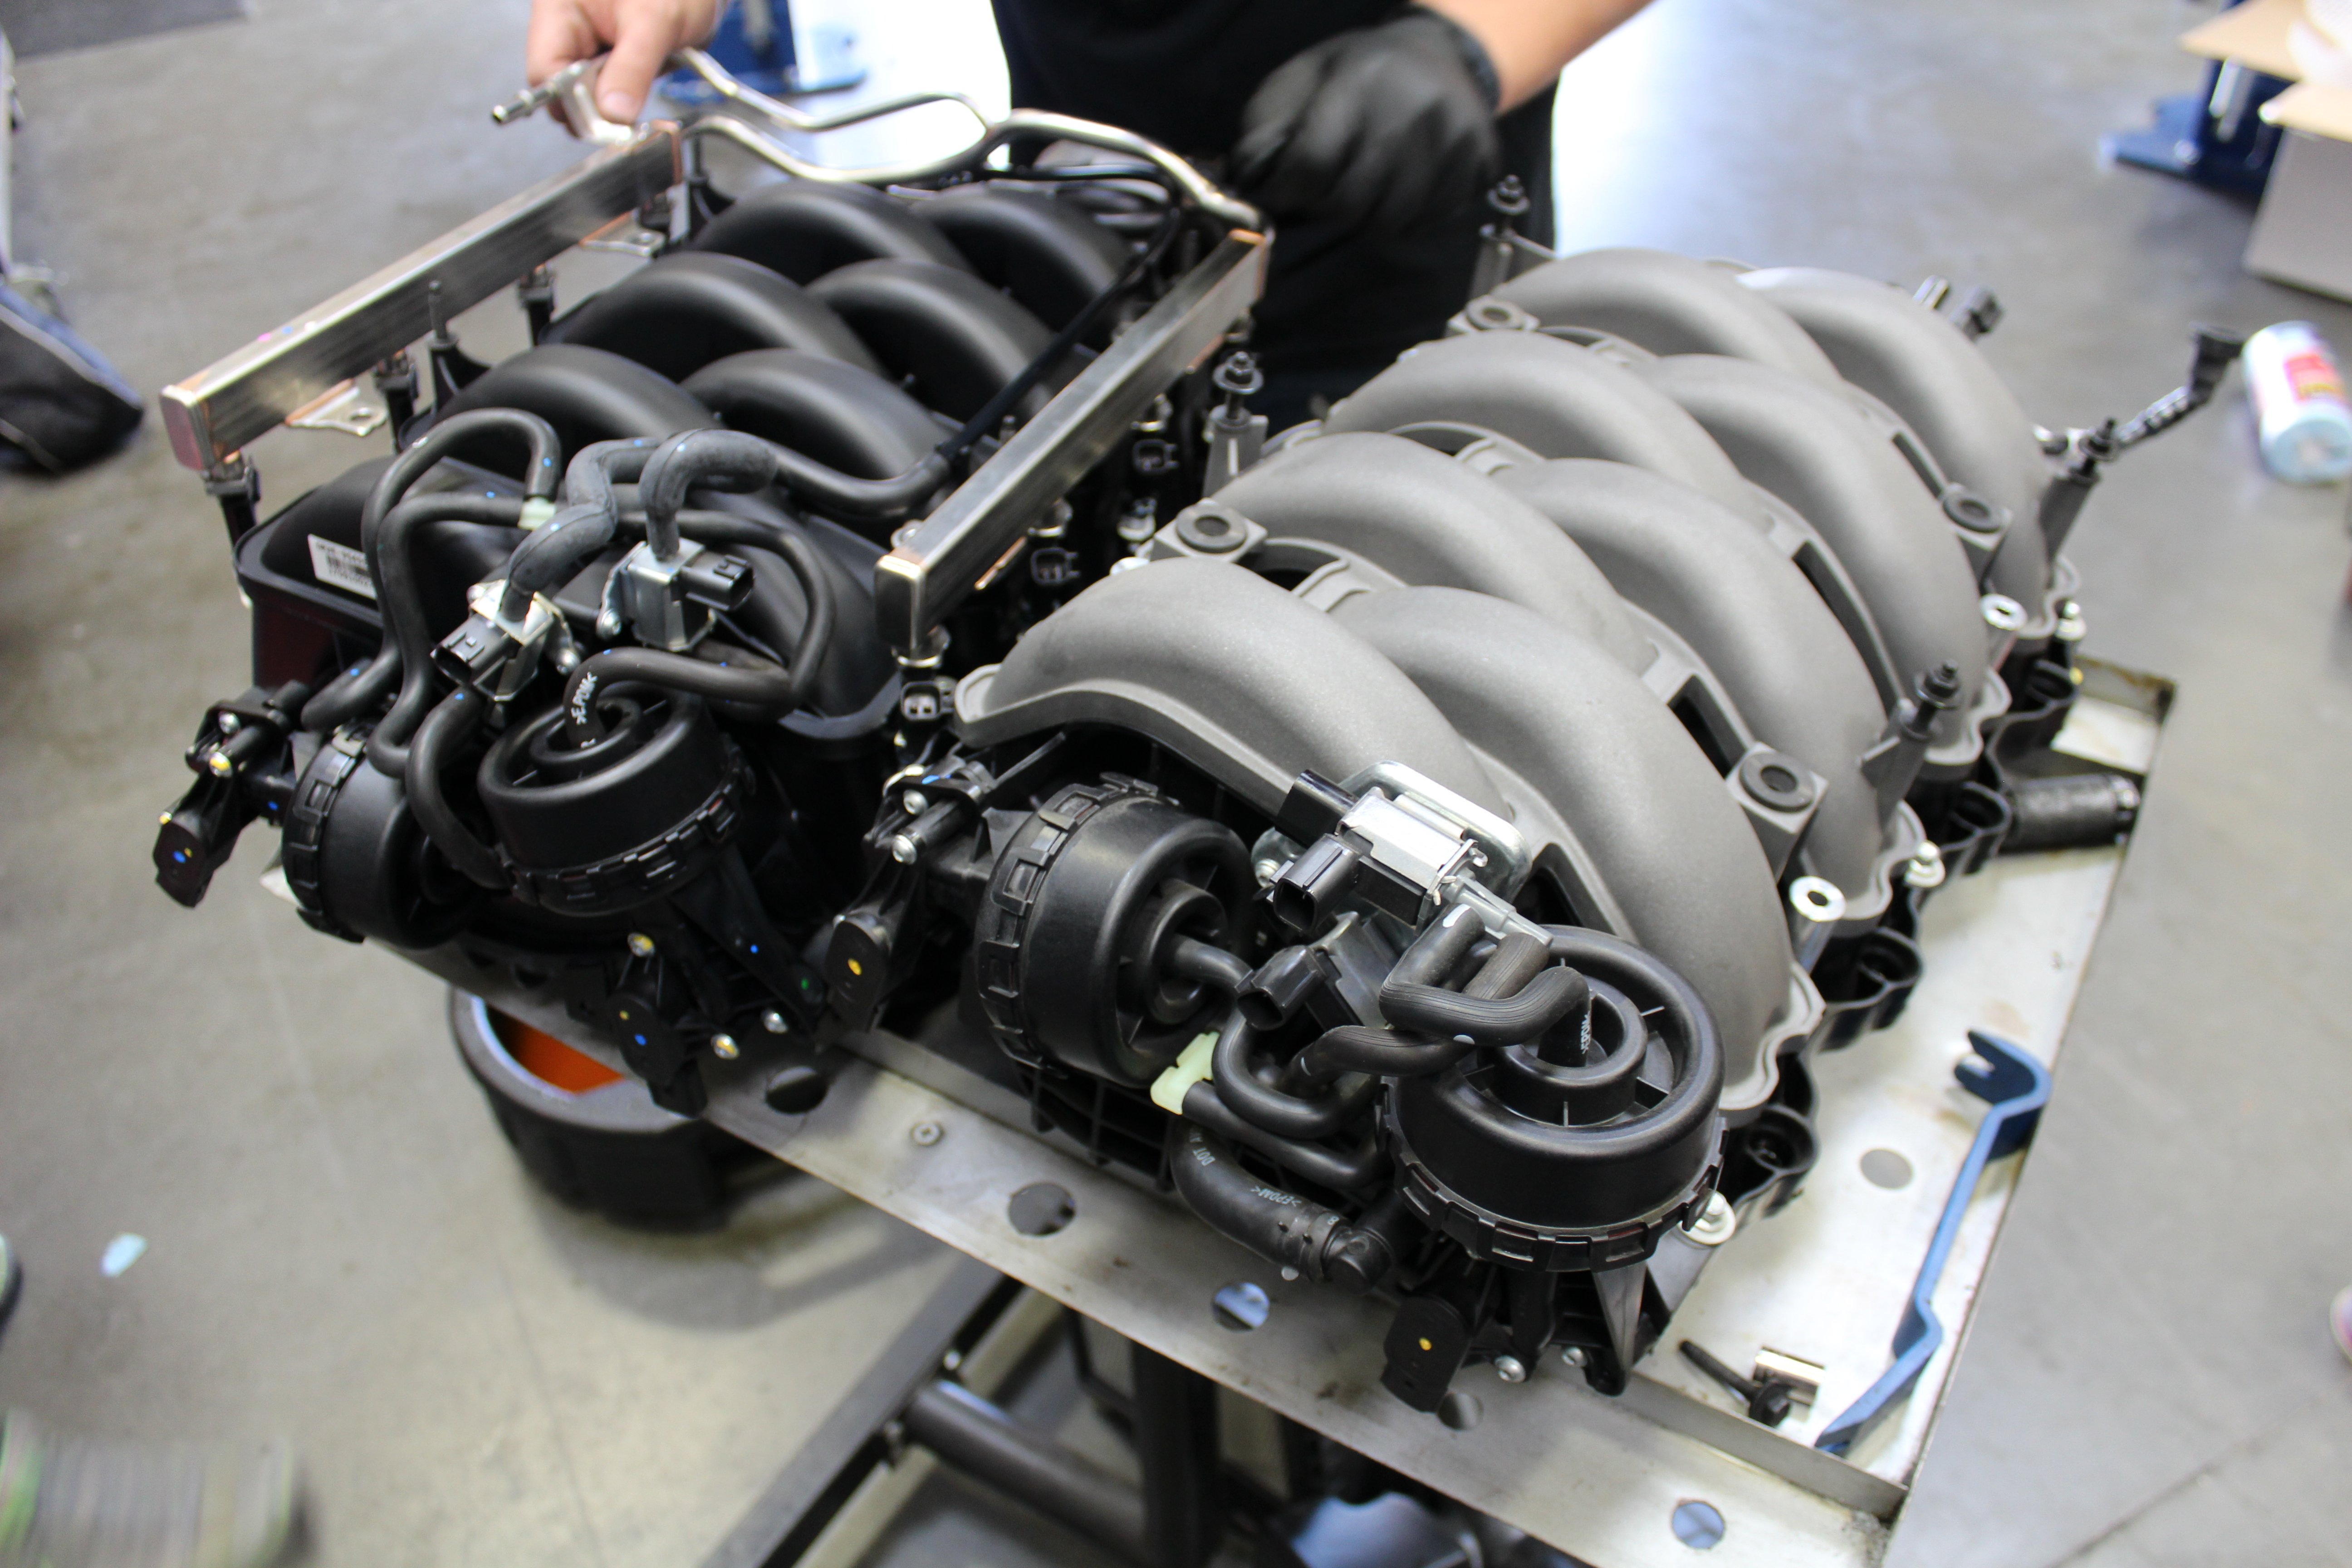
Adding naturally aspirated power is attributable to a familiar recipe of improving the engine’s breathing on the induction side and reducing restriction on the exhaust side. Of course, the trick was doing so in a way that we can stay under budget and utilize as many parts as possible that will translate to Phase 2. That led us to start with a package from Ford Performance Parts that includes the Shelby GT350 cold air intake, intake manifold, and throttle body.
“Coyote engines make substantial power in a small displacement package due mostly to cylinder head and intake manifold design,” Mike Robins, Product Manager at Ford Performance, said. “Swapping a better breathing intake manifold onto a 5.0-liter Coyote has proven time and time again to be a consistent, cost-effective performance improvement, especially for high-RPM enthusiasts and racers. This intake manifold transfers the power curve upward on a 5.0-liter engine while promoting efficiency through the powerband.”
There are numerous intake manifold options for the modern 5.0 engines, which makes choosing one difficult when you need it to perform in a variety of venues. You can’t just go for all-out RPM and power, rather you need a balance.
Key to Phase 1 of the build is adding parts that will not only perform well at this stage but also create a solid foundation for our supercharged Phase 2 build. That is definitely the case with our Ford Performance GT350 induction upgrades, including the intake manifold and throttle body. The CAI will help now, but will be left behind when we add boost. However, at this phase, the induction package will help the midrange and top-end performance of our Gen 2 Coyote 5.0-liter engine.
“When considering Coyote intake manifolds, Ford Performance Parts offers three different aftermarket variations: The legendary Boss 302 and Cobra Jet manifolds, as well as this 5.2-liter GT350 intake manifold,” Mike added. “It is best for a customer to understand what short- and long-term goals they have for the car when selecting an intake manifold. If you are looking for a version that promotes a ton of gain high in the powerband — and fits nicely under a stock hood is desired — then get ready to mentally train yourself into delaying your shifts and go with a GT350 intake manifold!”
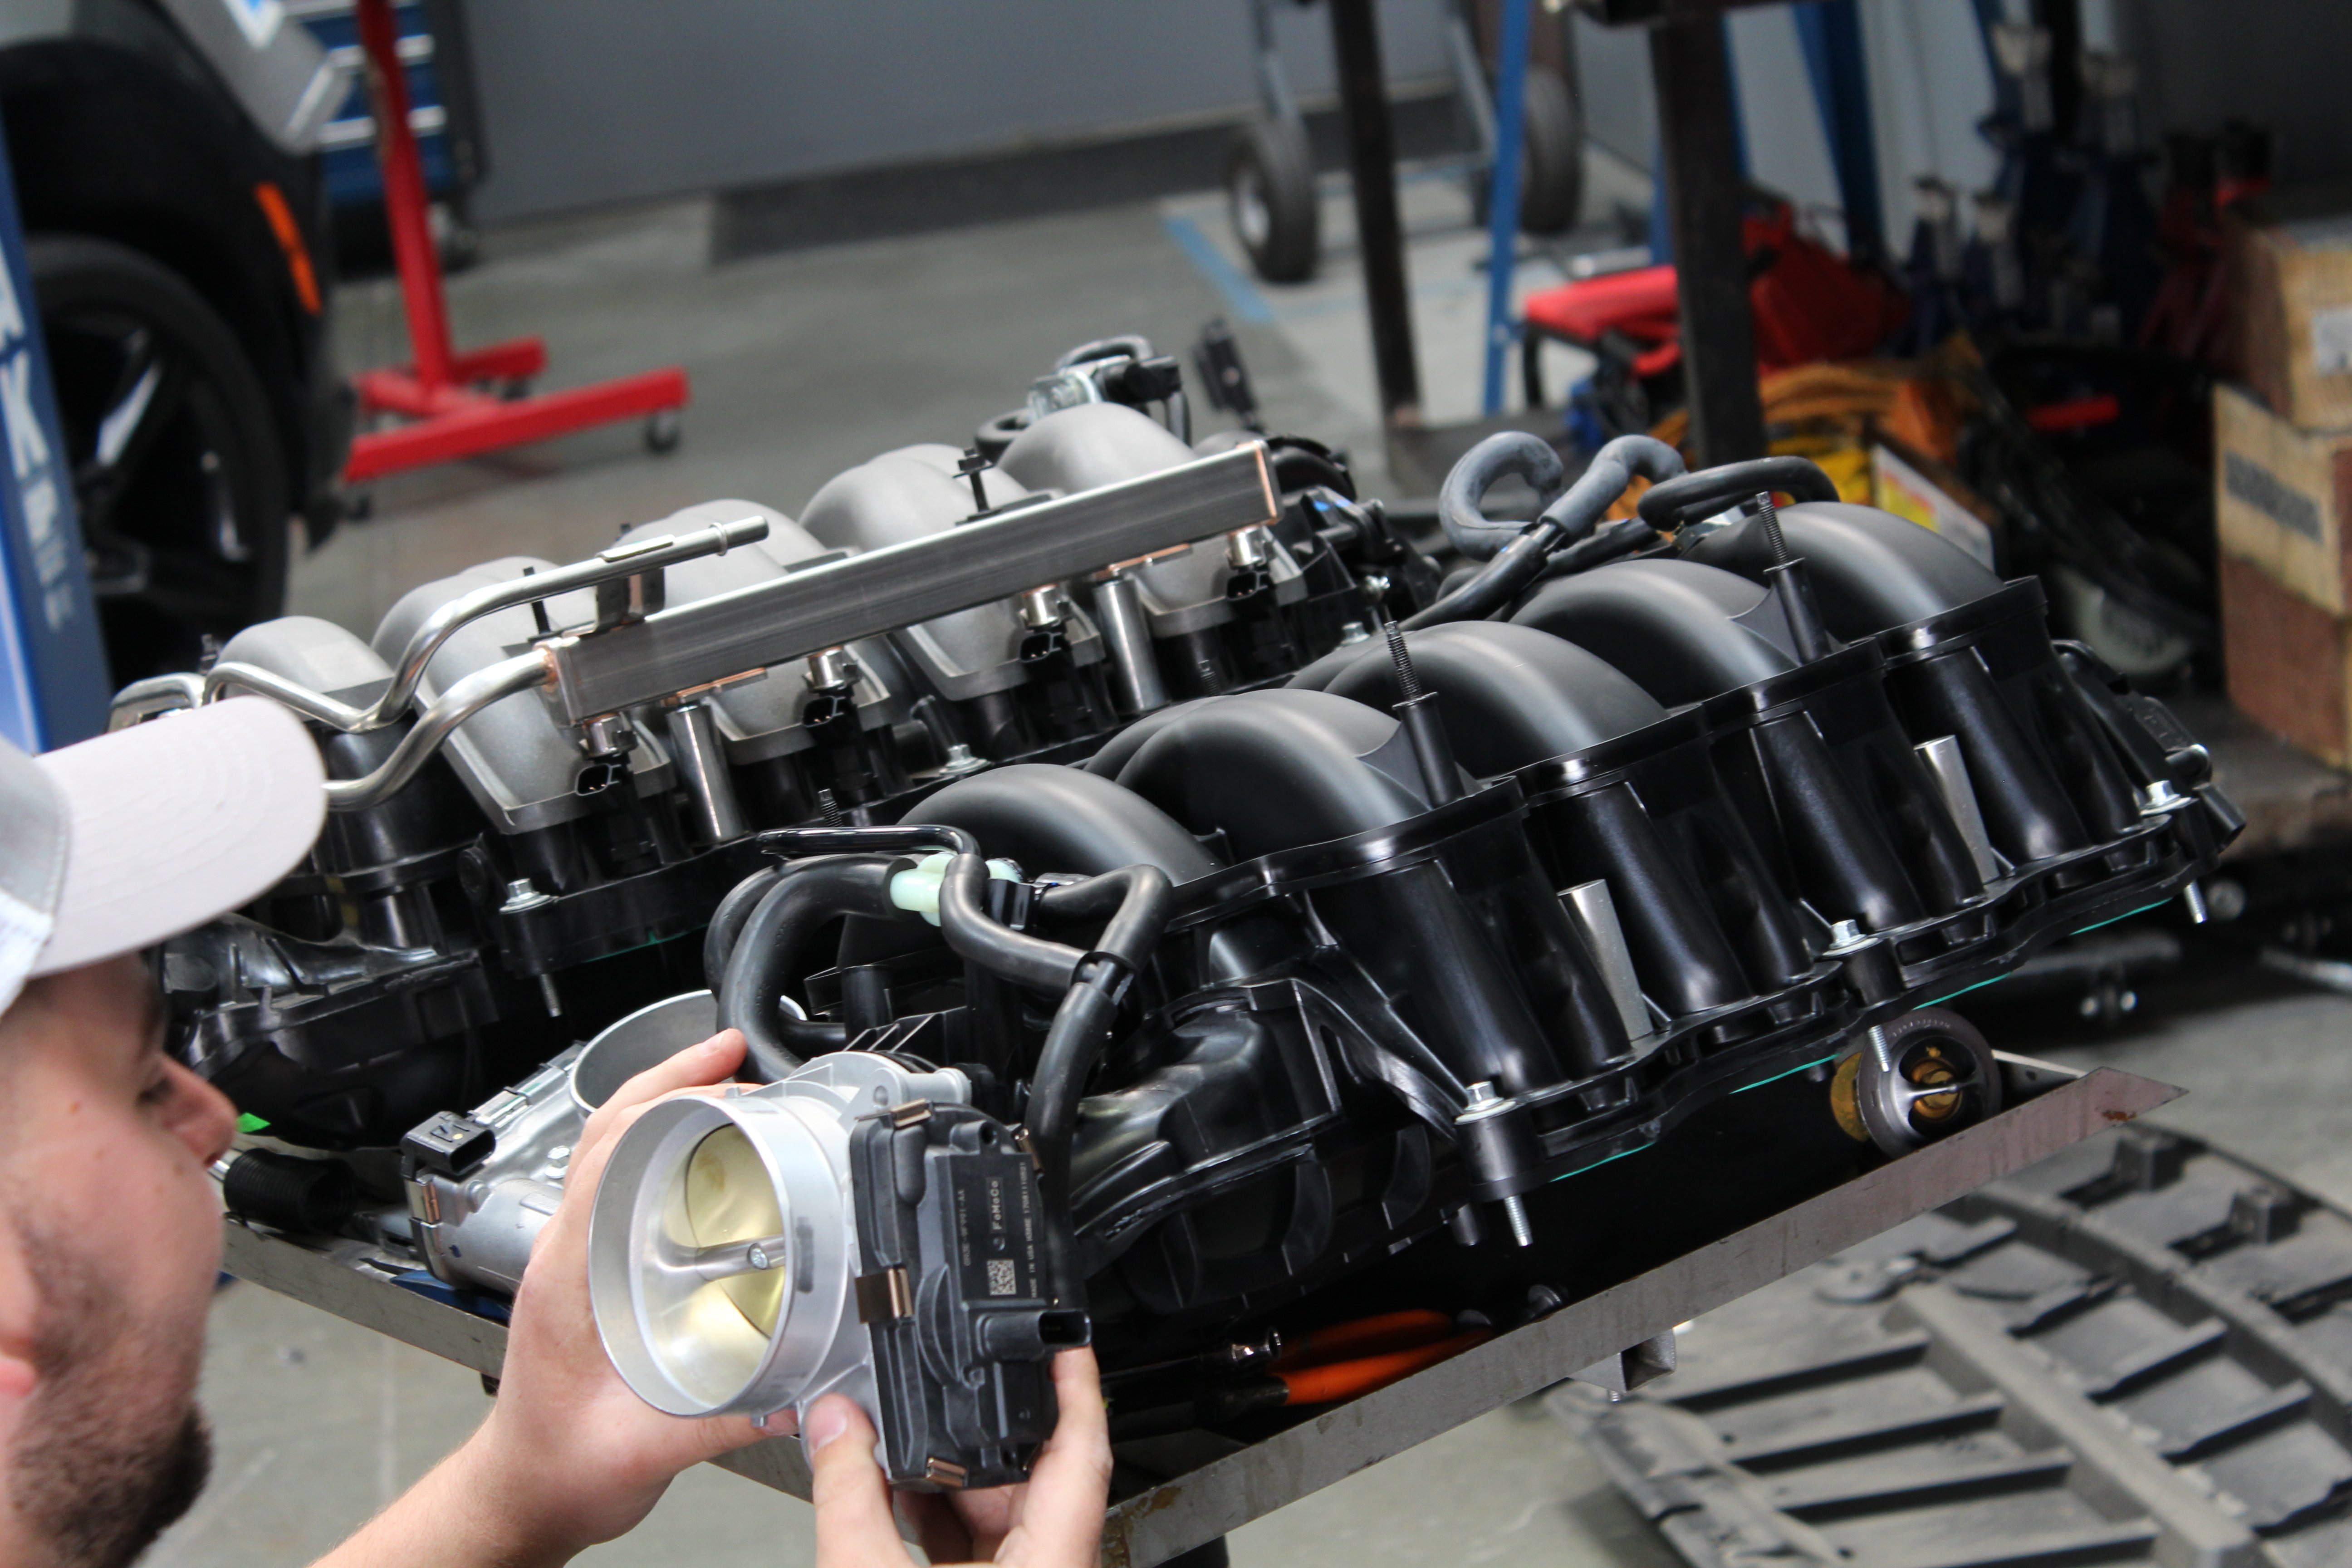
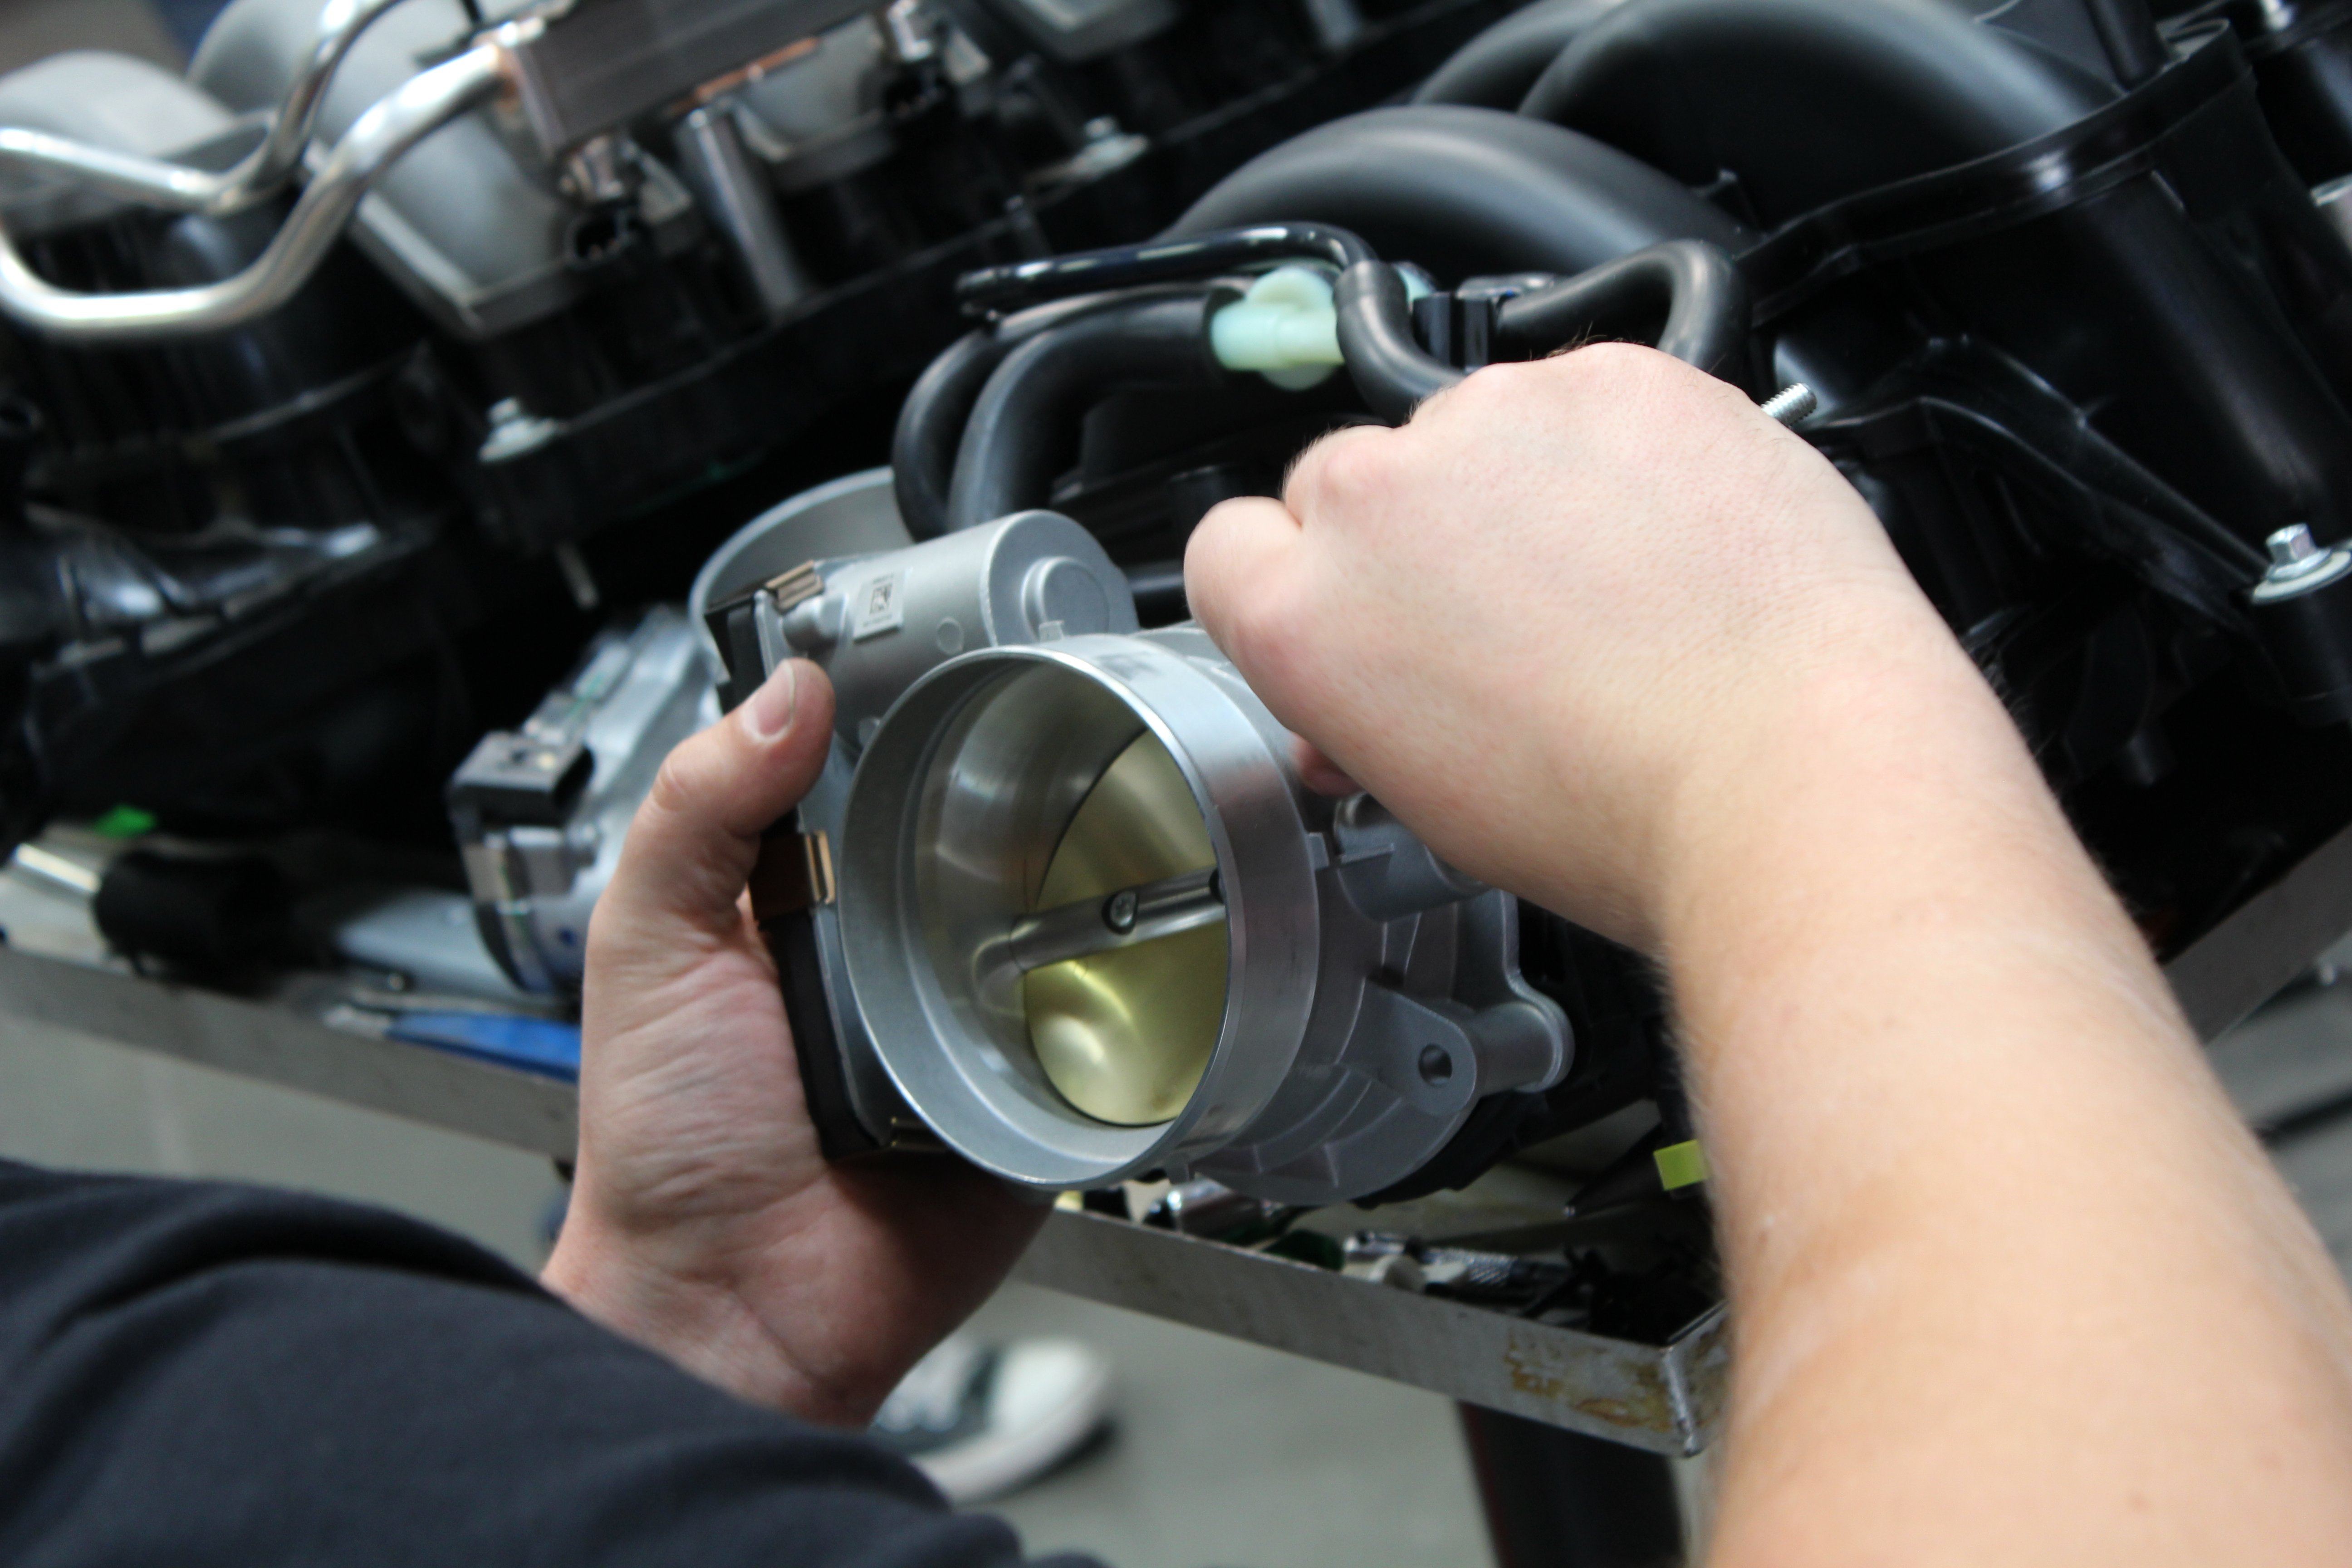
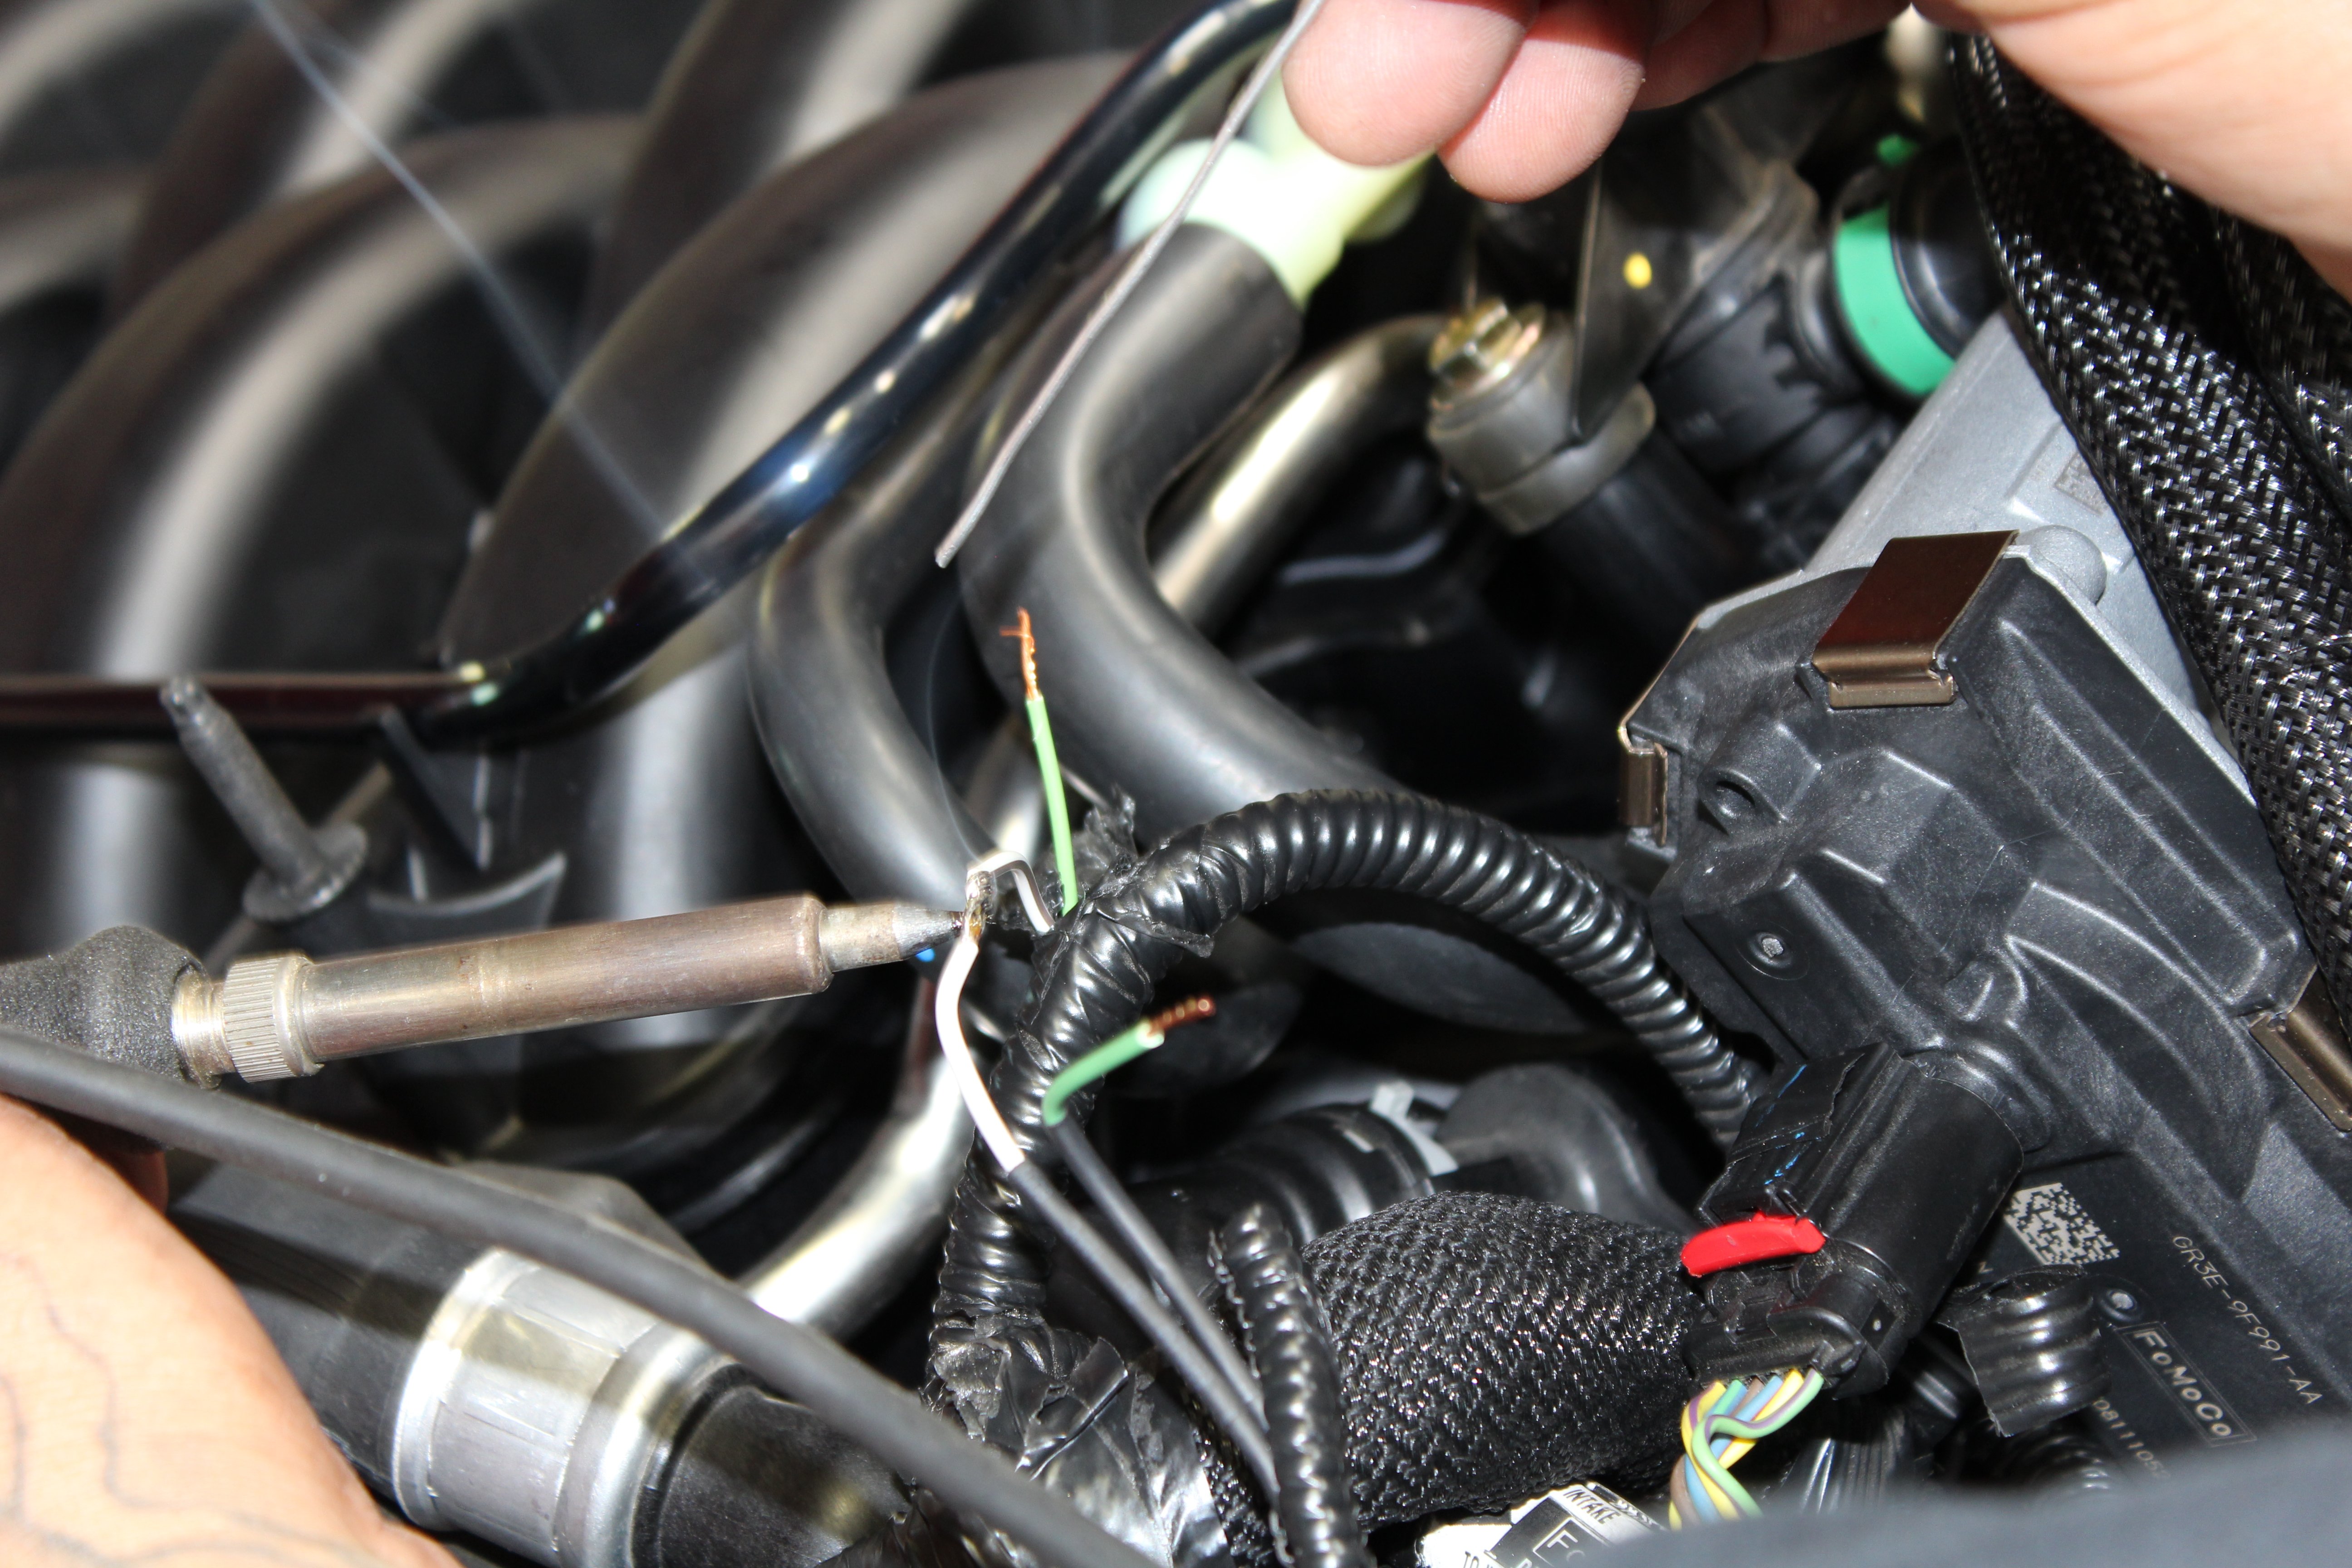
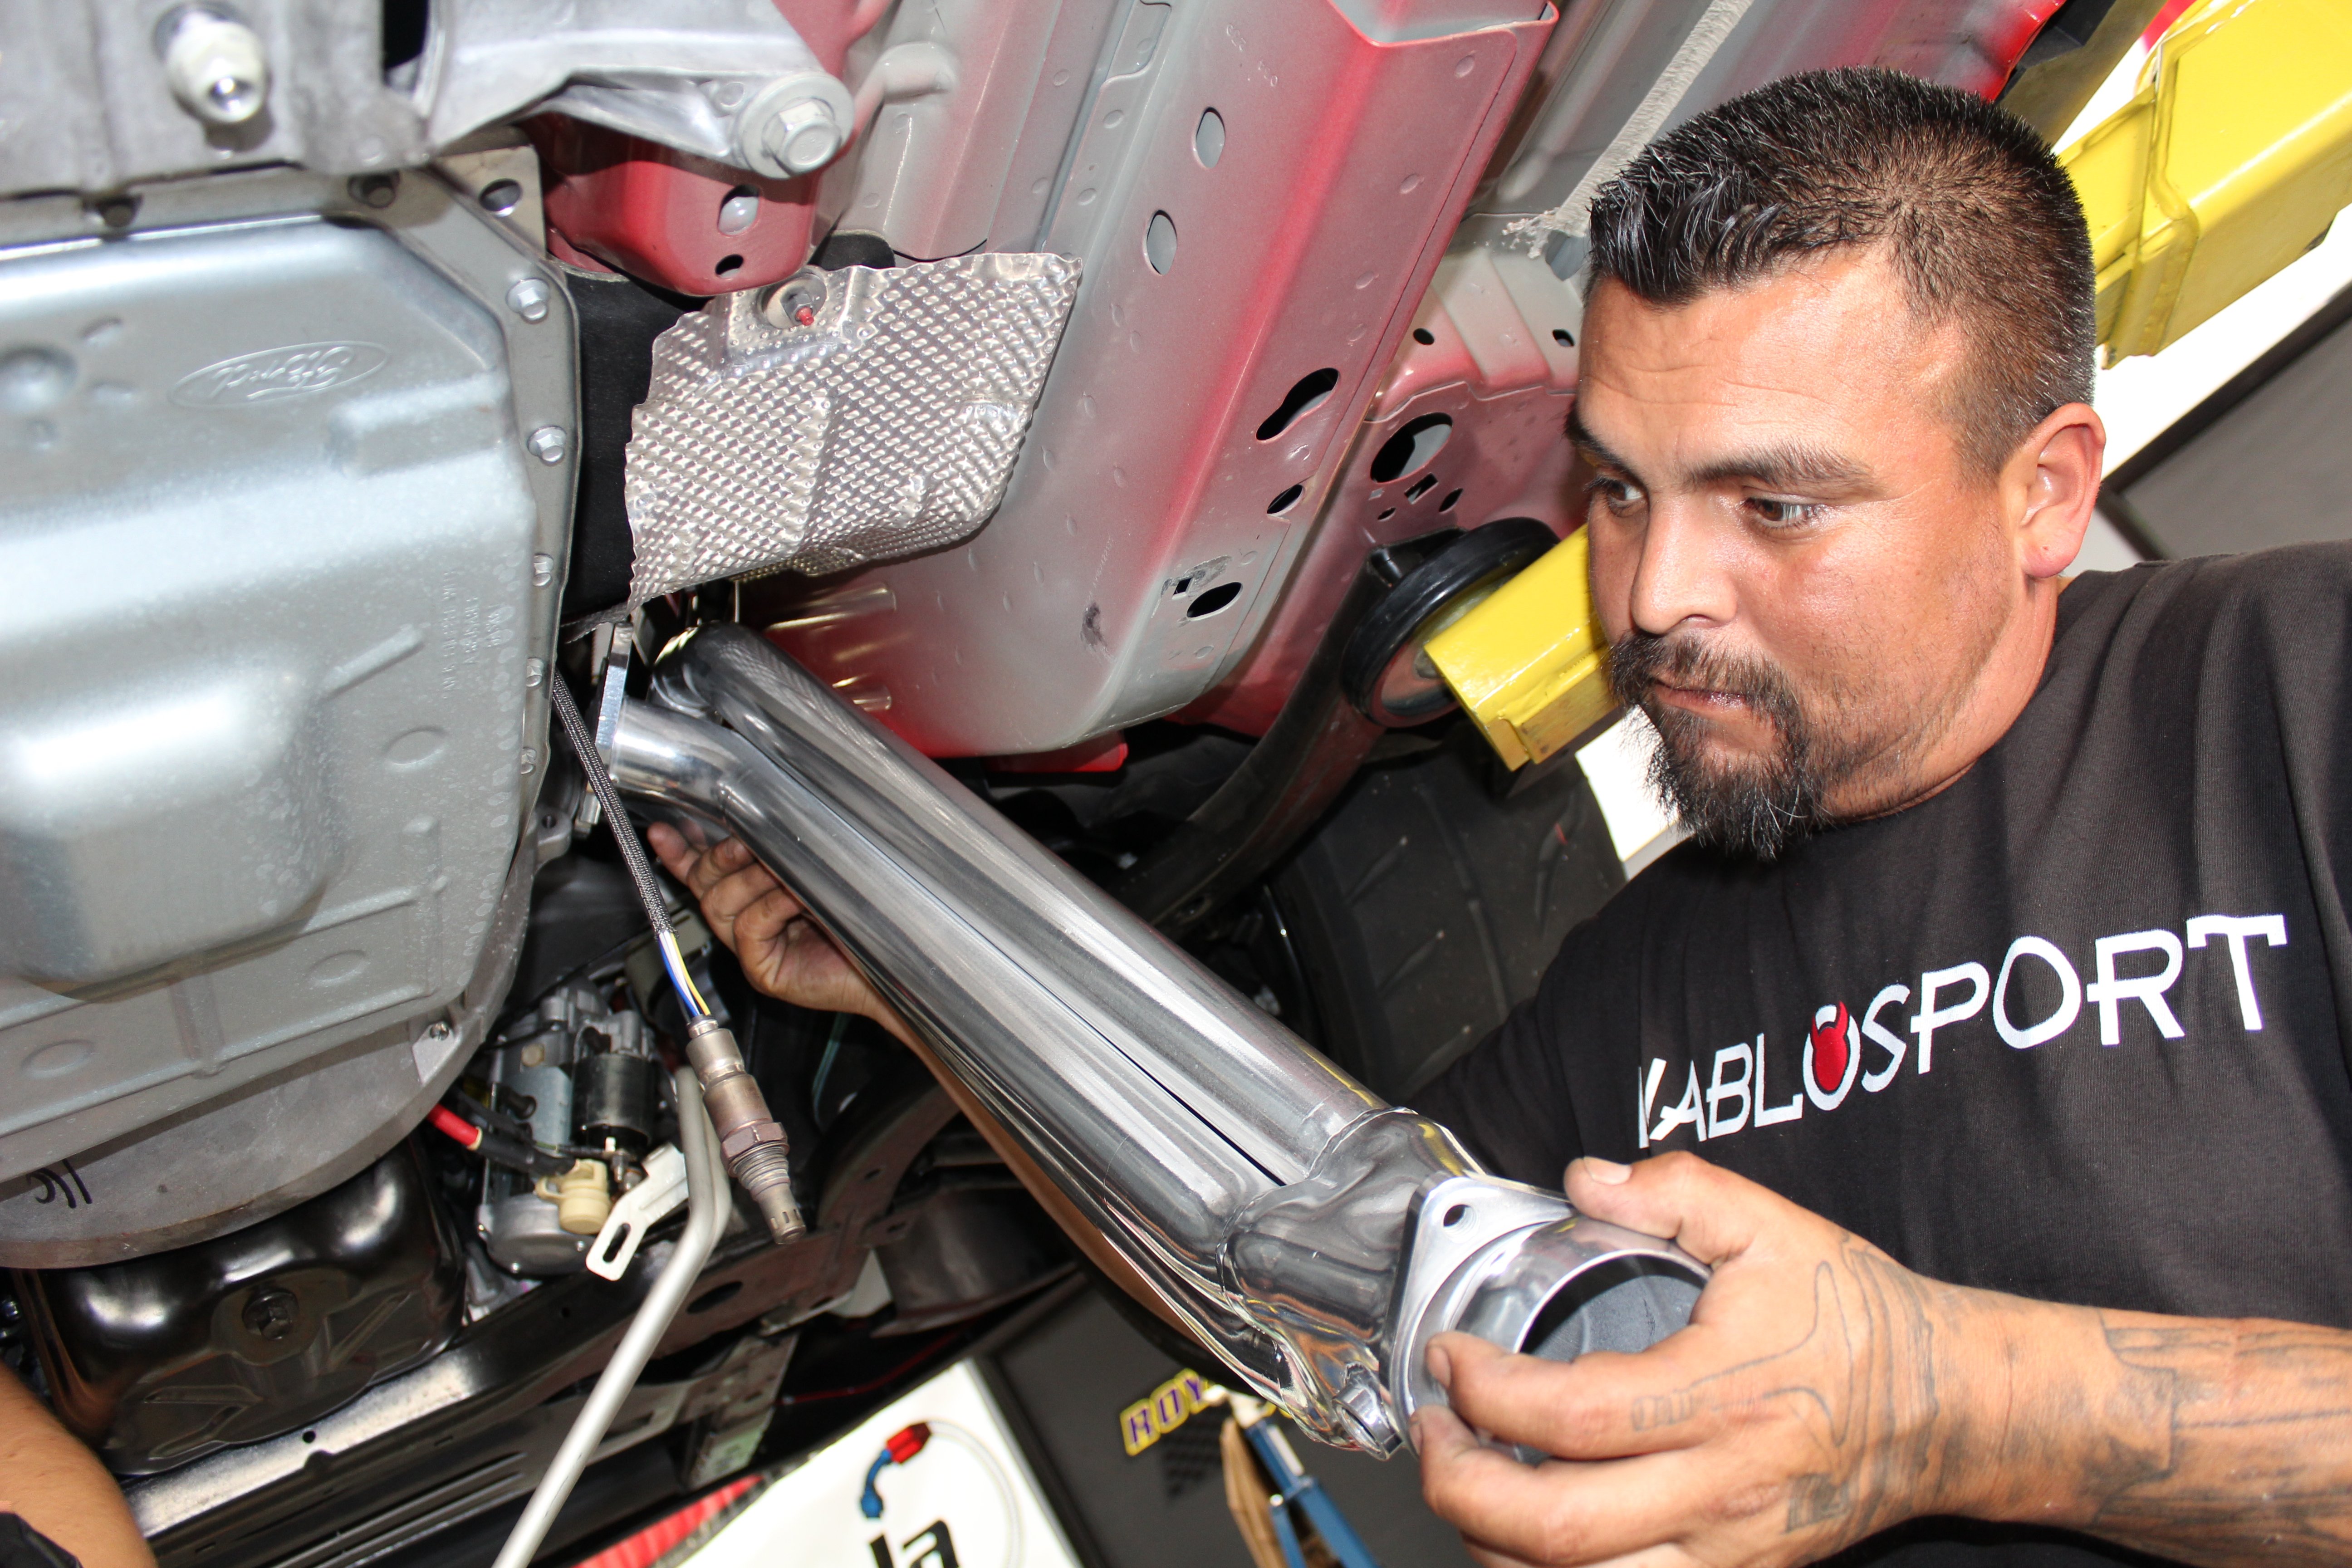
Ford recommends disconnecting the Fuel Pump Driver Module, which is located under the rear seat. It's a good idea to do this, as we'll be removing the factory intake manifold, which means disconnecting the factory fuel rails, so they'll need to be depressurized. The FPDM is located under the rear seat on the driver's side. Next, you'll want to start the vehicle and allow it to idle until the vehicle stalls. Once stalled, disconnect the battery at the negative terminal. Then you can remove the factory induction. With the stock stuff out of the way, we placed the new 87mm throttle-body onto our new GT350 intake manifold, as well as the factory fuel rails. Be sure to reuse the two factory vacuum lines for the GT350's IMRC as well. You'll also need to reuse your factory passenger side PCV inlet from the factory intake manifold, but make sure you use the provided hardware to install it. This same process will be used for the EVAP solenoid as well. To install the new GT350 intake manifold, perform the disassembly in reverse order.
The GT350 intake has proven a solid performer in the midrange while delivering impressive gains at the top of the tach. When paired with the whole Shelby induction system, it should deliver solid gains on our Mustang GT.
“When this intake manifold and cold air intake kit is paired with an aftermarket calibration, the vehicle makes an additional 60 horsepower at 7,500 RPM,” Mike said.
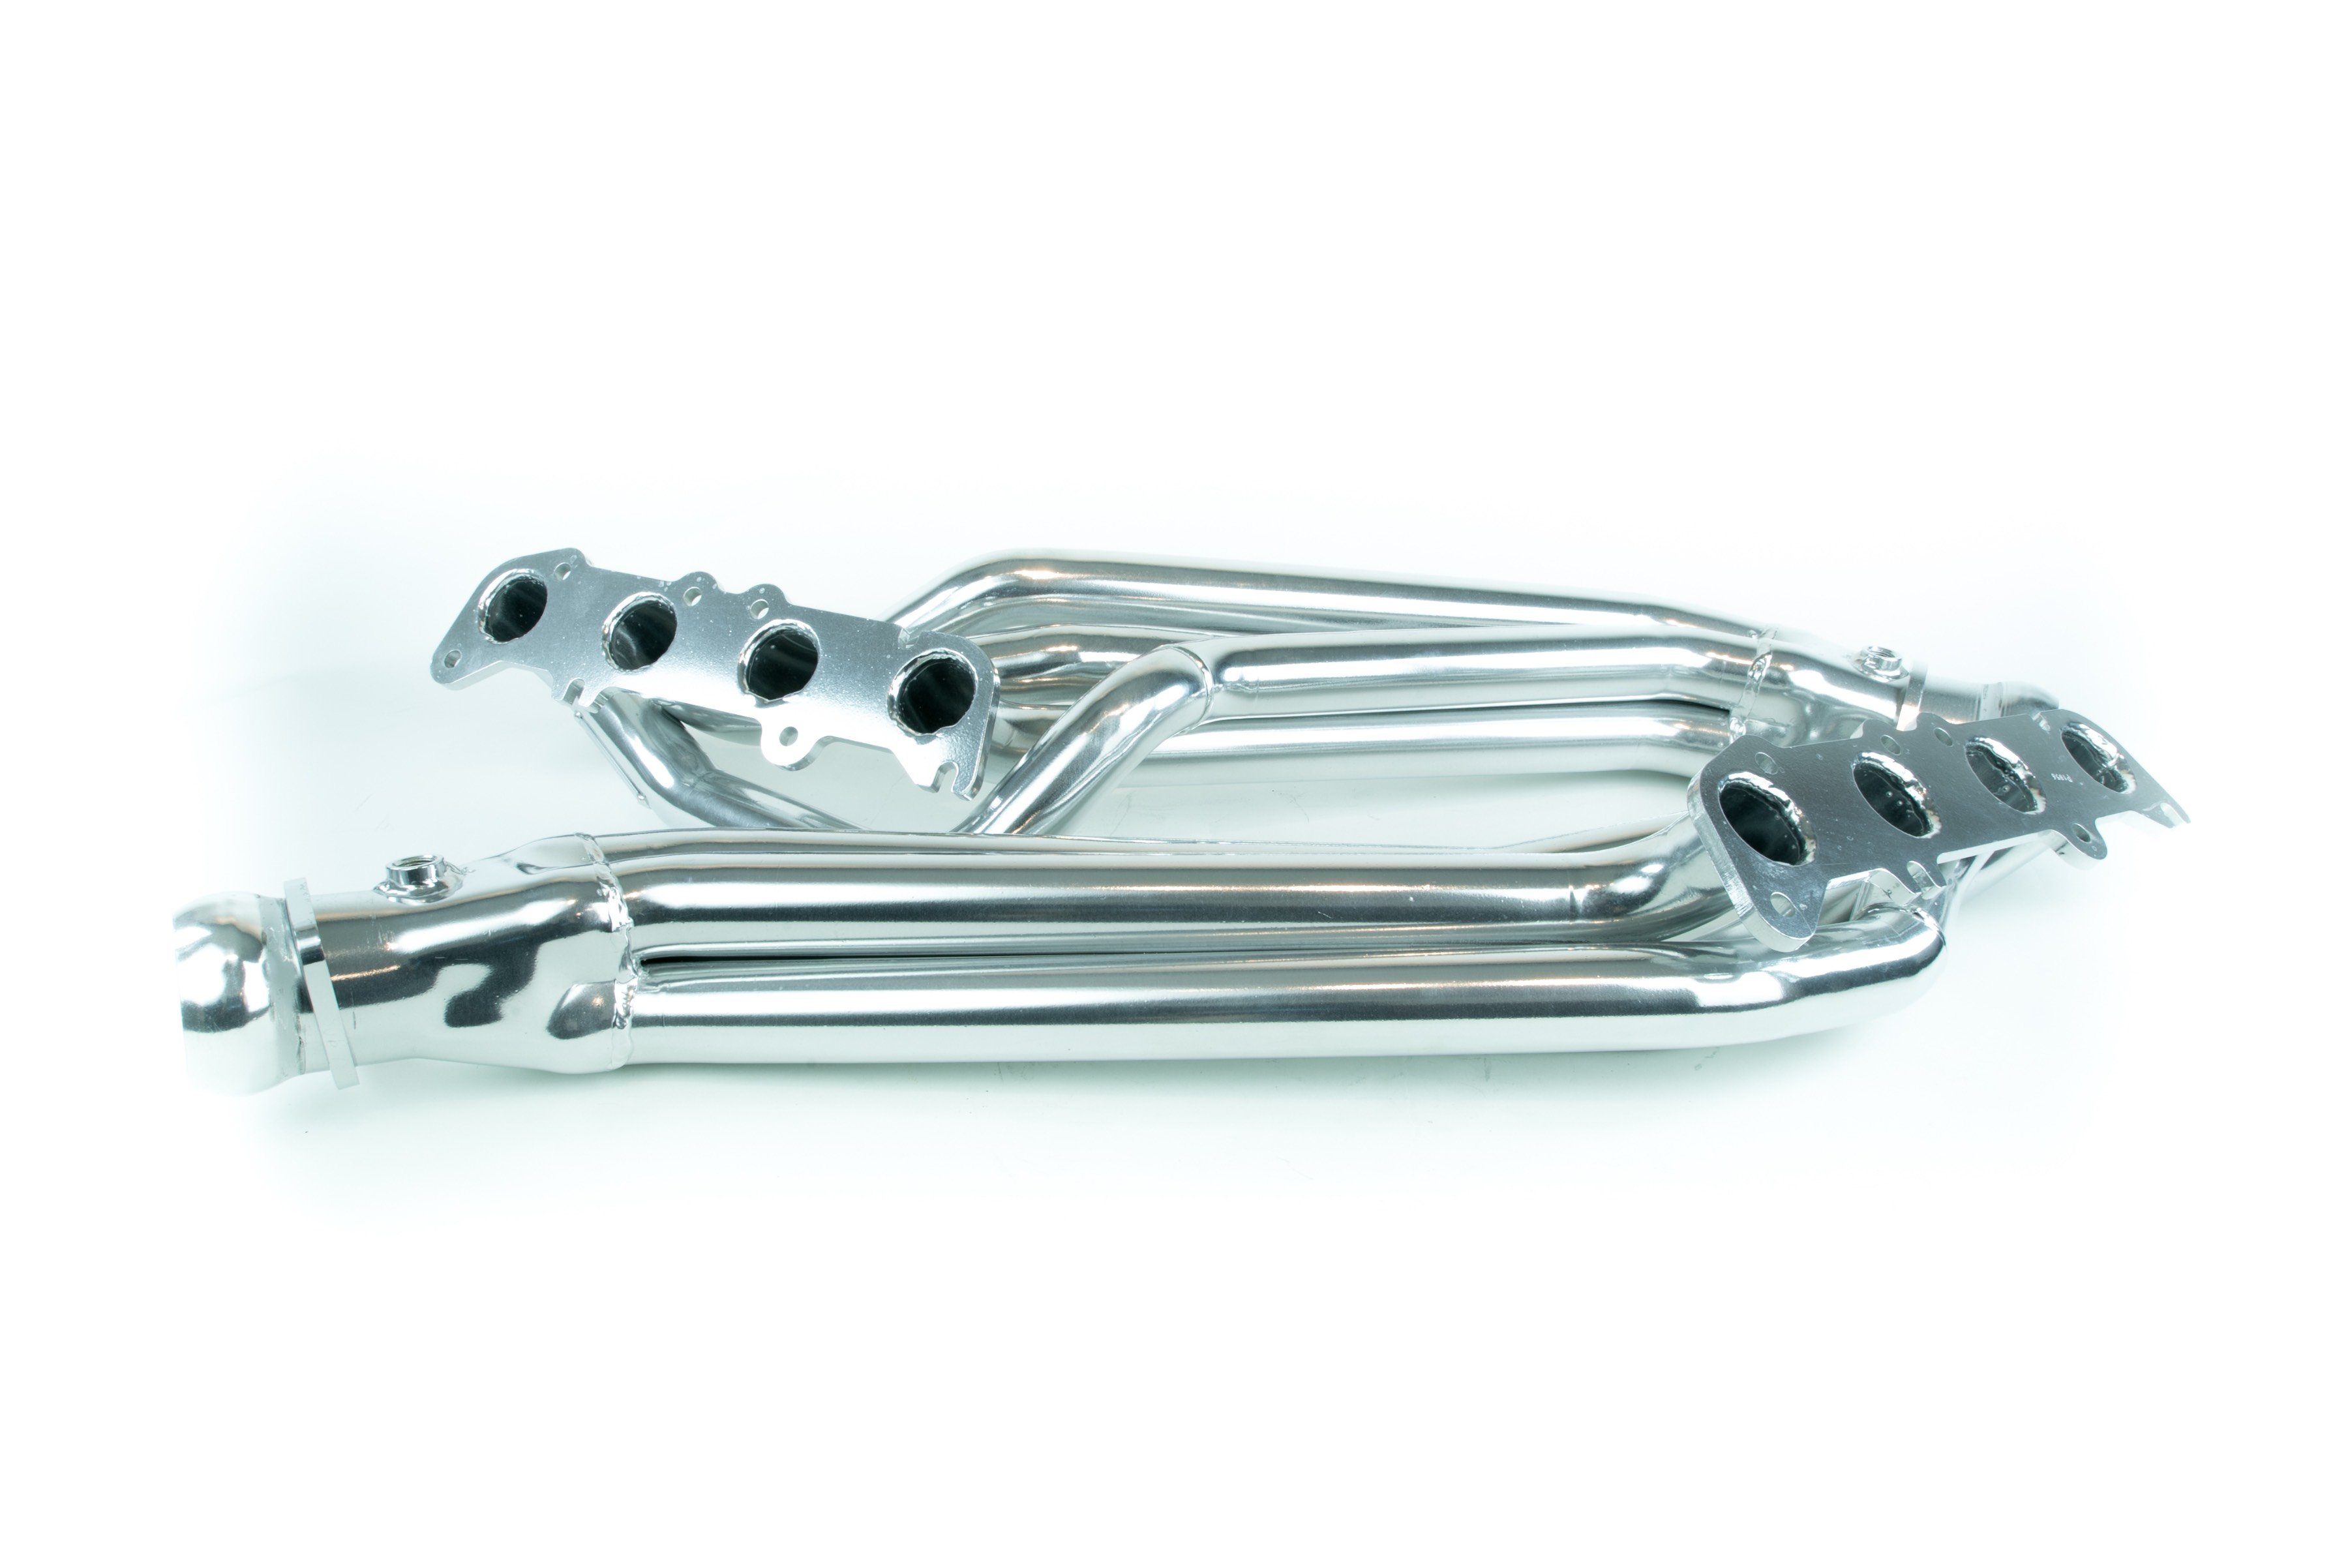
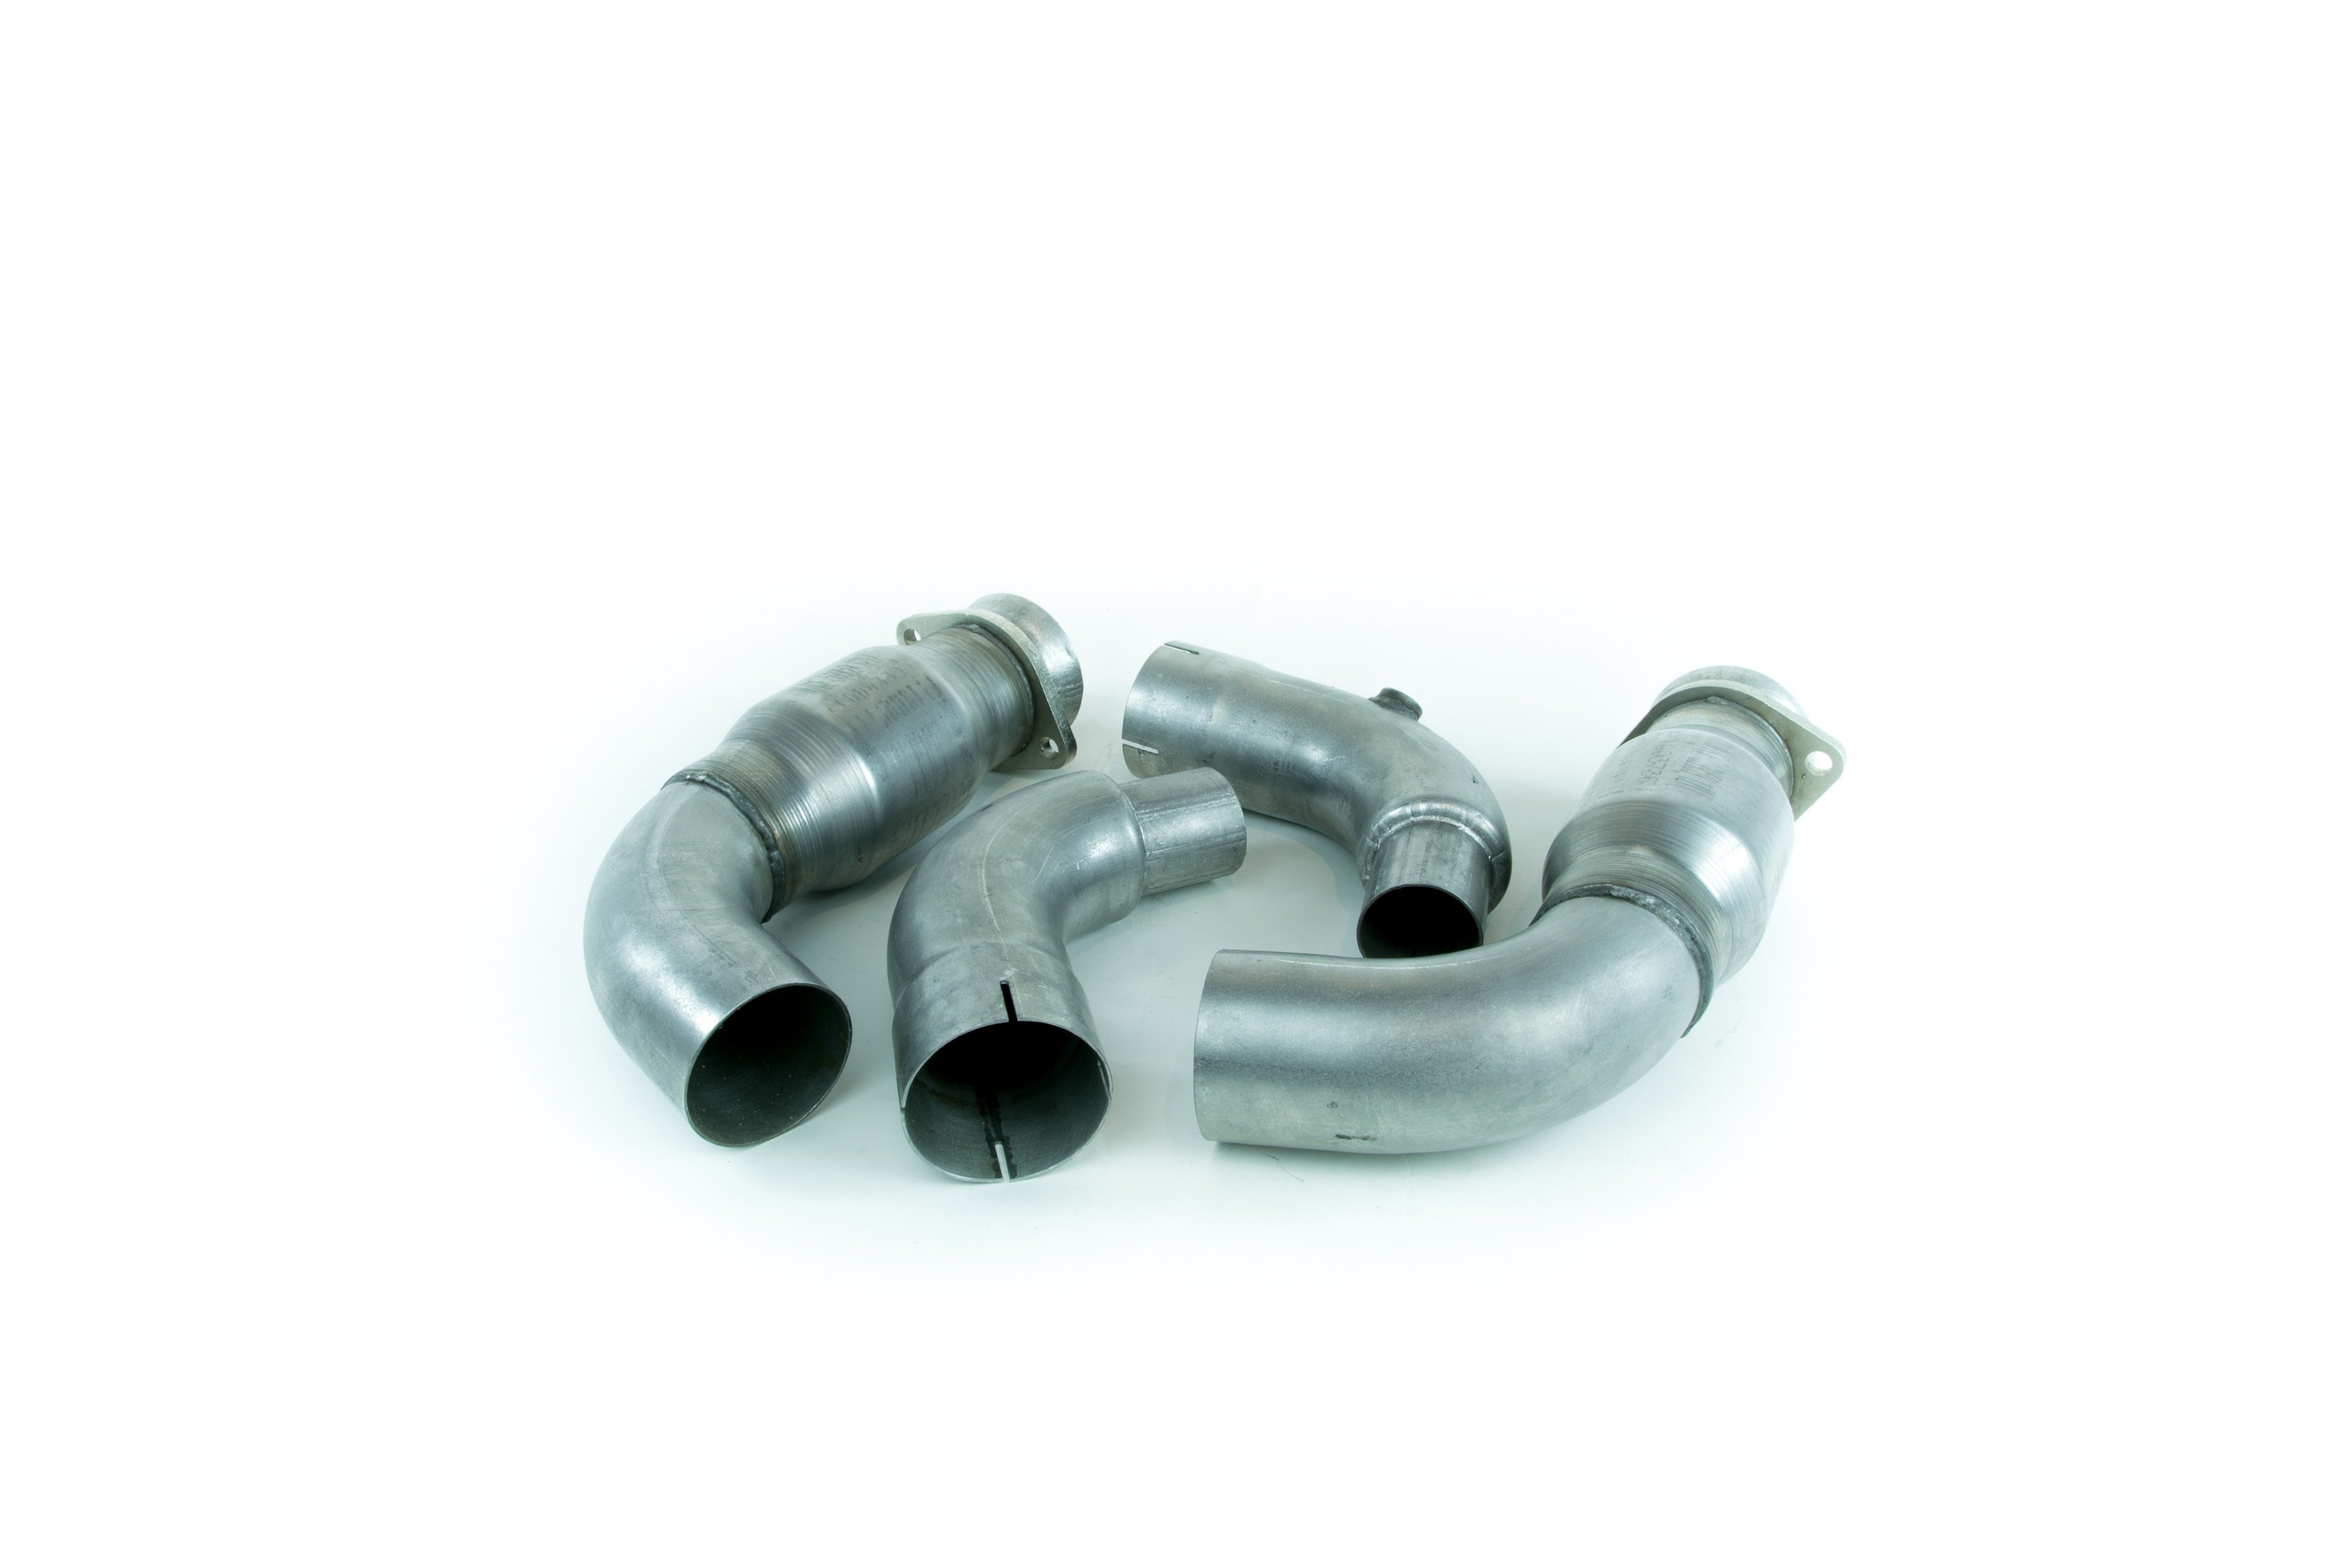
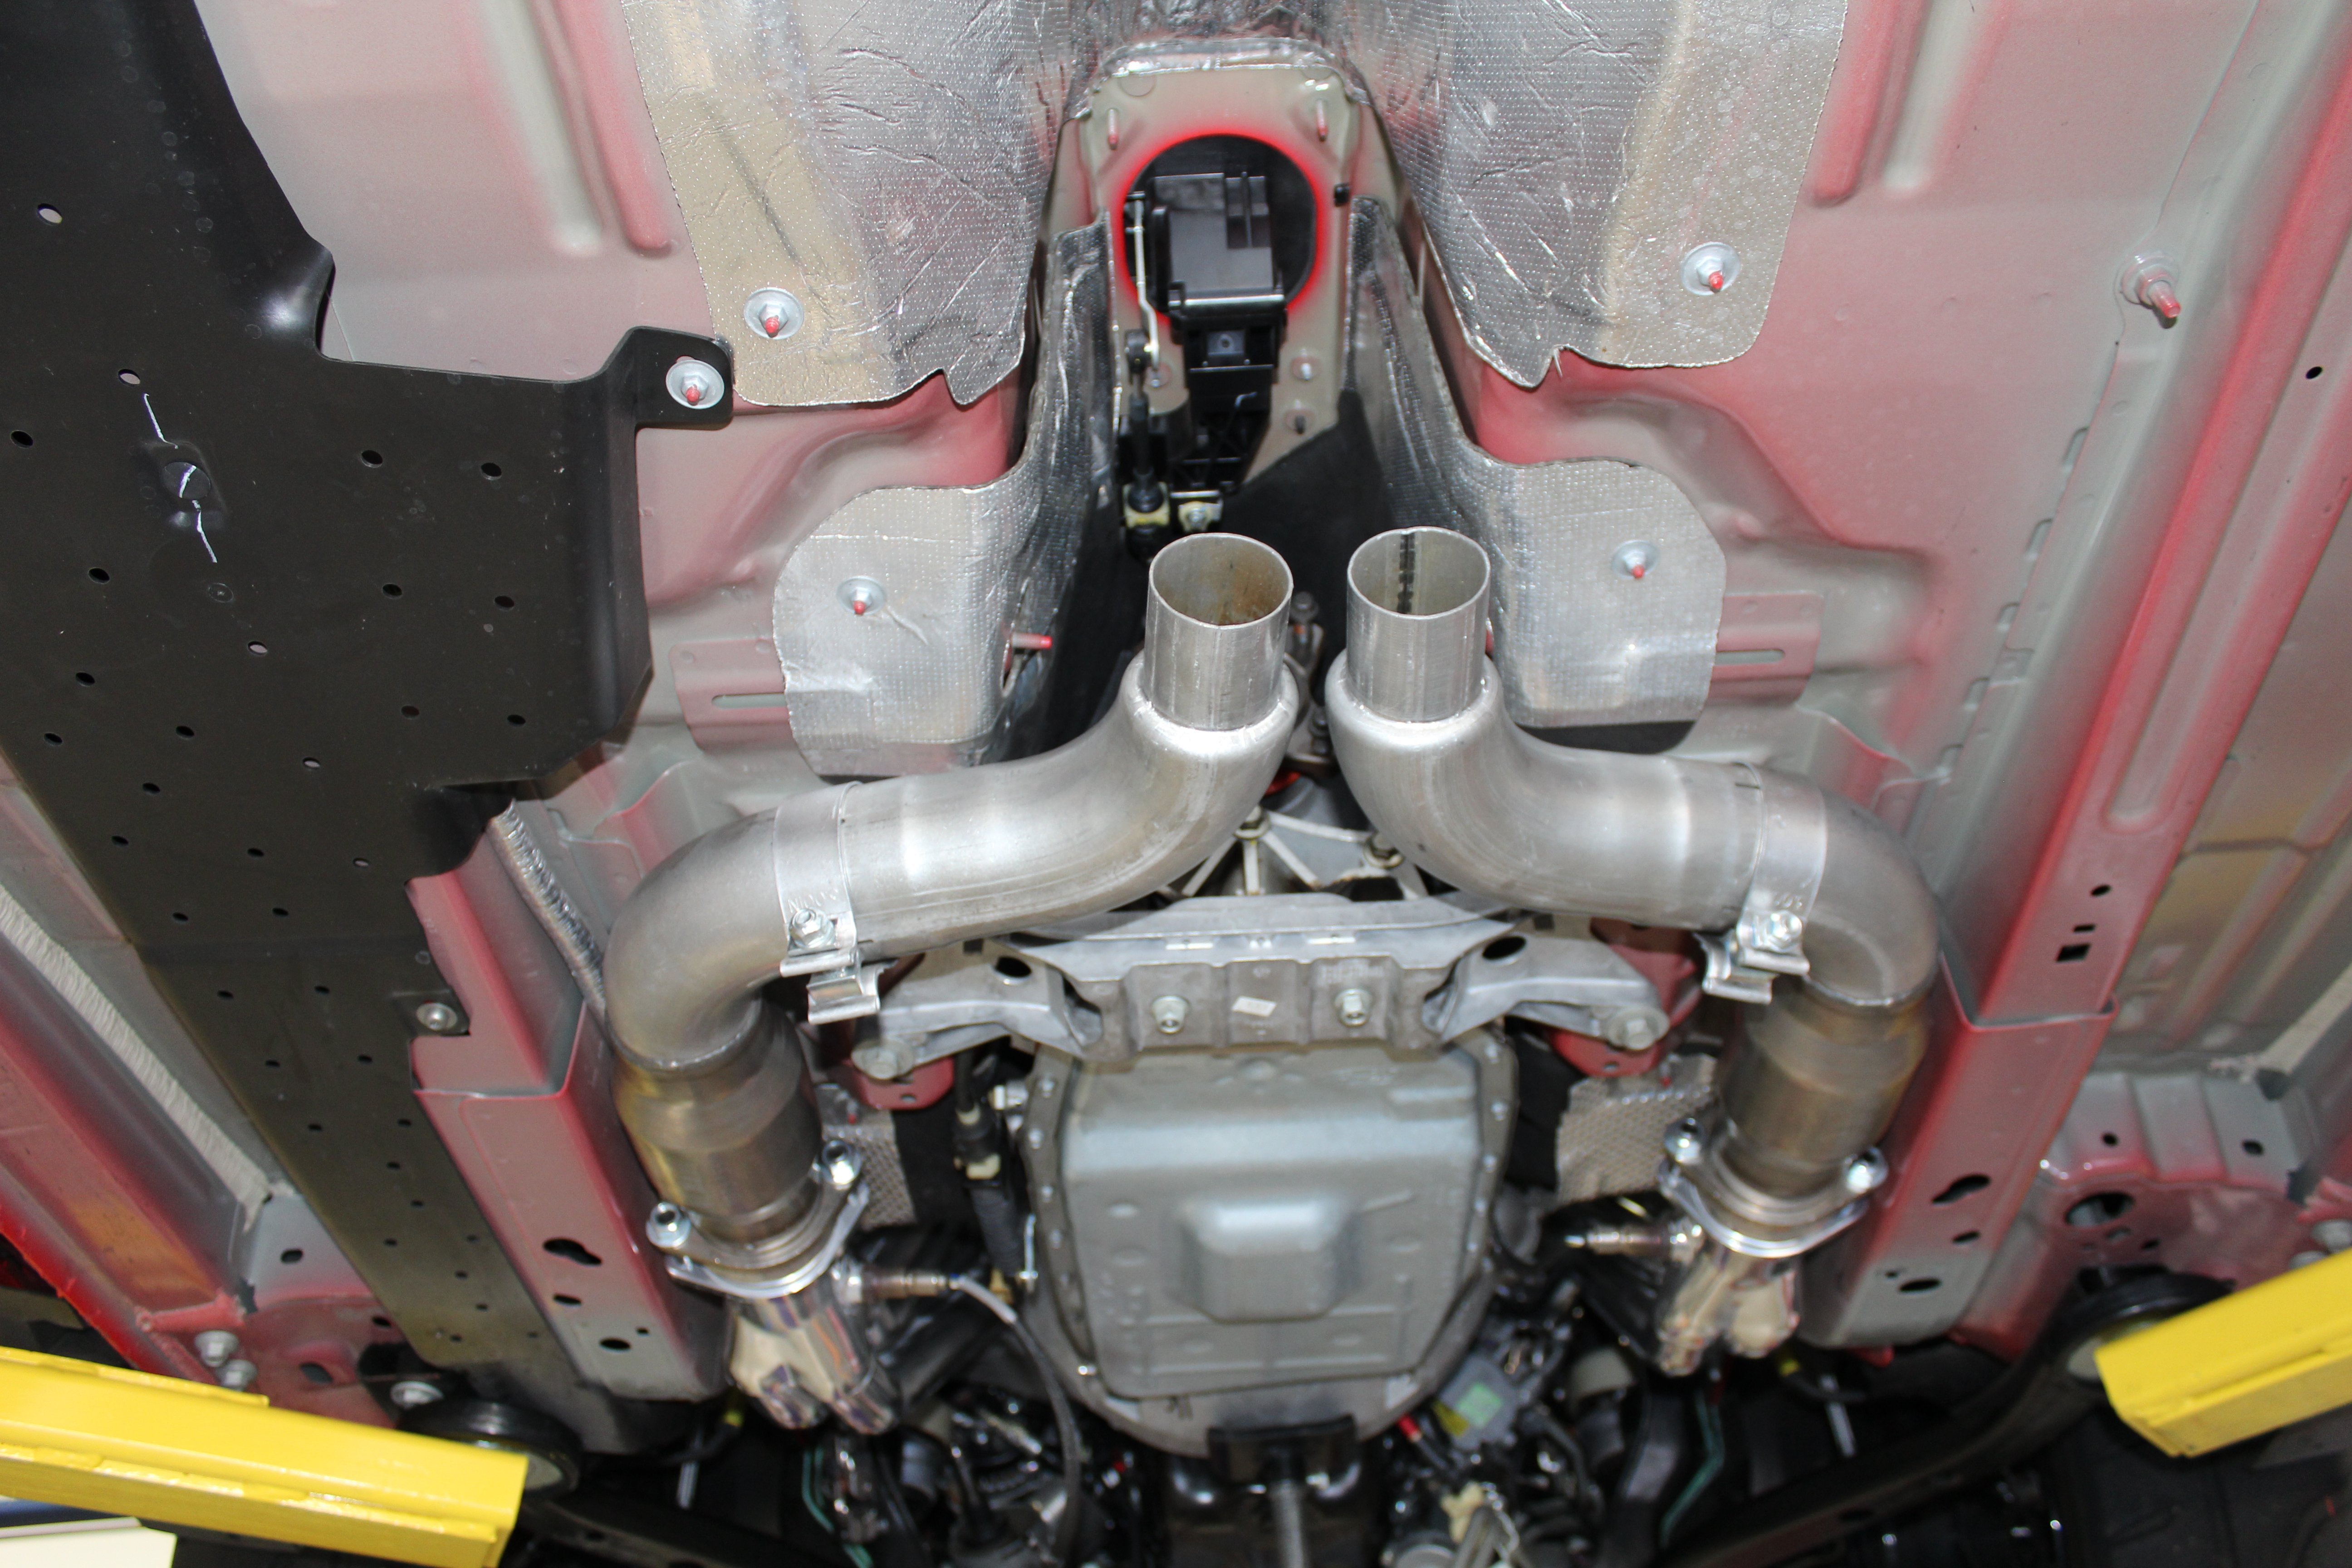
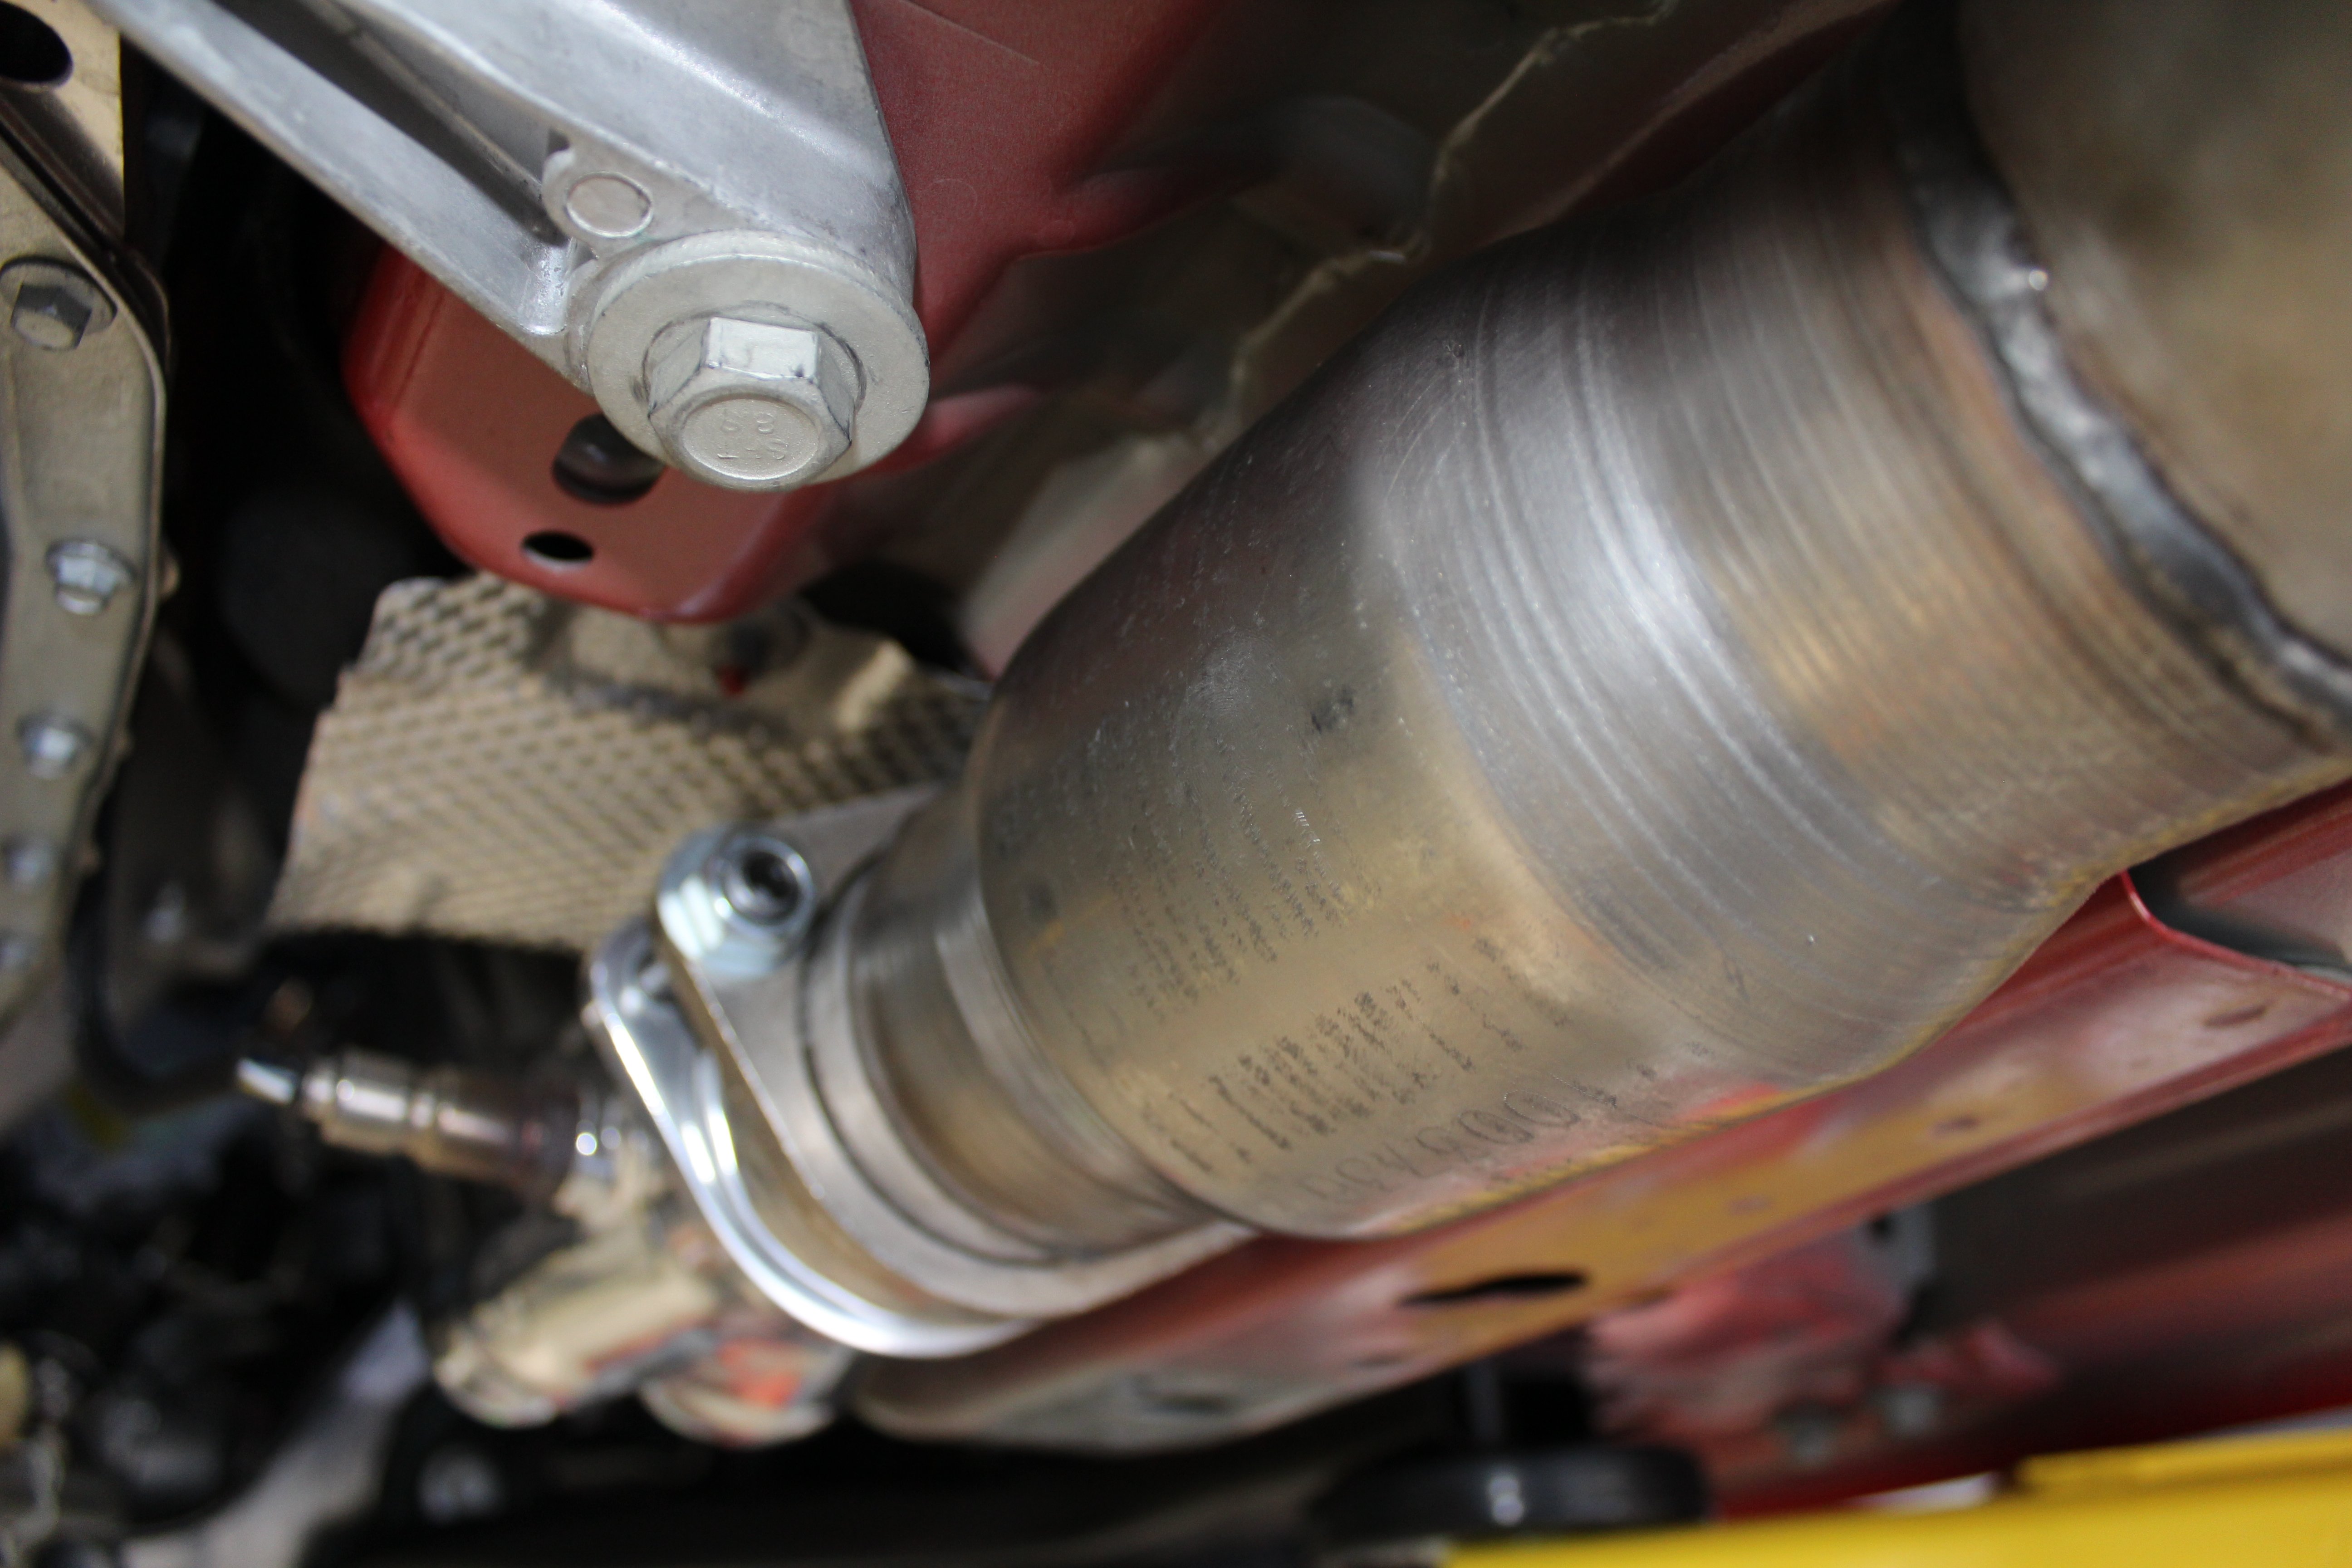
Key to maximizing performance on a $5,000 budget is getting the most bang for the buck from our parts selections, and BBK Performance’s exhaust offerings definitely fit that bill. We opted for the 1 7/8-inch long-tubes and high-flow cats. The headers are probably a bit large for Phase 1’s NA bolt-ons but the extra flow will serve us well when we pour on the boost.
Better yet, since the cold air intake is one of the few parts that won’t carry over to Phase 2, it is a reasonably priced part, so we aren’t giving up a lot of budget on something we can’t reuse when we add a ProCharger in Phase 2. Plus, the intake and throttle body will really shine then.
“Seeing as how centrifugal superchargers make substantial power at peak and high in the RPM range, the GT350 intake manifold is a perfect match,” Mike explained. “A vehicle equipped with both a GT350 intake manifold and a centrifugal supercharger will live happily high in the RPM world, on tracks or on the street. A centrifugal supercharger further benefits on the high-RPM nature of the GT350 manifold, and amplifies results in the form of power.”
The tuning is absolutely essential as it is the most impactful change you can make to the vehicle. — Matt Barker, DiabloSport
On the other end of the engine, we are opening up the exhaust by installing a set of long-tube headers and a high-flow mid-pipe from BBK Performance. These parts offer a great balance of bang for the buck, which lets us address the exhaust flow while not leveling our budget. We chose the 1 7/8-inch versions as they will be better optimized for boost in Phase 2, but BBK has seen gains as high as 30 horsepower from these and the high-flow mid-pipe.
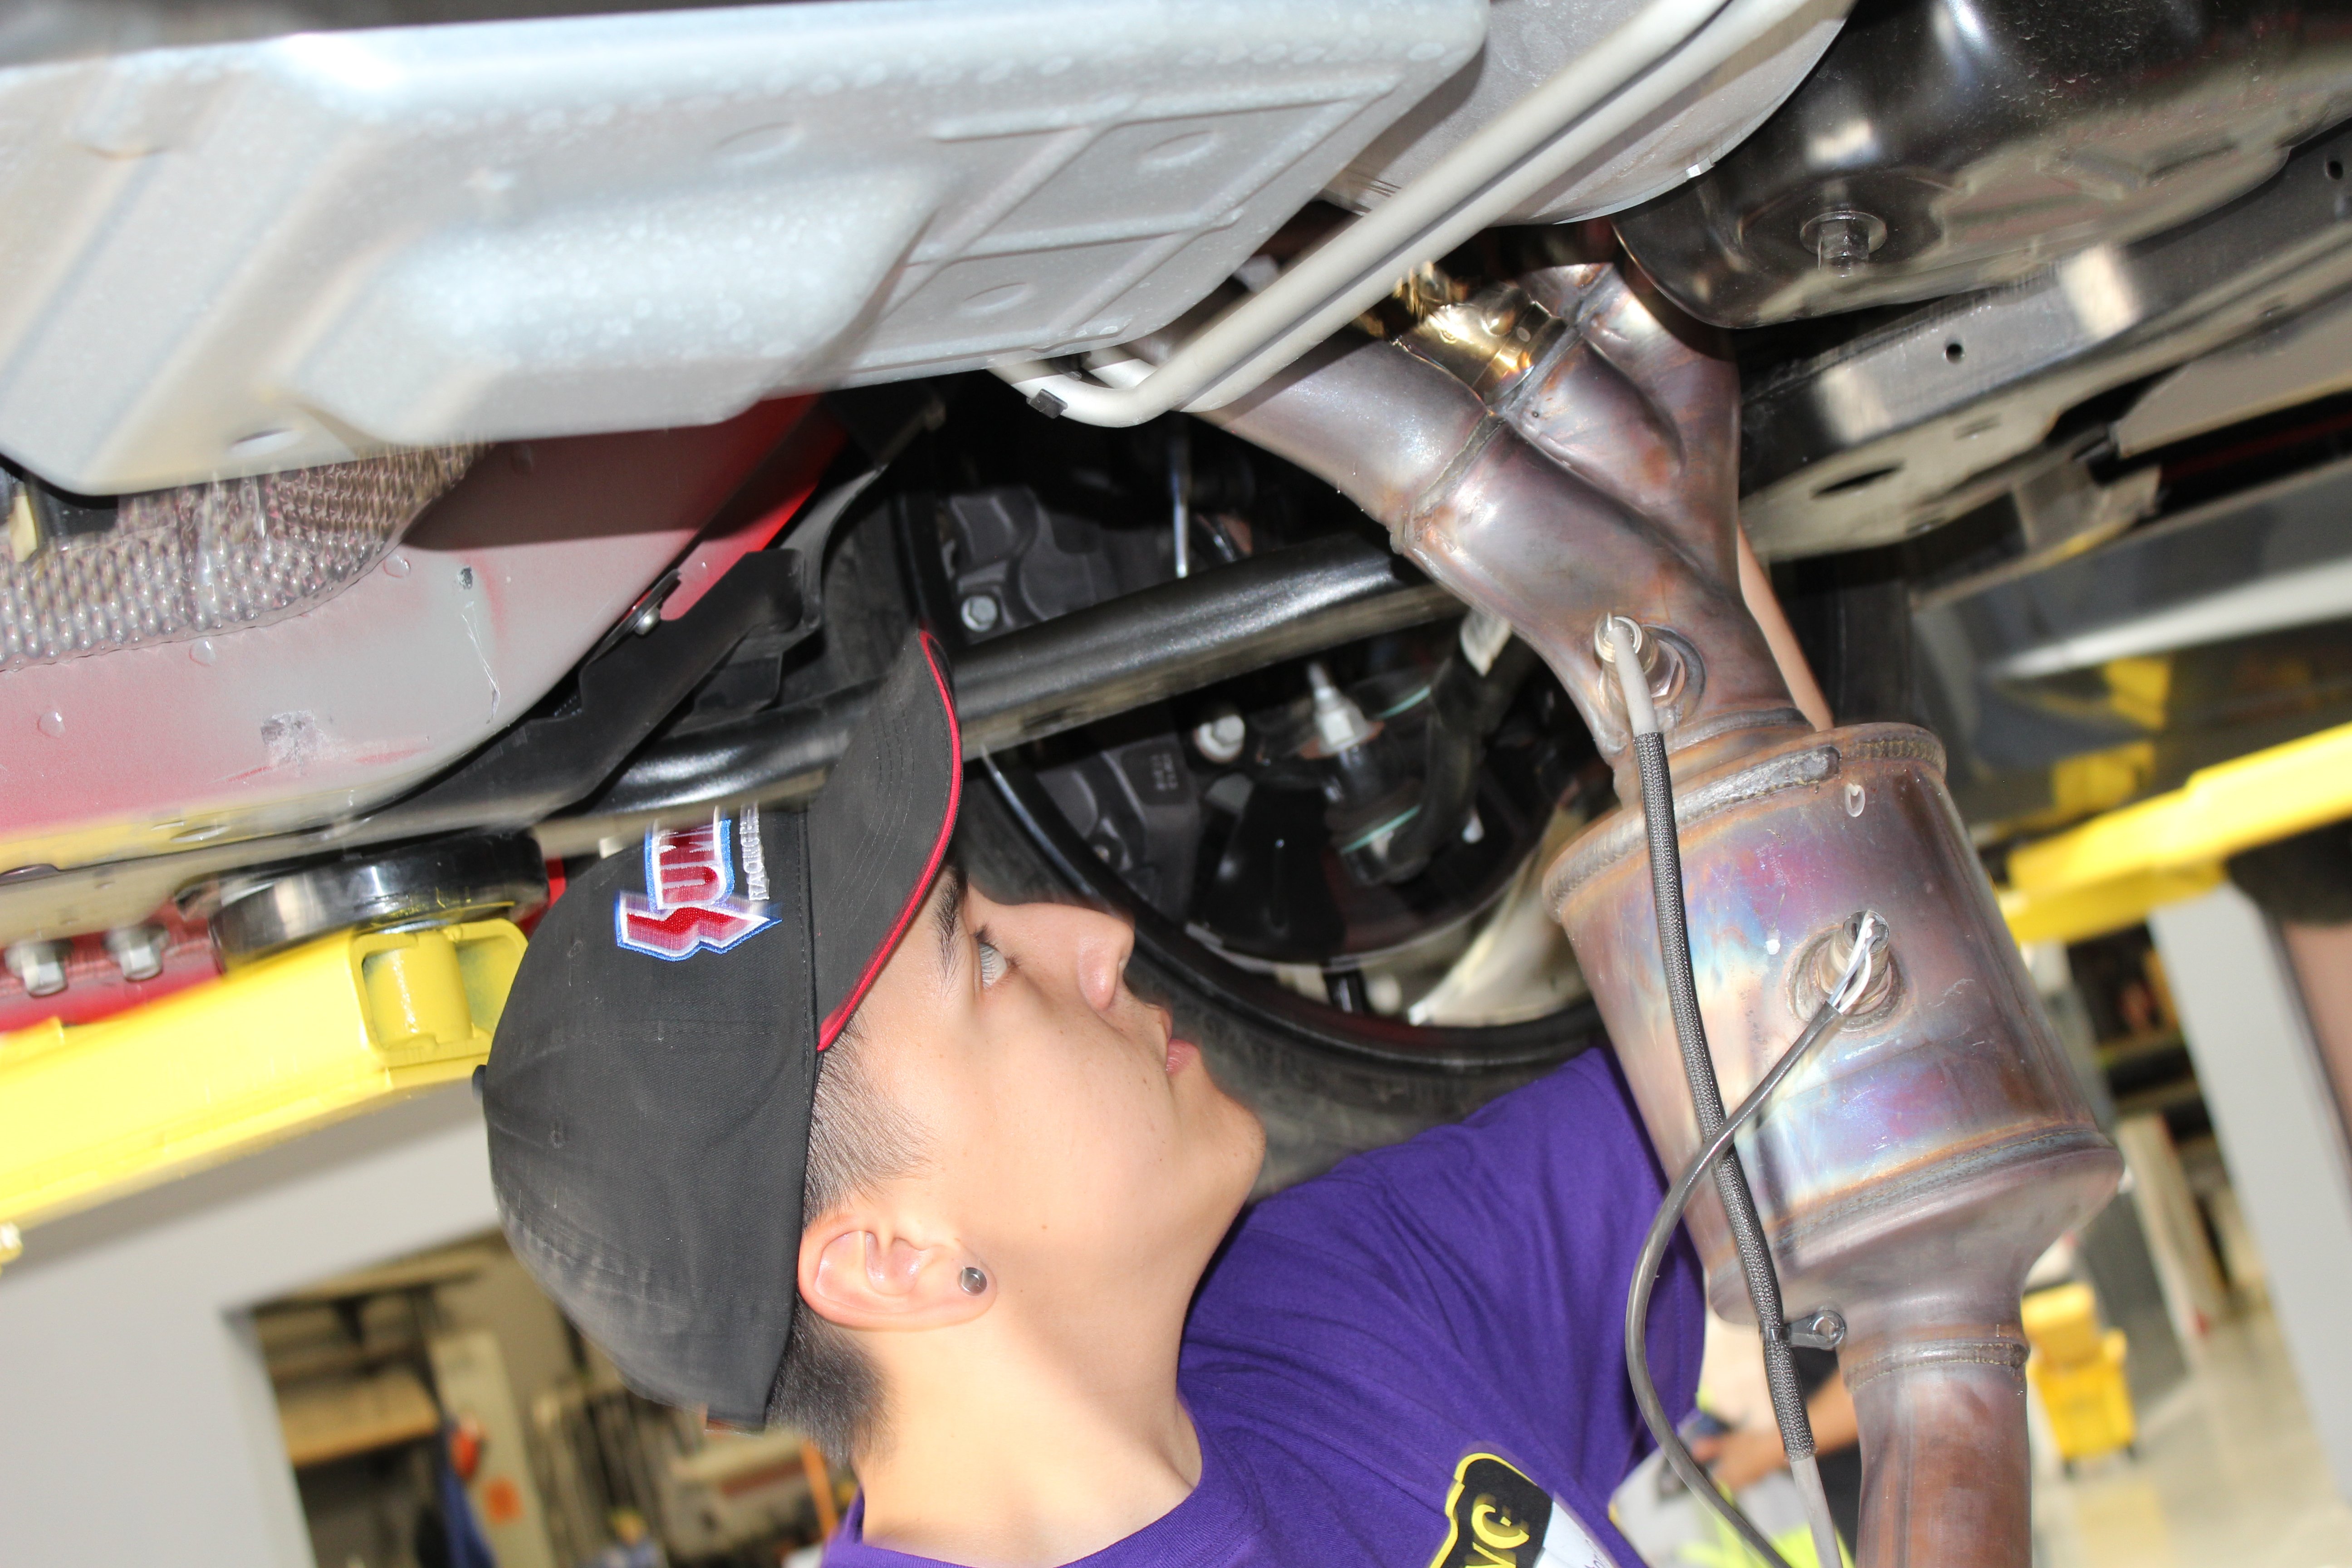
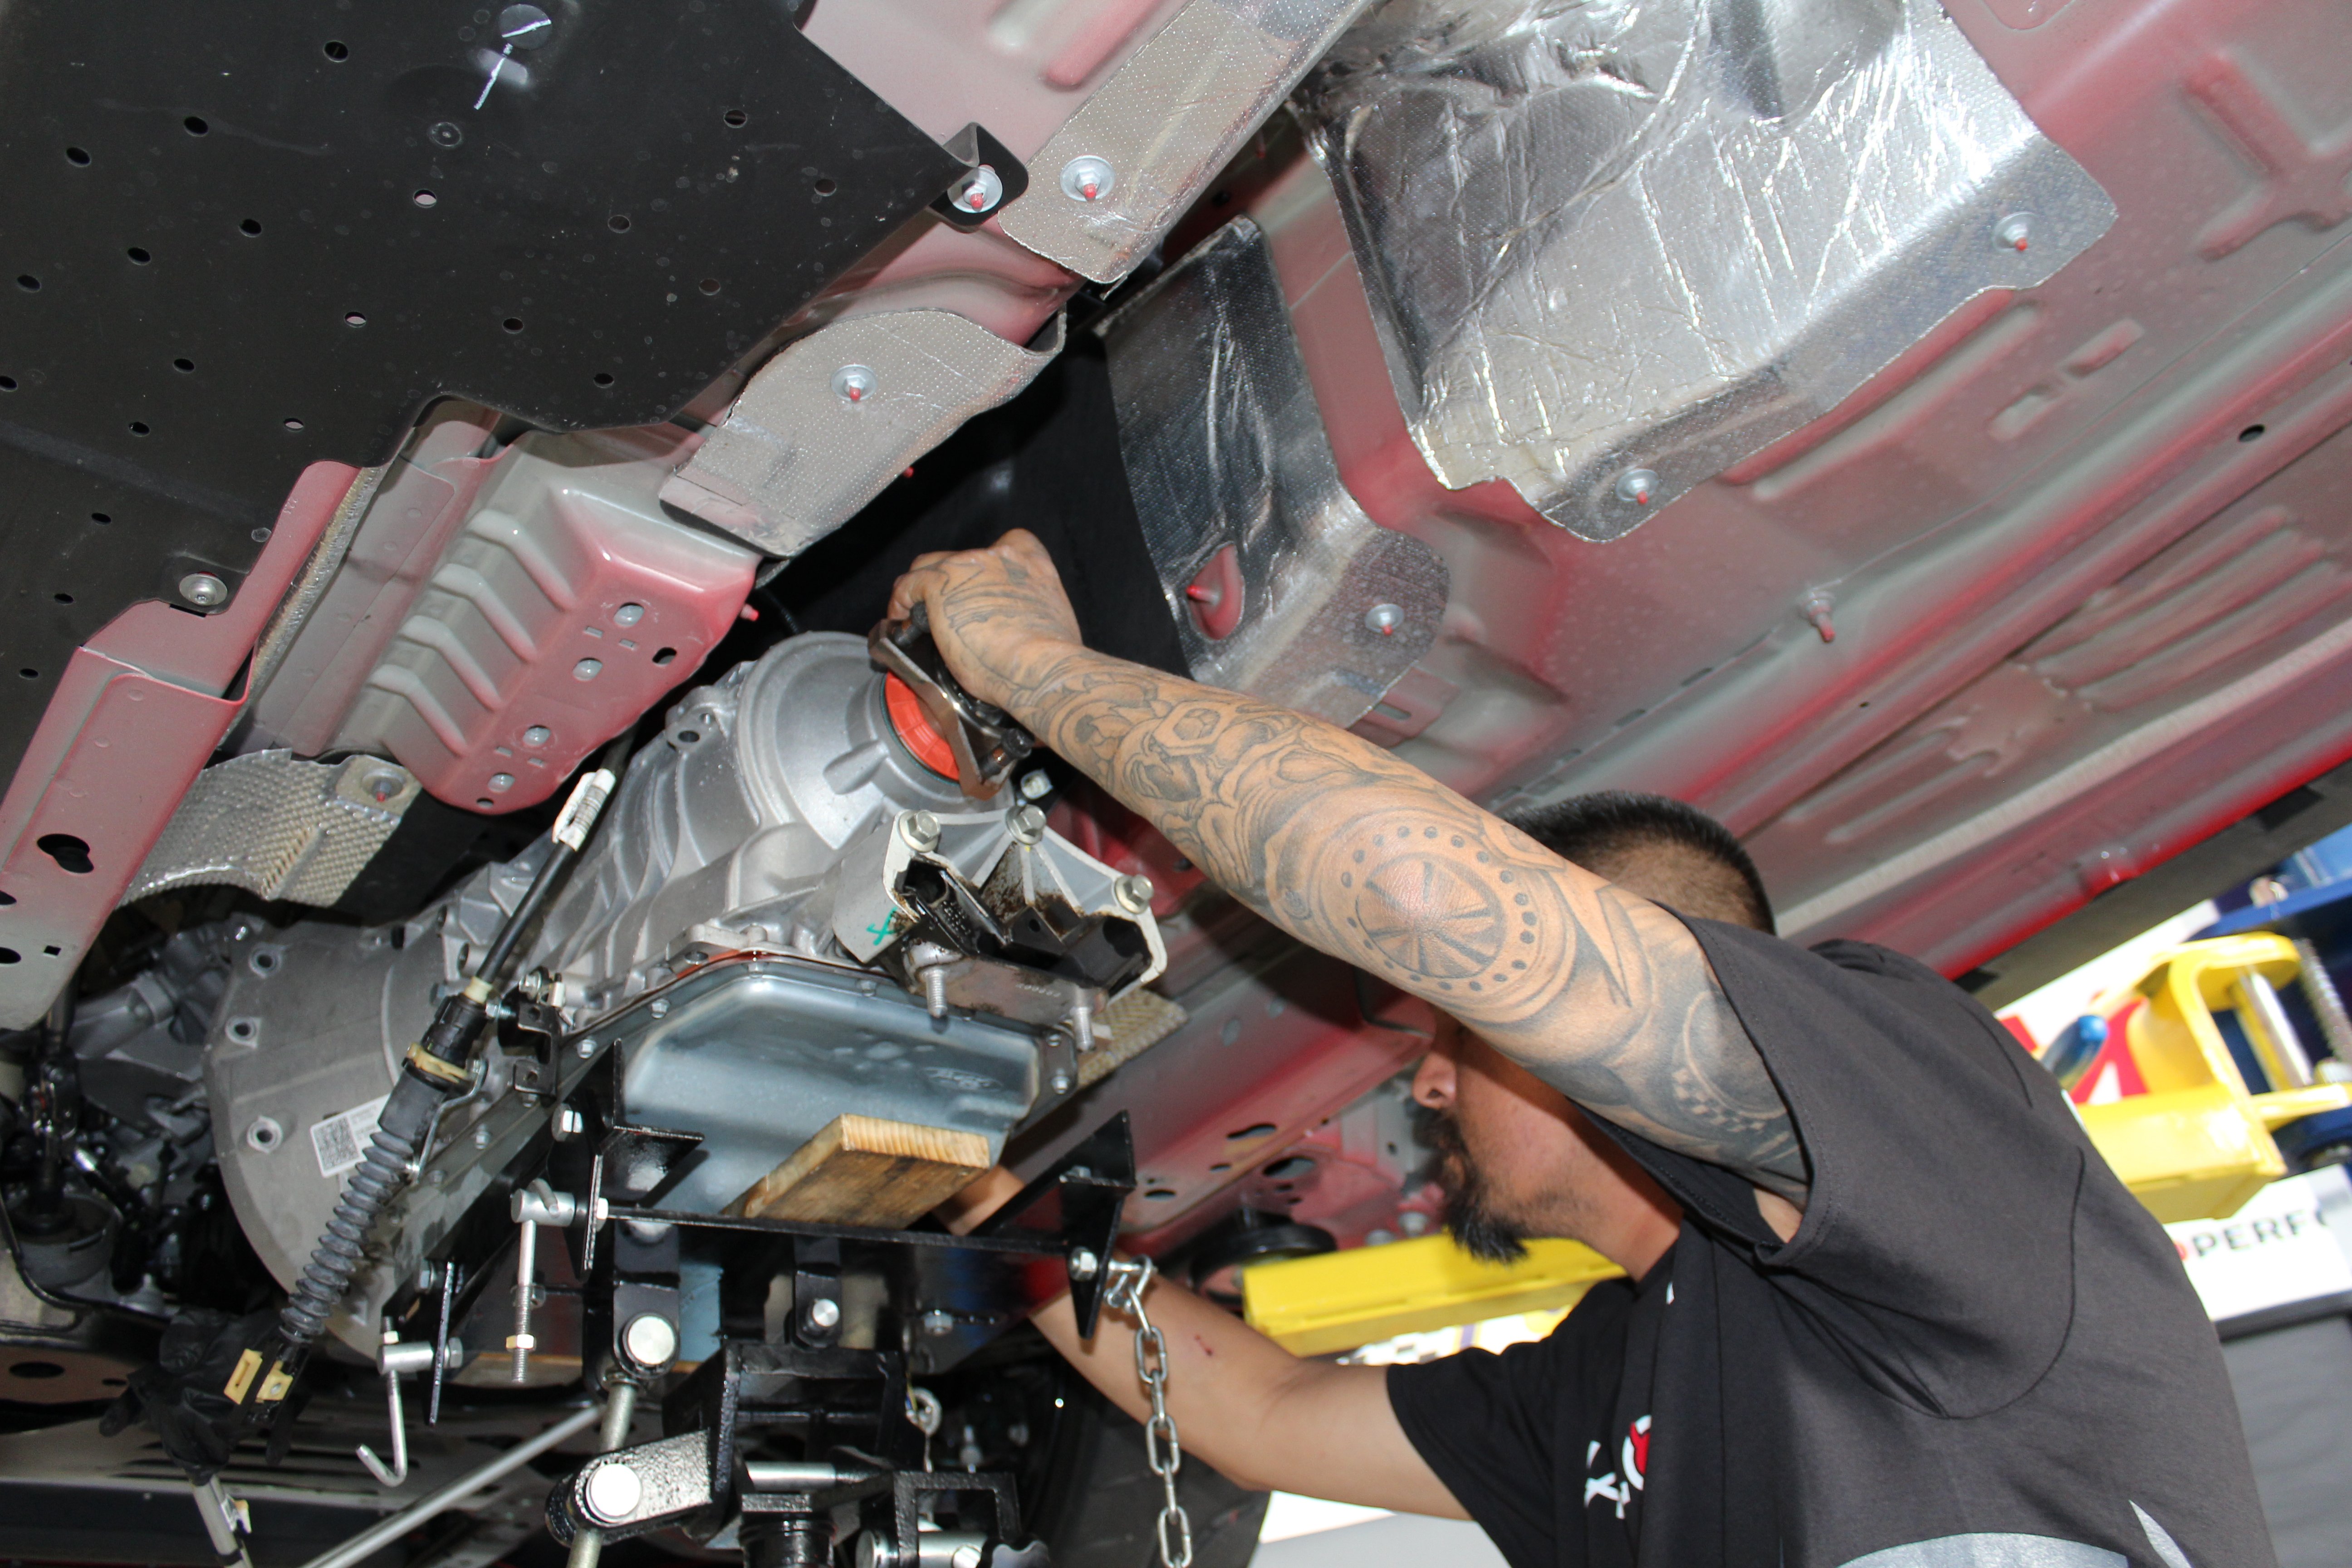
Moving under the car, we unbolted the factory mid-pipe and manifolds to make way for our BBK long-tube headers. This is a straight-forward remove and replace proposition. The BBK exhaust includes detailed instructions, new fasteners, and the extension harnesses needed to relocate the oxygen sensors farther downstream. If you aren’t swapping torque converters like we did, you can complete the install as shown, but we paused to remove the transmission.
“The factory manifolds, though they are a good design for OEM, leave much to gain by going to Shorty headers and especially full-lengths,” Ken Murphy, Vice President of BBK Performance, explained. “The BBK quality is on par with the highest priced systems on the market, but these parts are offered at a much more reasonable cost to the consumer. Also, the catalytic converters we utilized are of a high-quality, steel-core construction.”
Upgrading the cat-back was on our wish list as well, but this one area where we had to cut corners in deference to our budgeting constraints.
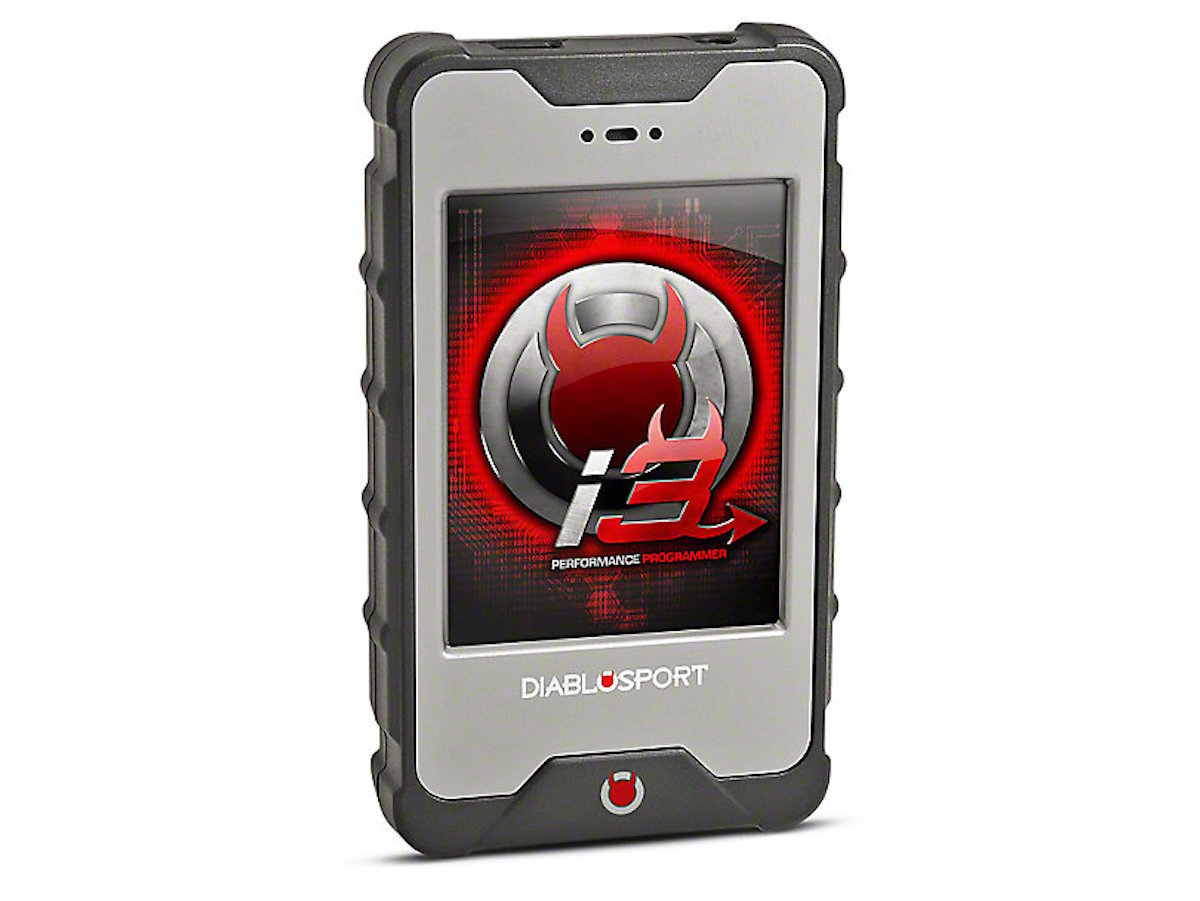
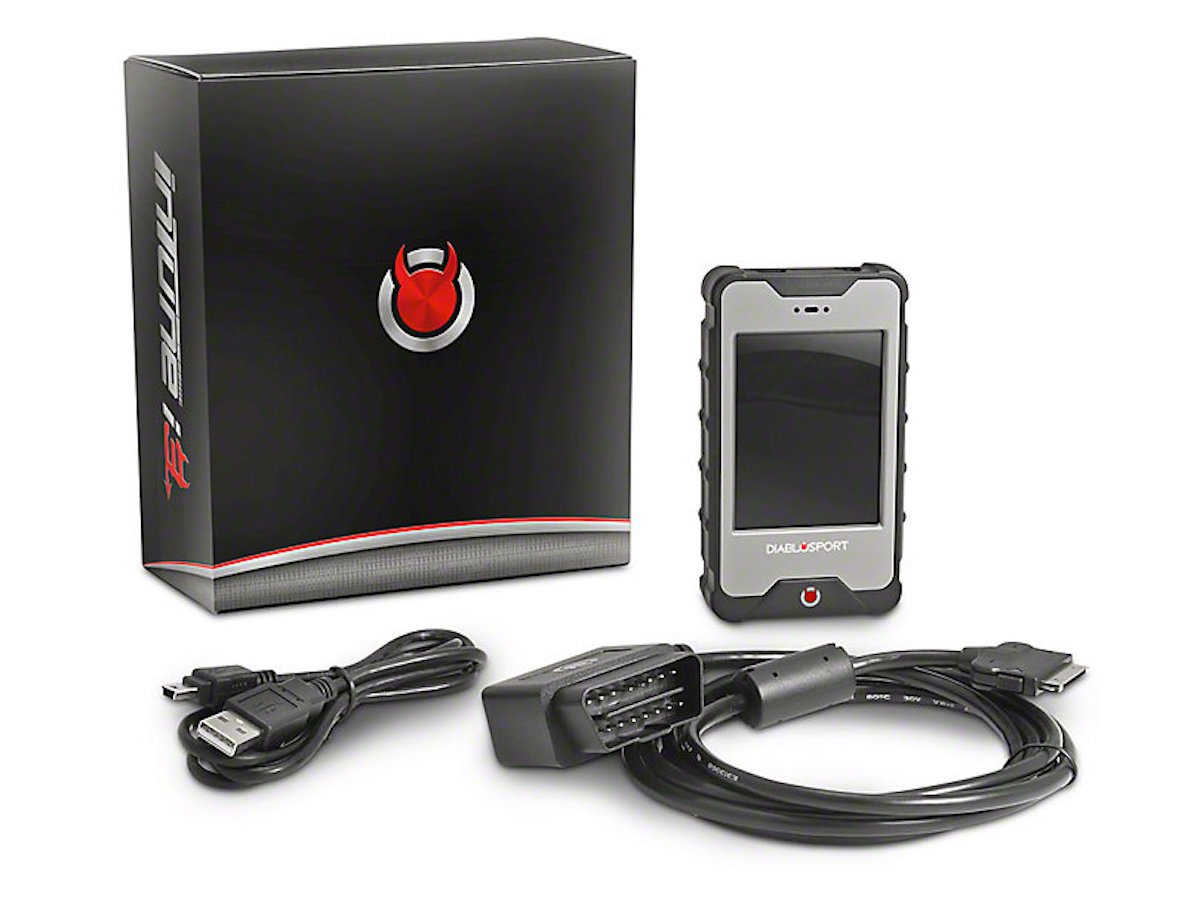
In the modern era, if you are going to mod a car, you have to revise the calibration to accept the new modifications or the factory PCM will be completely lost, which would lead to poor performance, and potentially, engine damage. Fortunately, we have the tuning experts at DiabloSport on board to dial in our combo.
“The tuning is absolutely essential as it is the most impactful change you can make to the vehicle. For example, our pre-loaded tunes for the Mustang improve drivability and performance right out of the box. In this case, the car is going to be modified with upgrades that may take it past what the factory tuning maps and even our pre-loaded maps are designed to support,” Matt Barker, Category Manager at DiabloSport, explained. “That is where our CMR custom-tuning capability in the inTune i3 Platinum comes in. The custom tuning is really what brings all of the modifications together to build more power. Without the tuning component, the gains would be minimal at best. We need to tell the vehicle how to take advantage of the changes in hardware to optimize the power and performance.”
DiabloSport’s inTune i3 Platinum handheld tuner and its custom tuning support will allow us to tell the factory PCM what to do with all these hardware upgrades. That way, we can maximize the performance of the combination while keeping an eye toward longevity. (Photo Credit: DiabloSport)
When it comes to our Phase 1 modifications, the DiabloSport custom calibration will help us maximize the performance while retaining driveability and durability.
“Without getting too technical, I can say that the custom tunes are going to modify the fueling and timing in order to maximize the performance with the upgrades that are going to be added. Our CMR custom tuners have been tuning modified vehicles for years,” Matt added. “Our network of third-party tuners carries a wealth of experience to optimize performance with modifications in mind but beyond that, our inTune i3 Platinum has datalogging capability that allows them to tweak the changes to perfect them for each individual vehicle and driving environment. The DiabloSport product line empowers consumers to take advantage of technology that electronically compensates for any changes they may make on their vehicles.”
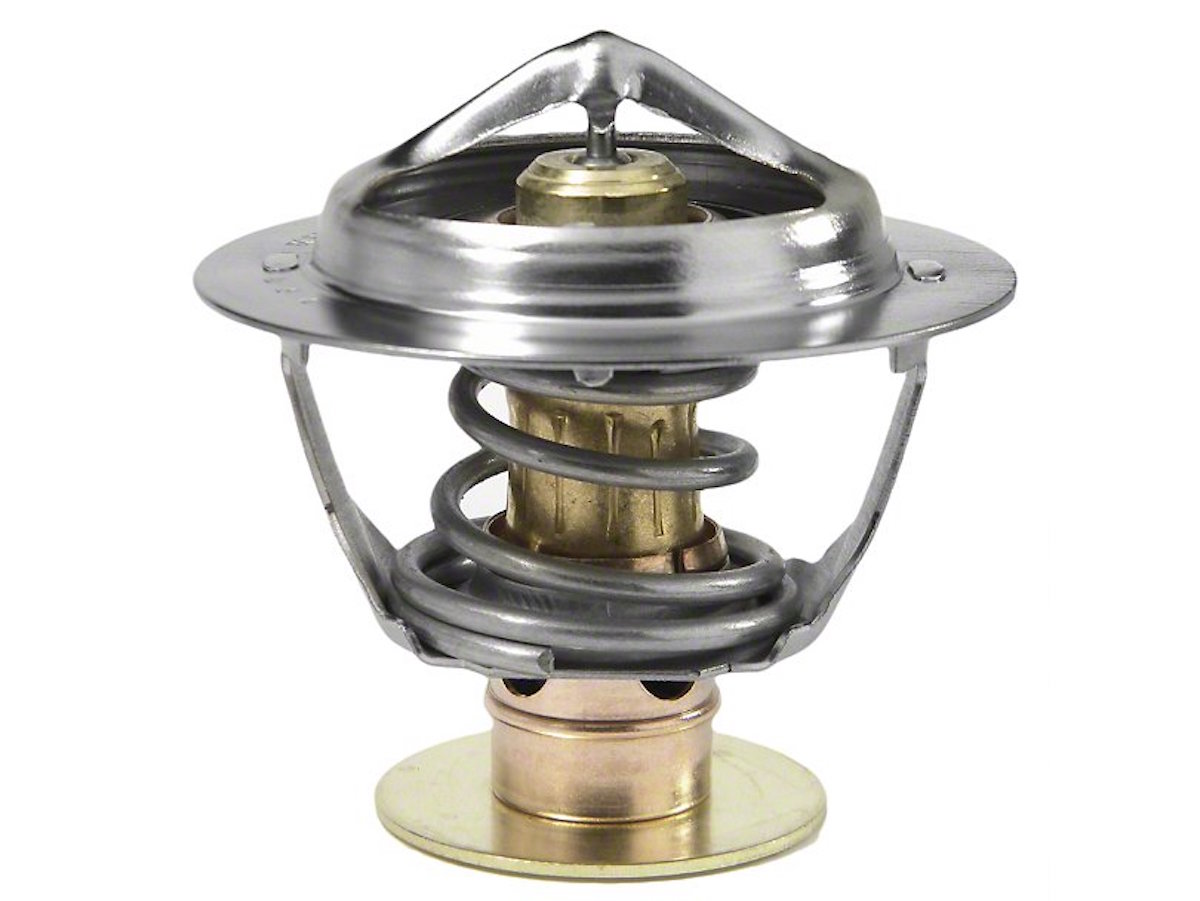
To keep our Coyote engine cool, we selected one of Reische Performance Products’ 170-degree thermostats, which is said to help keep engine-coolant temperatures in the 180-degree range during the warmer months. The result of those lower, more consistent engine-coolant temps is more power and less chance of engine-damaging detonation. (Photo Credit: Reische Performance Products)
Of course, we are going to be putting these new combos to the test on the track and the dyno, so keeping heat at bay will become important as the laps, passes, and pulls add up. As such, we opted to install one of Reische Performance Products’ 170-degree thermostats designed specifically for the Coyote engines.
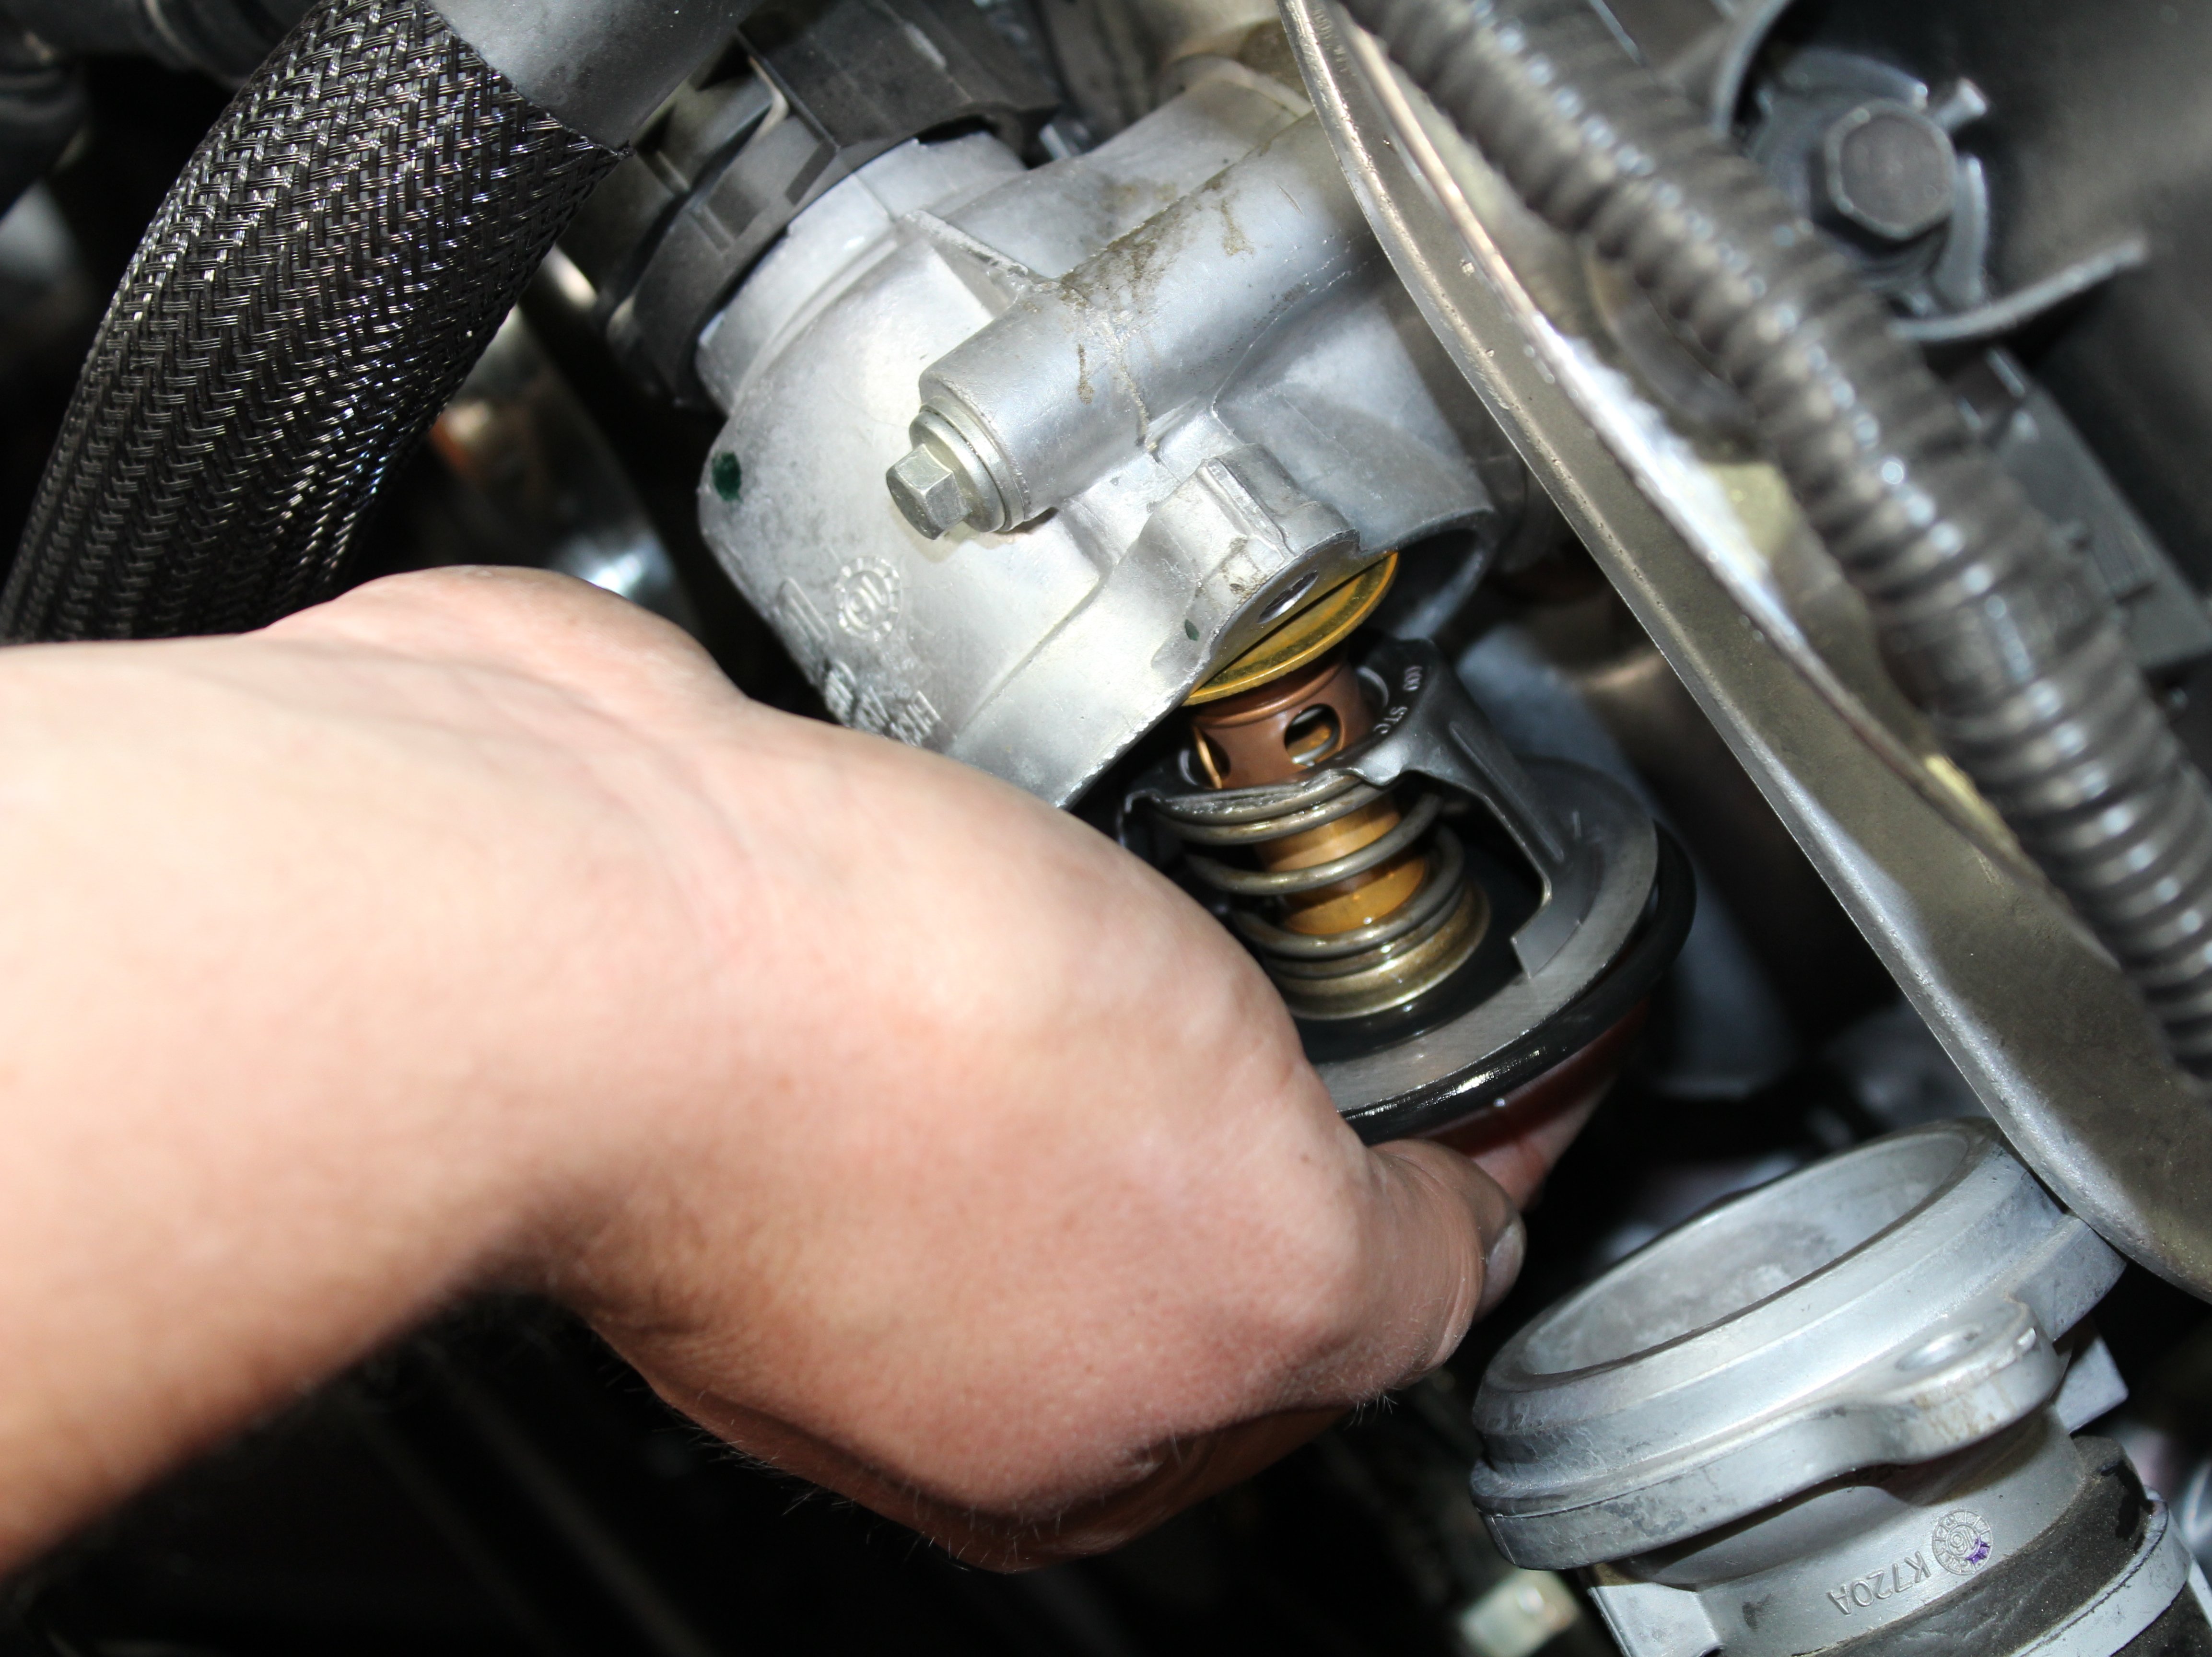
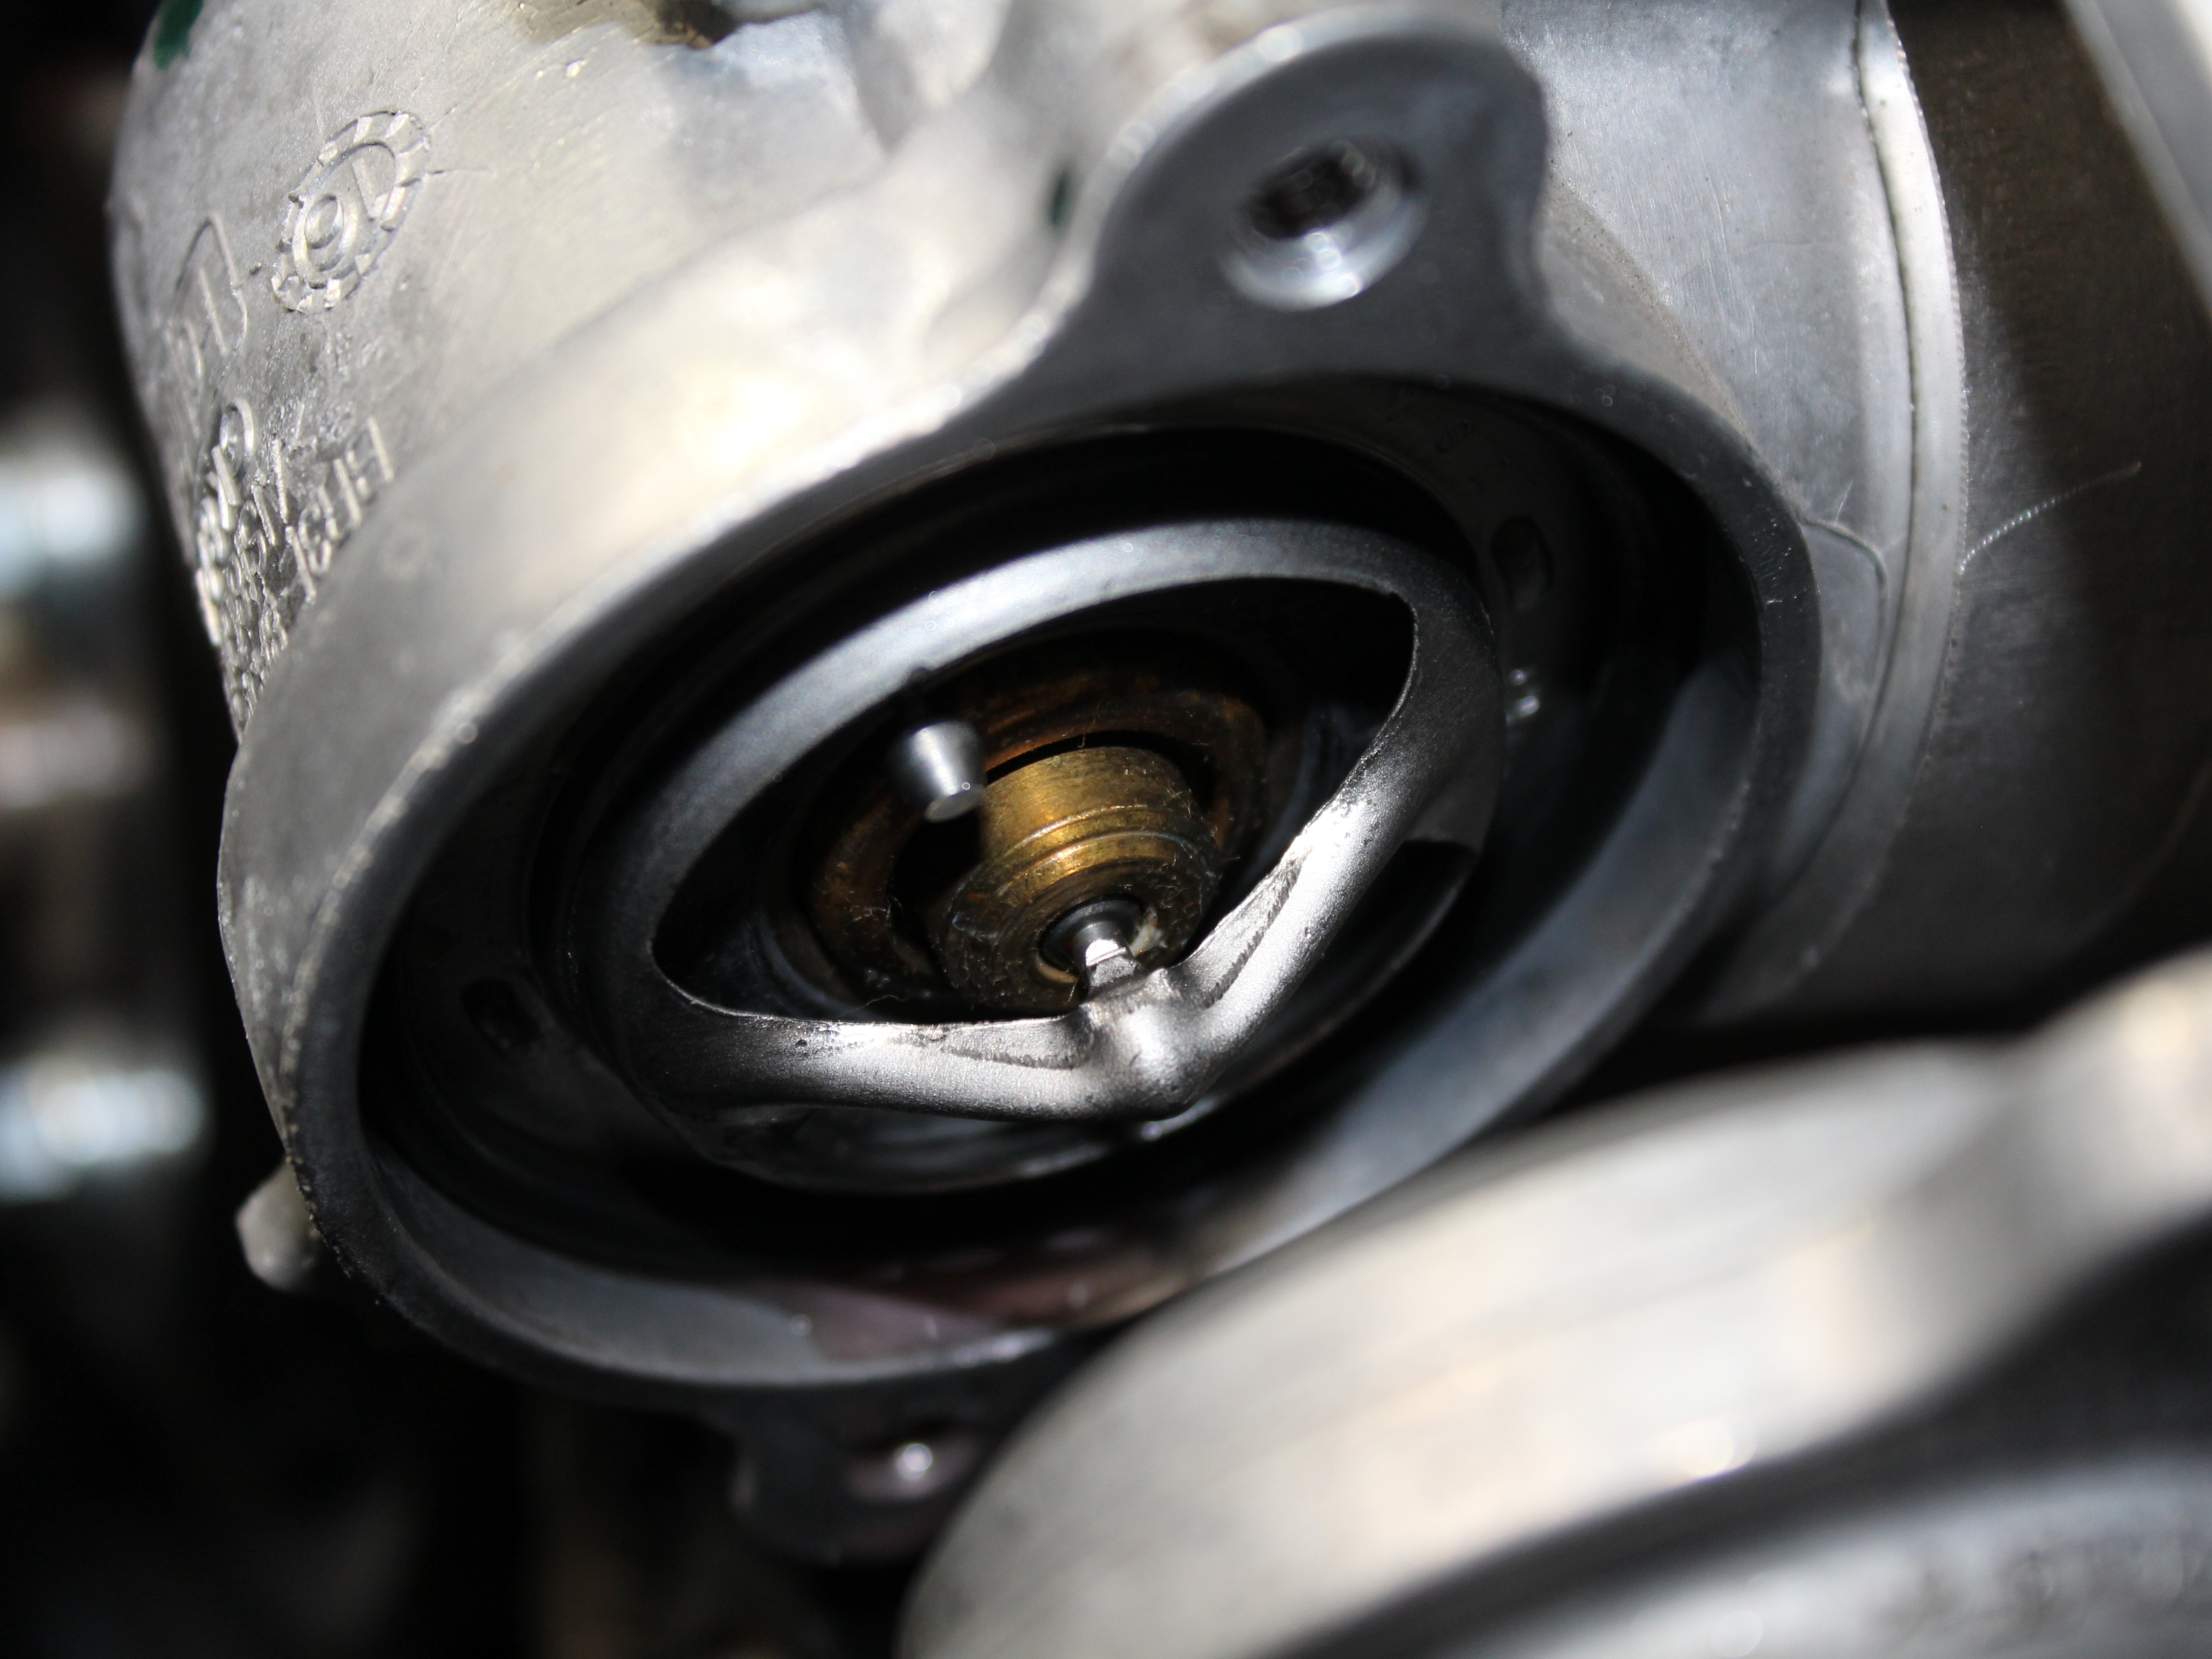
One of our easiest upgrades was swapping in one of Reische Performance Products’ 170-degree thermostats. Simply put a bucket or tray under the theromstat housing to catch the coolant, disassembe the thermostat housing, and swap in the new unit. Once the hardware is in place, you’ll want to change the cooling fan settings in the the calibration via a custom tune.
“Reische believes the 170-degree opening temp is the ideal balance for high-performance engines, providing high flow to your radiator by mid-180 temps, while still providing good all-season performance,” says the company. “With proper fan settings your coolant temps in cool weather will be in the 170s and in hot weather the 180s, giving those running high levels of timing or boost added protection against engine-damaging detonation as well as maximum horsepower.”
Making The Most Of It
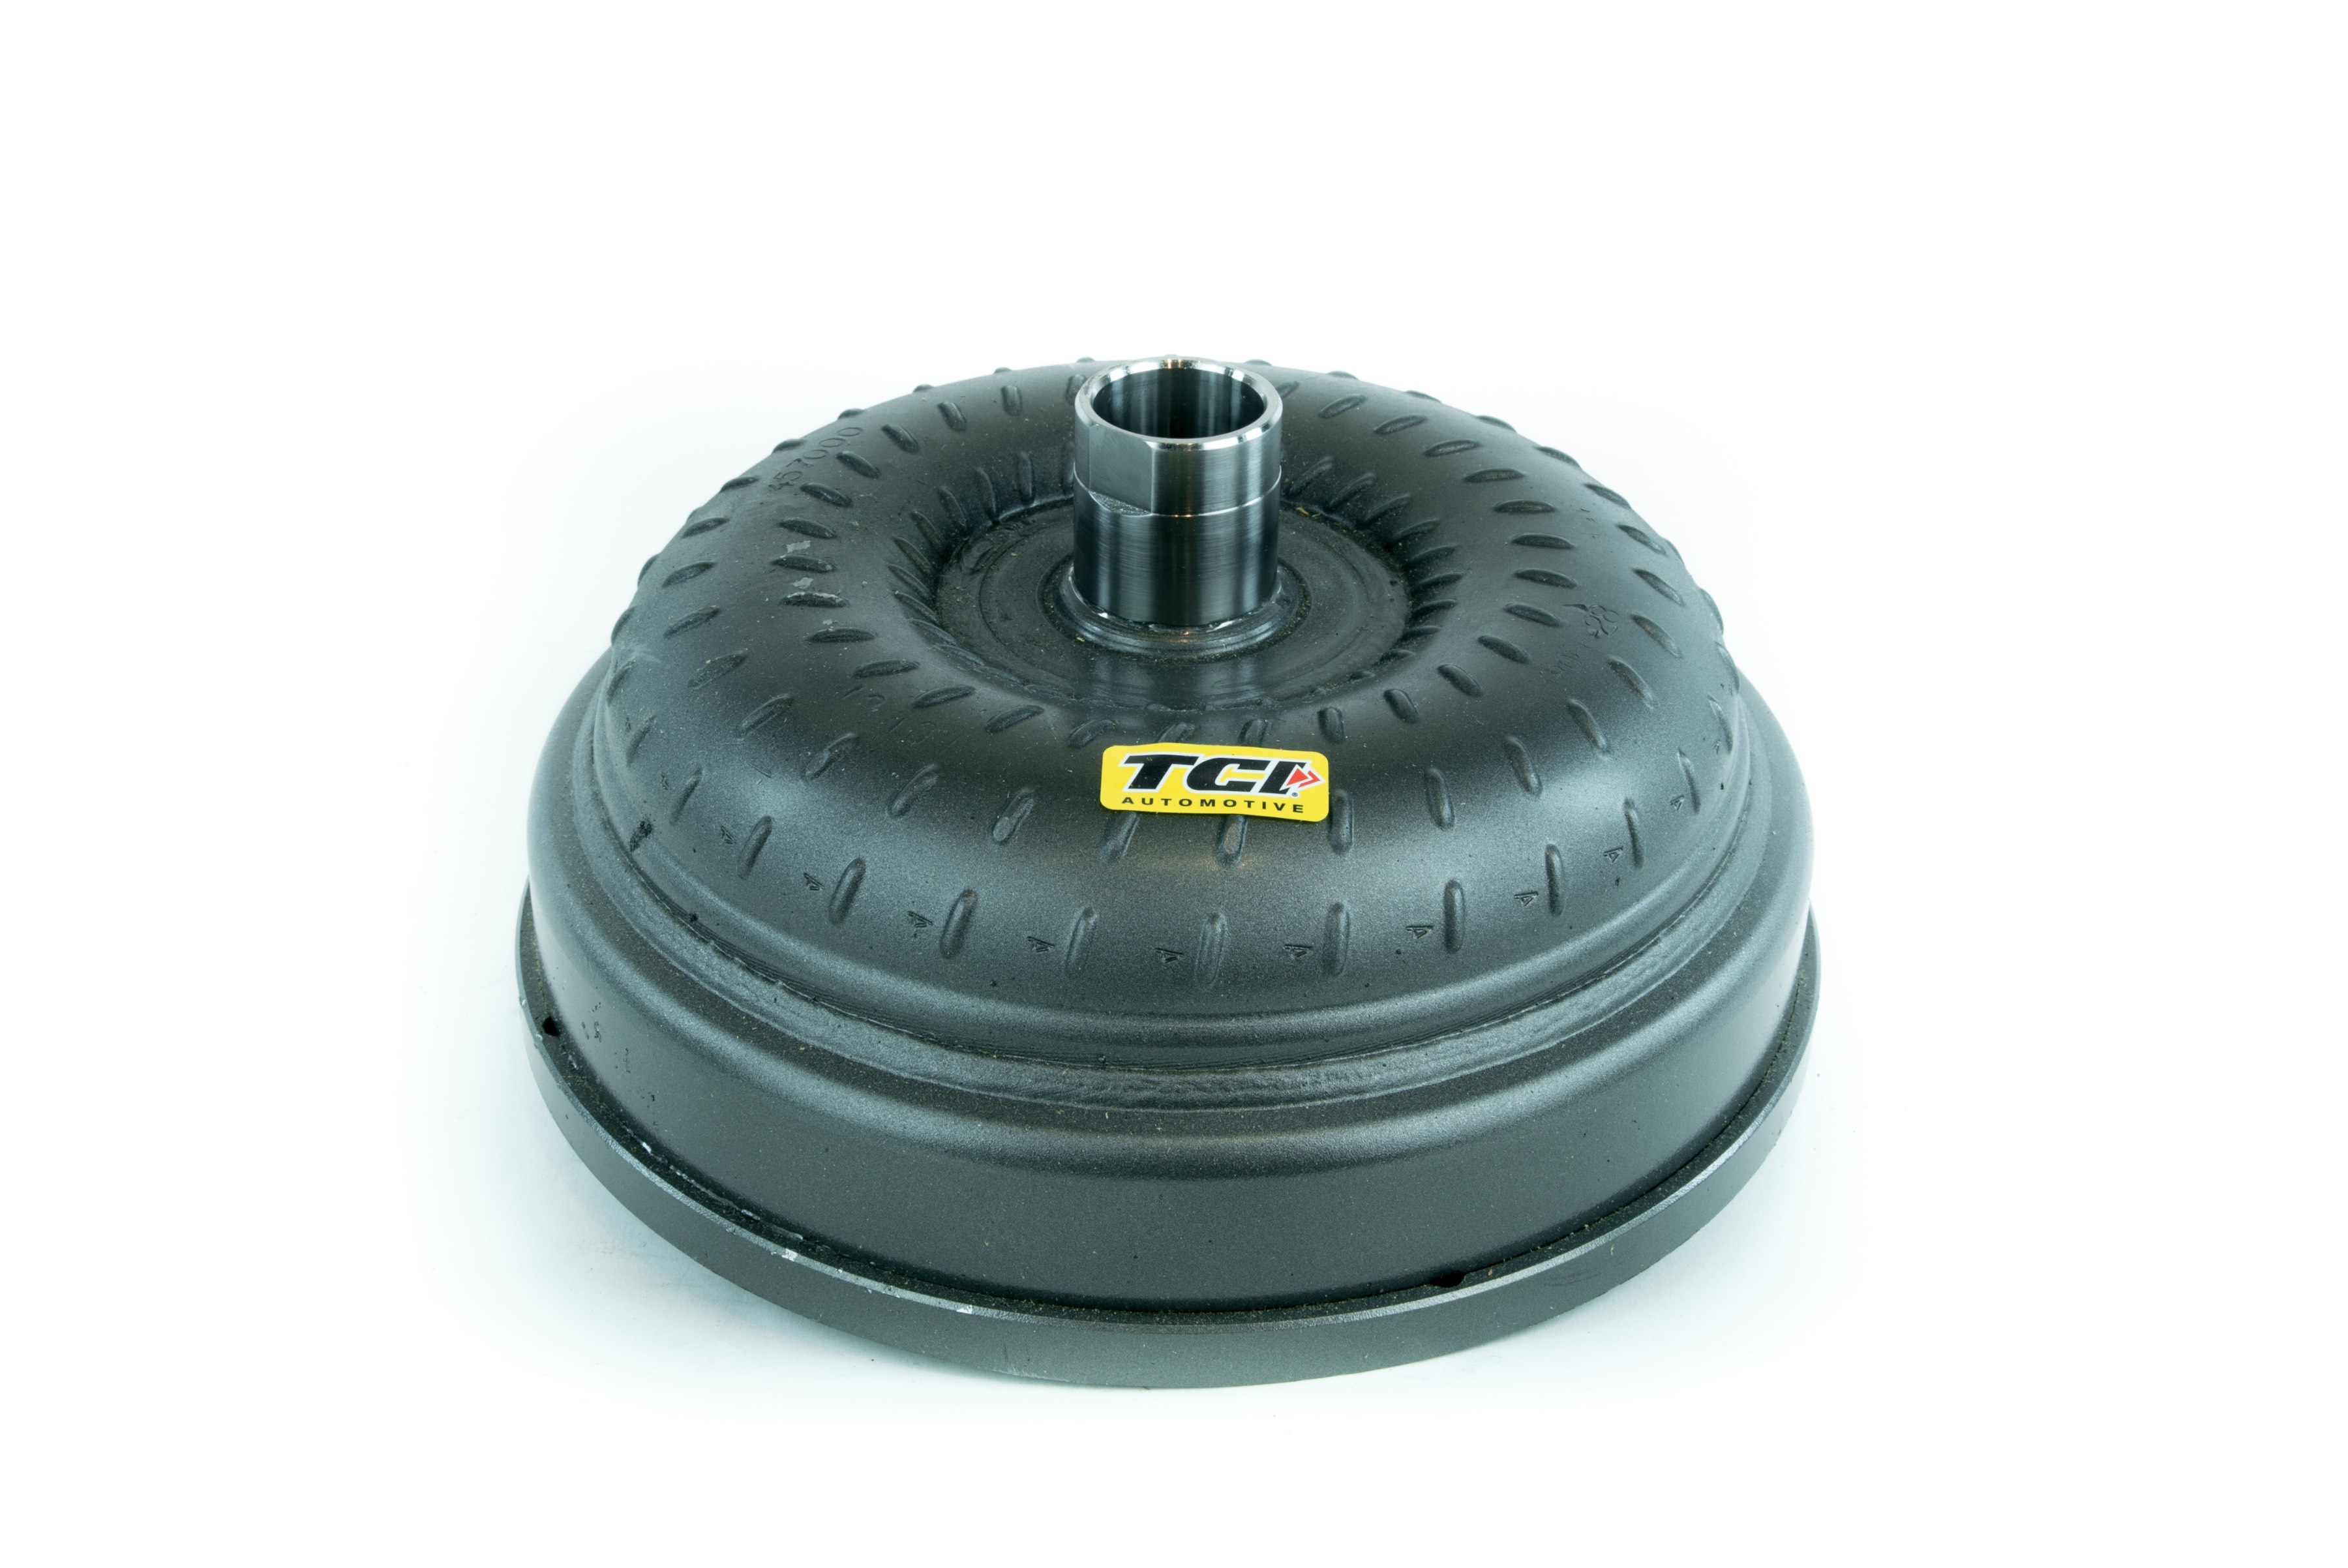
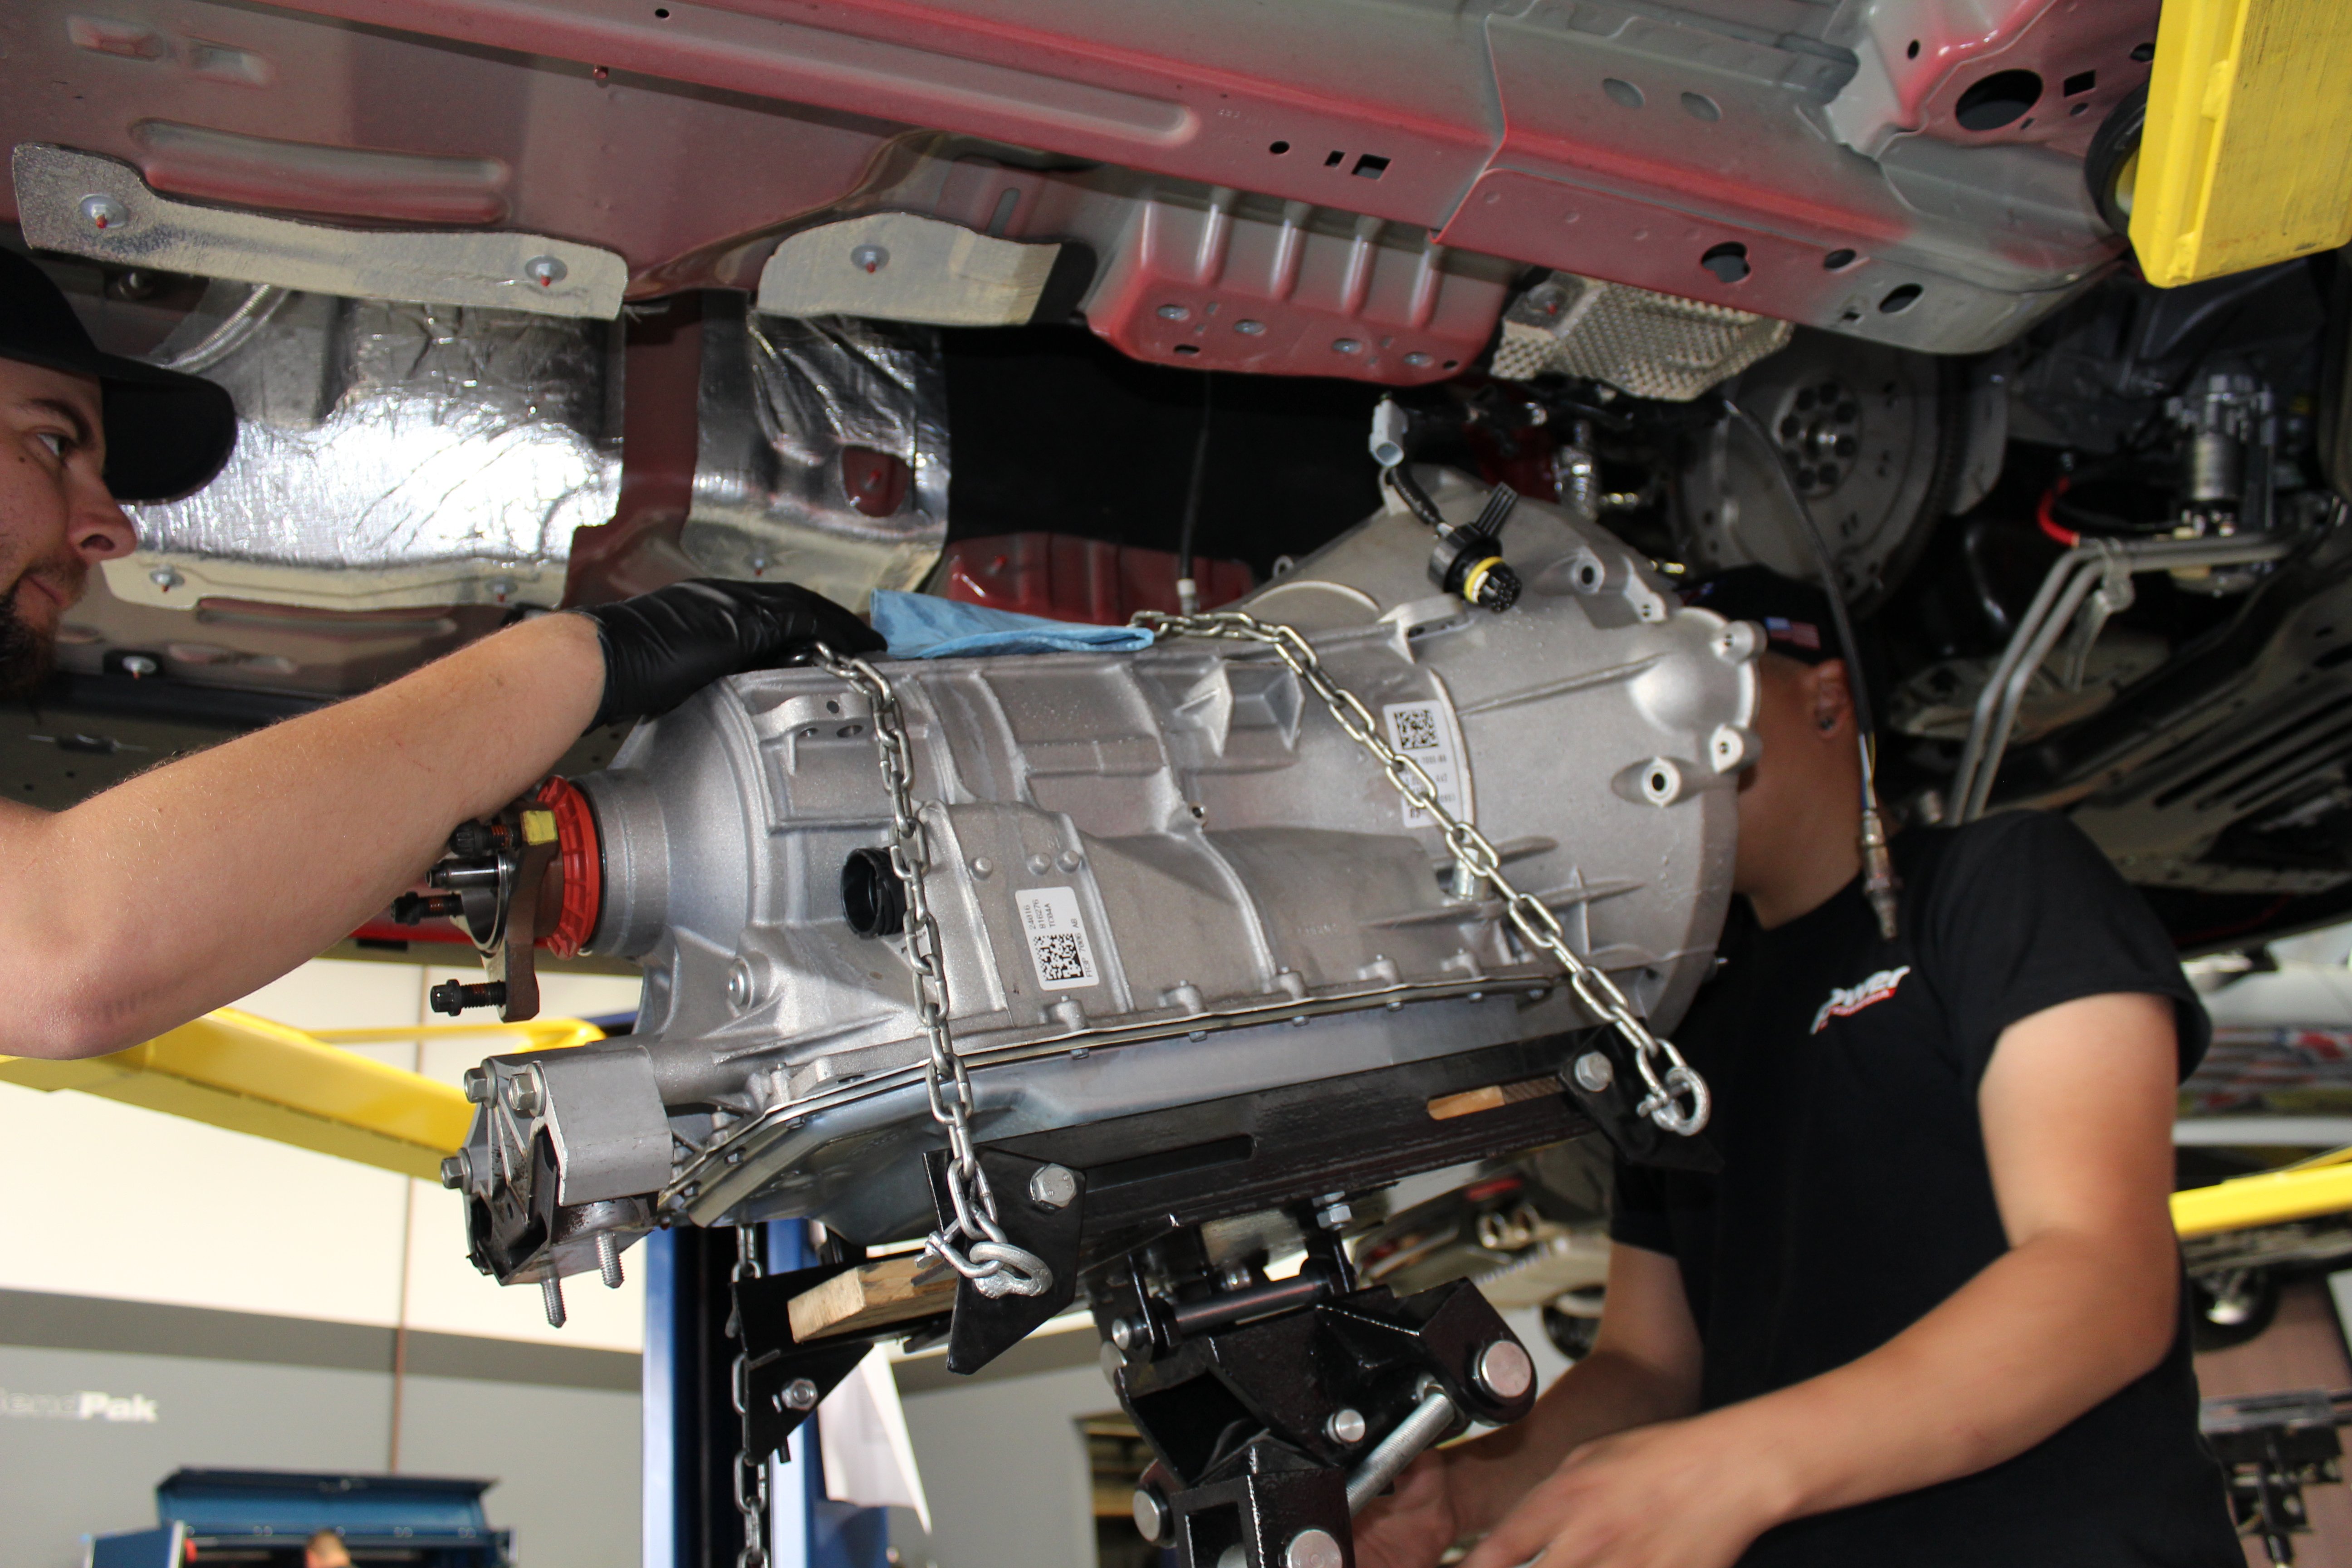
While adding horsepower is great, making the most of it at the track is just as important, which is why we wanted to upgrade the factory six-speed automatic. While the 6R80 has proven durable, it is not optimized for the sort of performance we will unleash during Pony Wars.
With the higher stall speed, the drag strip and road course performance will improve considerably. — Kevin Winstead, TCI Automotive
“The OE converter is really strong from the factory. The problem with it is that the stall speed is just too low for a naturally aspirated Coyote engine. It leaves a lot of performance on the table,” Kevin Winstead, sales and technical specialist at TCI Automotive, explained. “By increasing the torque multiplication and stall speed, the performance is improved tremendously in a naturally aspirated application.”
During our baseline testing, we quickly learned that our stock S550 was a bit lazy off the line. By increasing the torque multiplication and stall speed with a high-performance torque converter from TCI, we should be able to better maximize our drag-strip and road-course performance.
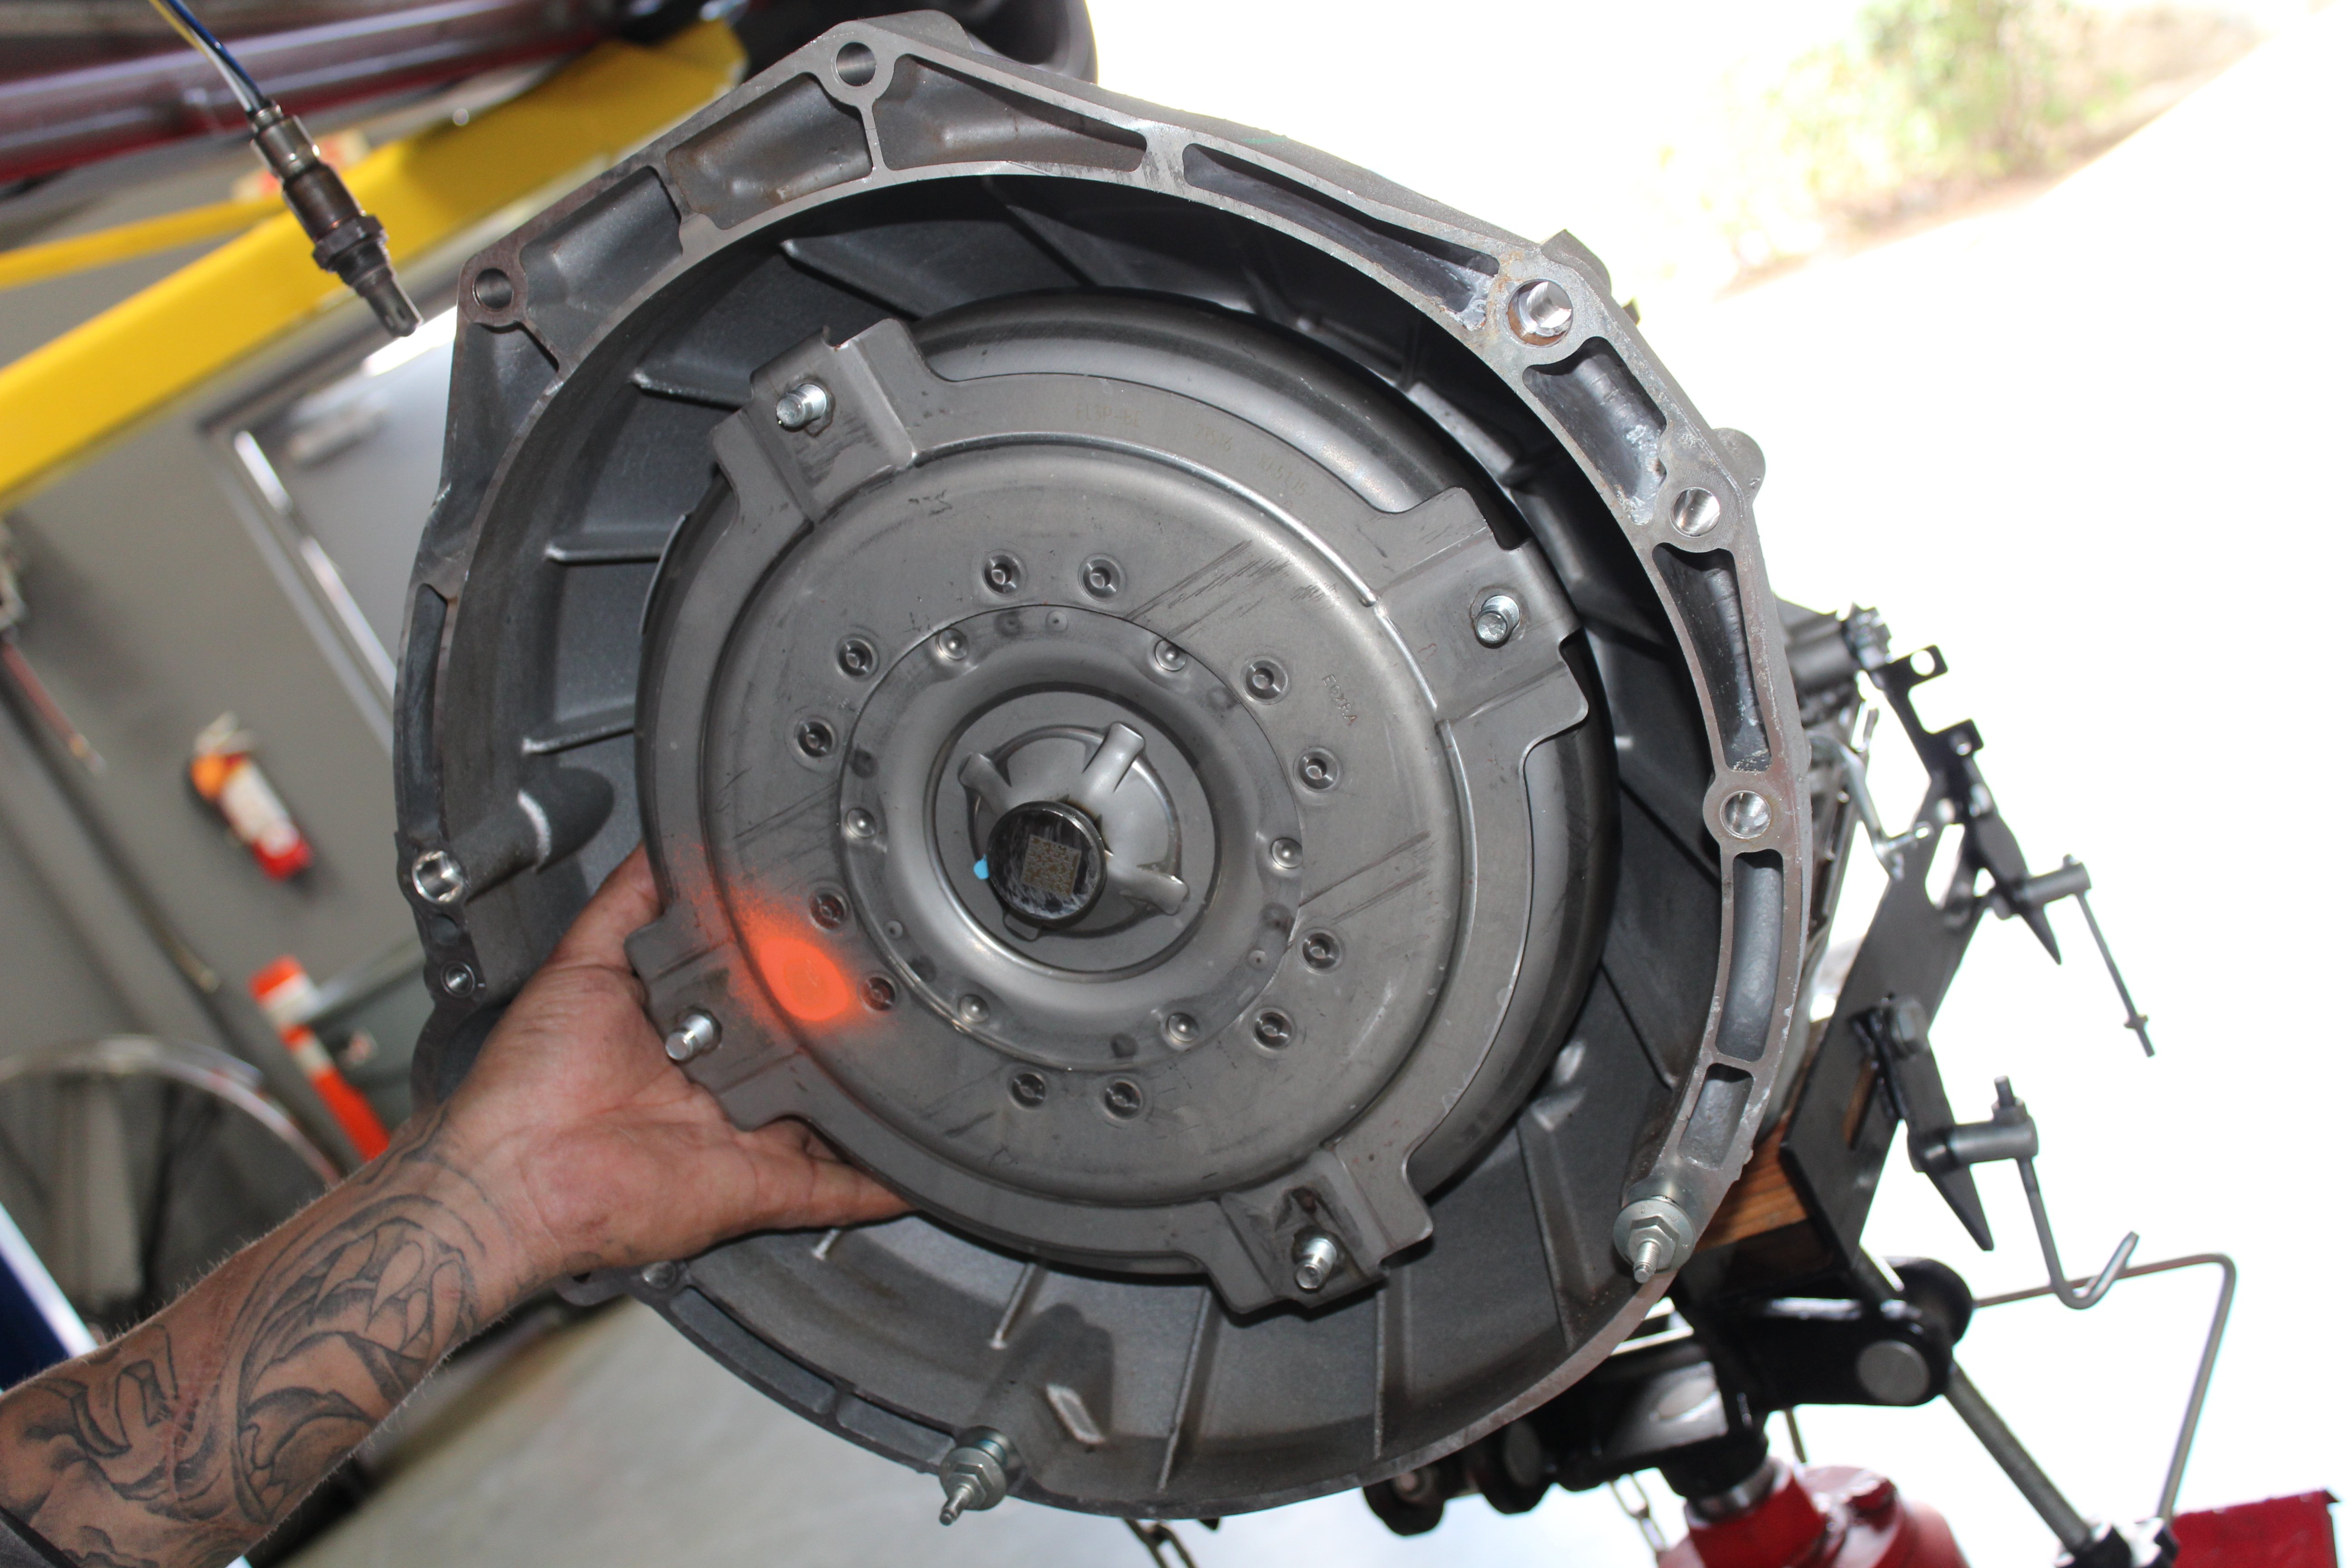
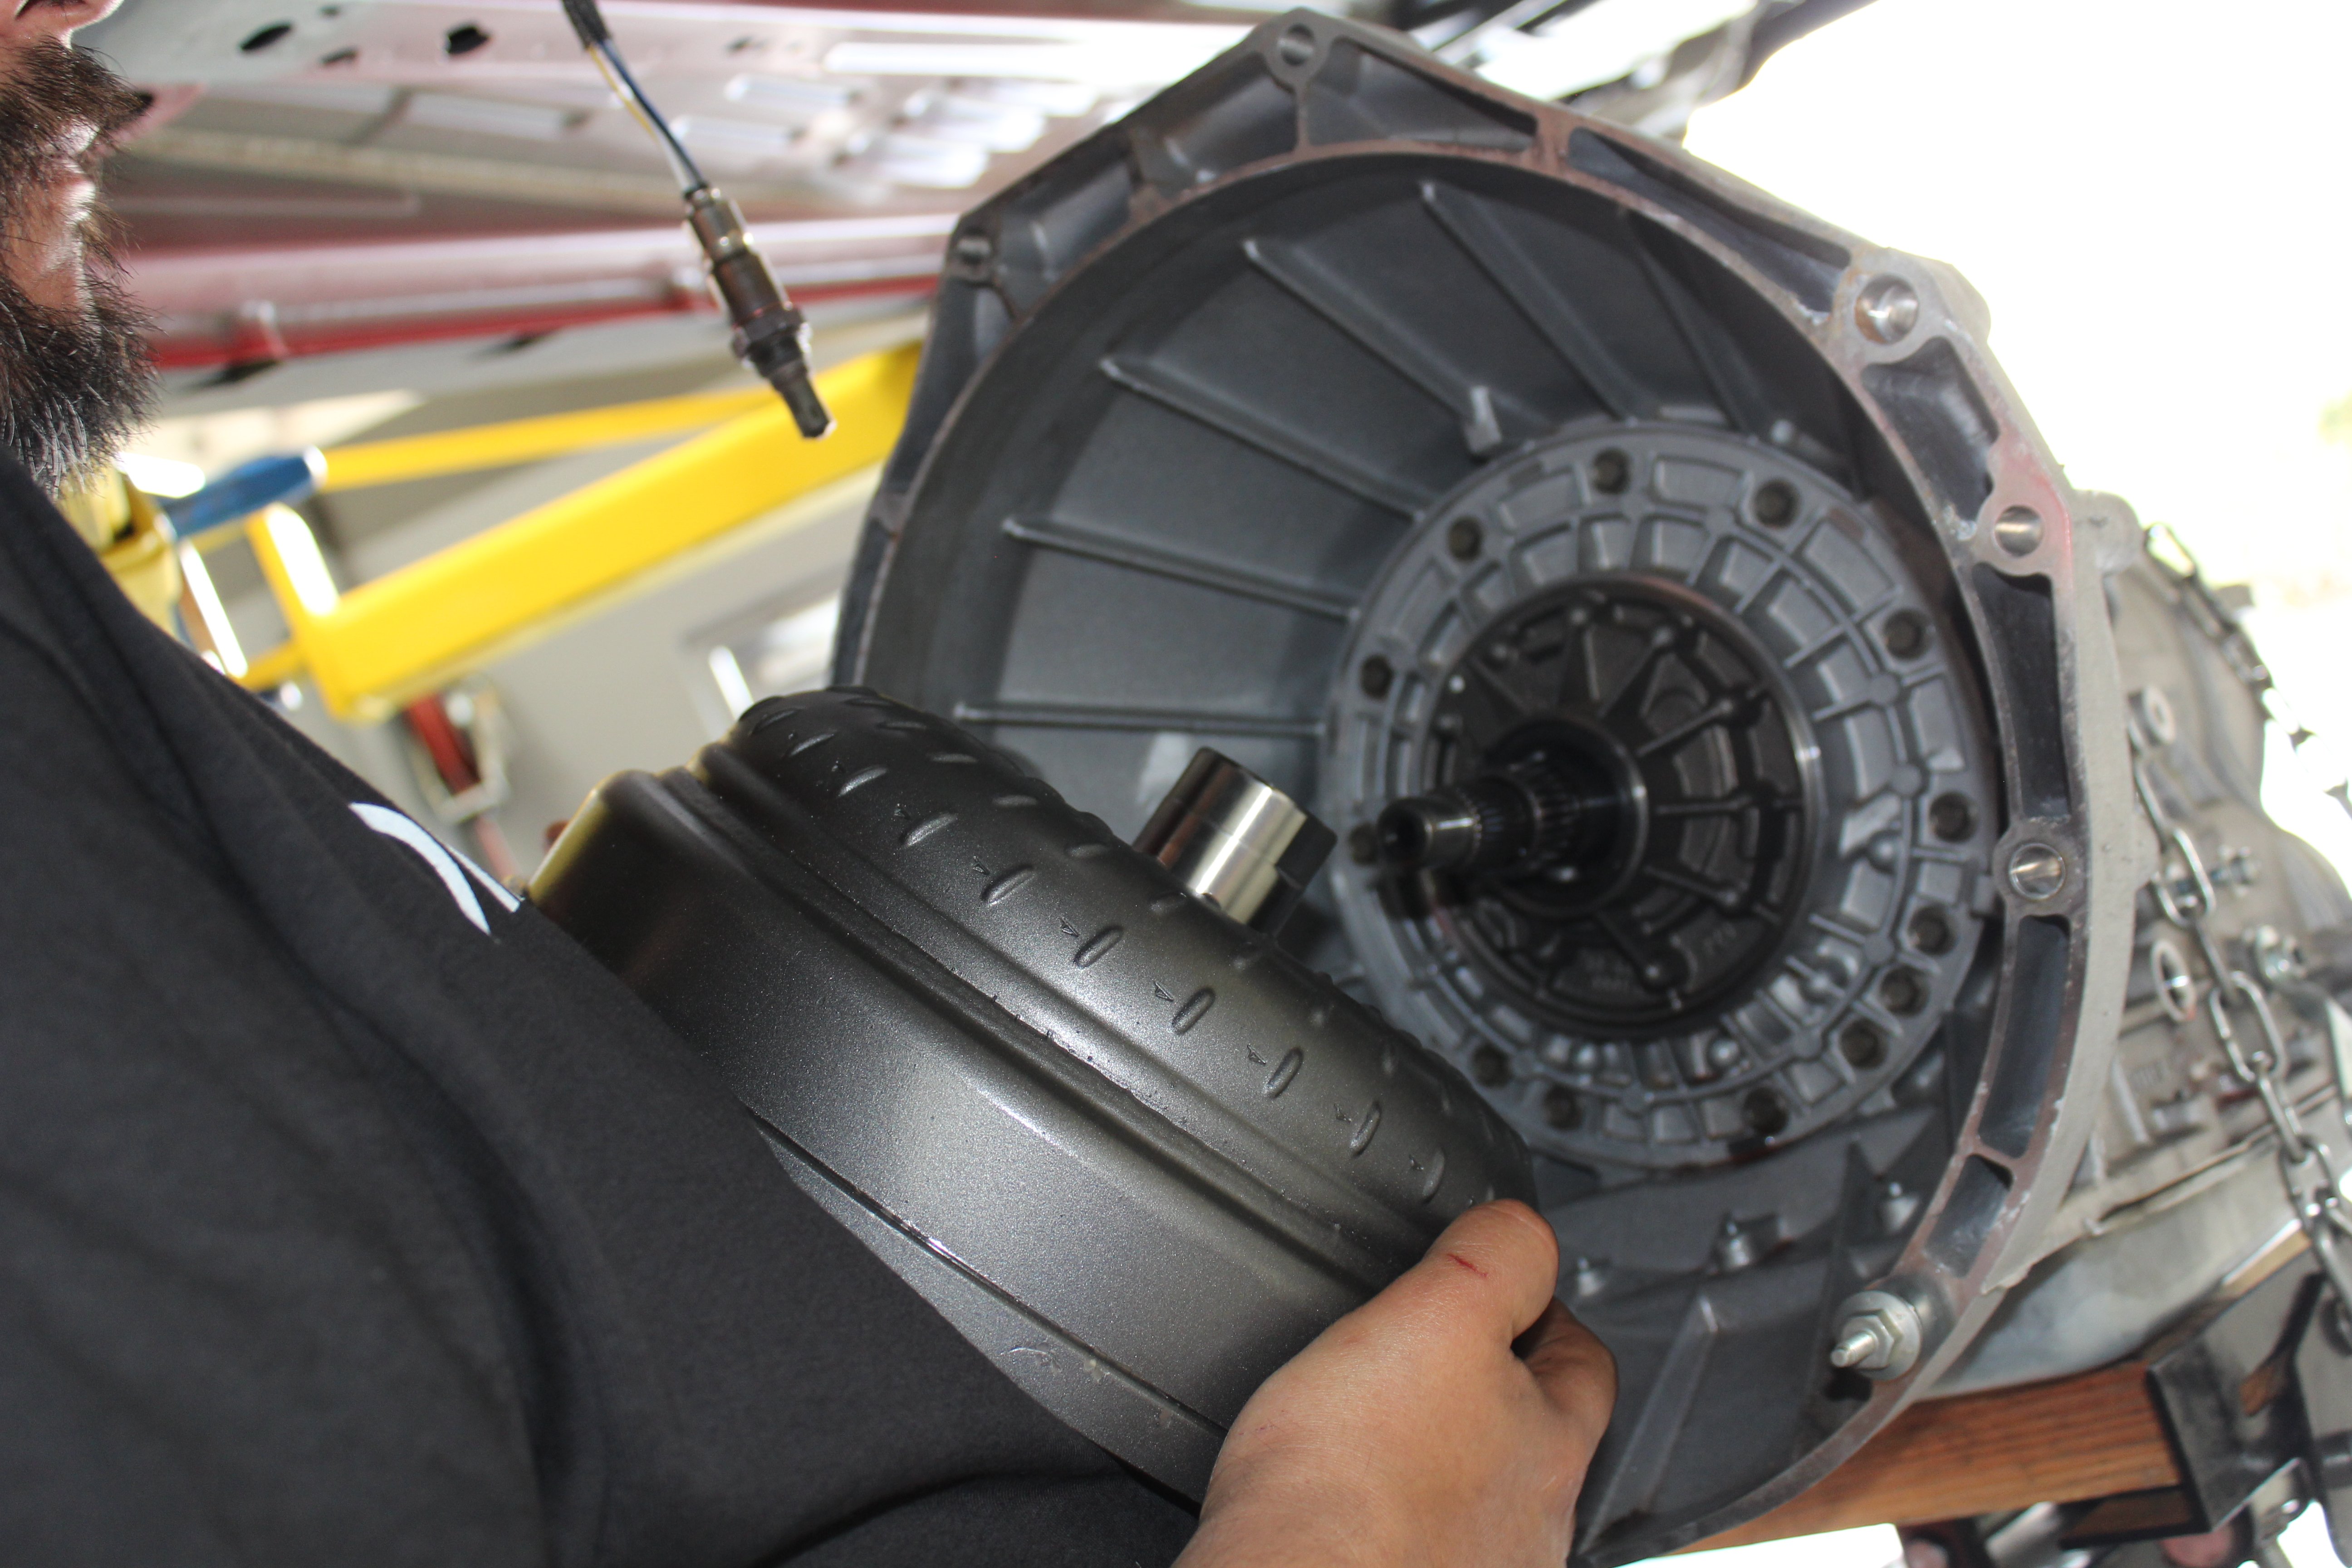
Installing one of TCI’s 6R80 lock-up torque converter with a 3,400-3,600 RPM stall will make the most of our NA power, and also translate to our supercharged combo in Phase 2.
“It will allow the engine to operate in the RPM range that is best suited to power production,” Kevin added. “With the higher stall speed, the drag strip and road course performance will improve considerably. Typical drag strip gains are on the order of a half second of e.t. improvement. Lap times will improve simply because the engine is in a better part of the powerband.”
That’s what we are talking about.
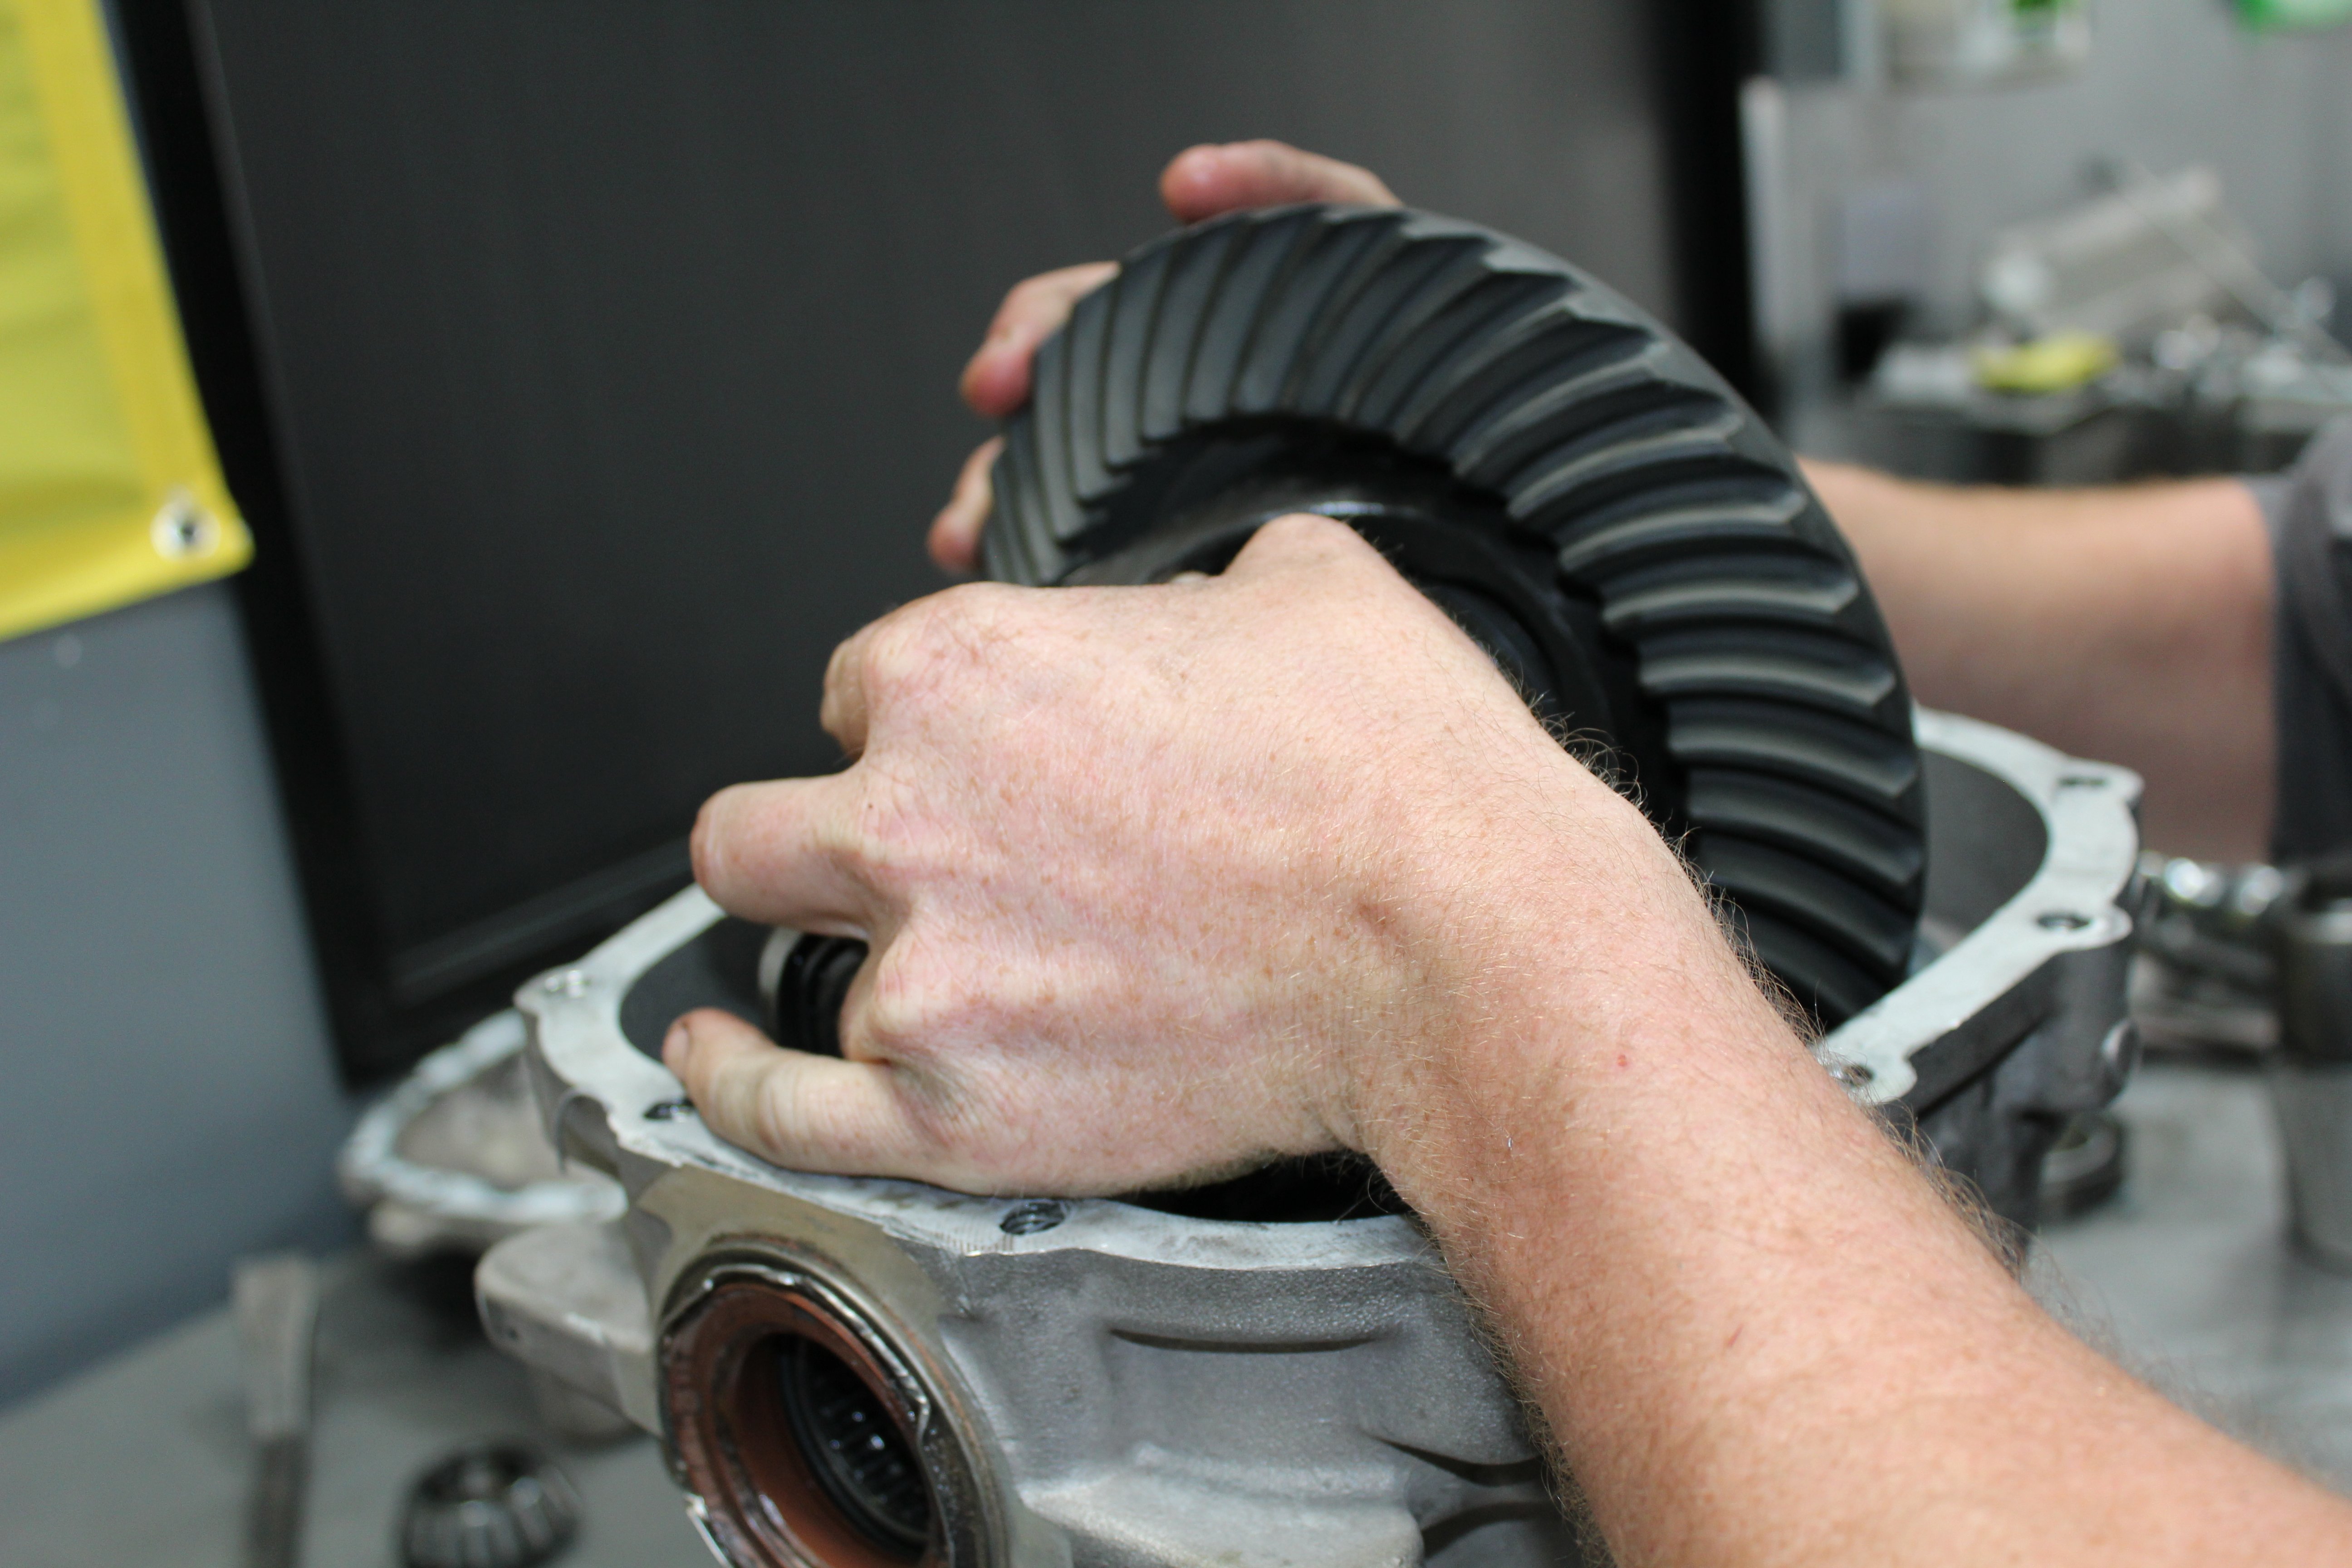
We commenced the removal of the factory 6R80 six-speed automatic transmission by supporting it, followed by removing the bolts on the factory bellhousing. Once everything was disconnected, we were able to remove the factory transmission. With the transmission support on our trans-jack, we were able to begin removing the factory torque converter in order to replace it with our new unit from TCI Automotive.
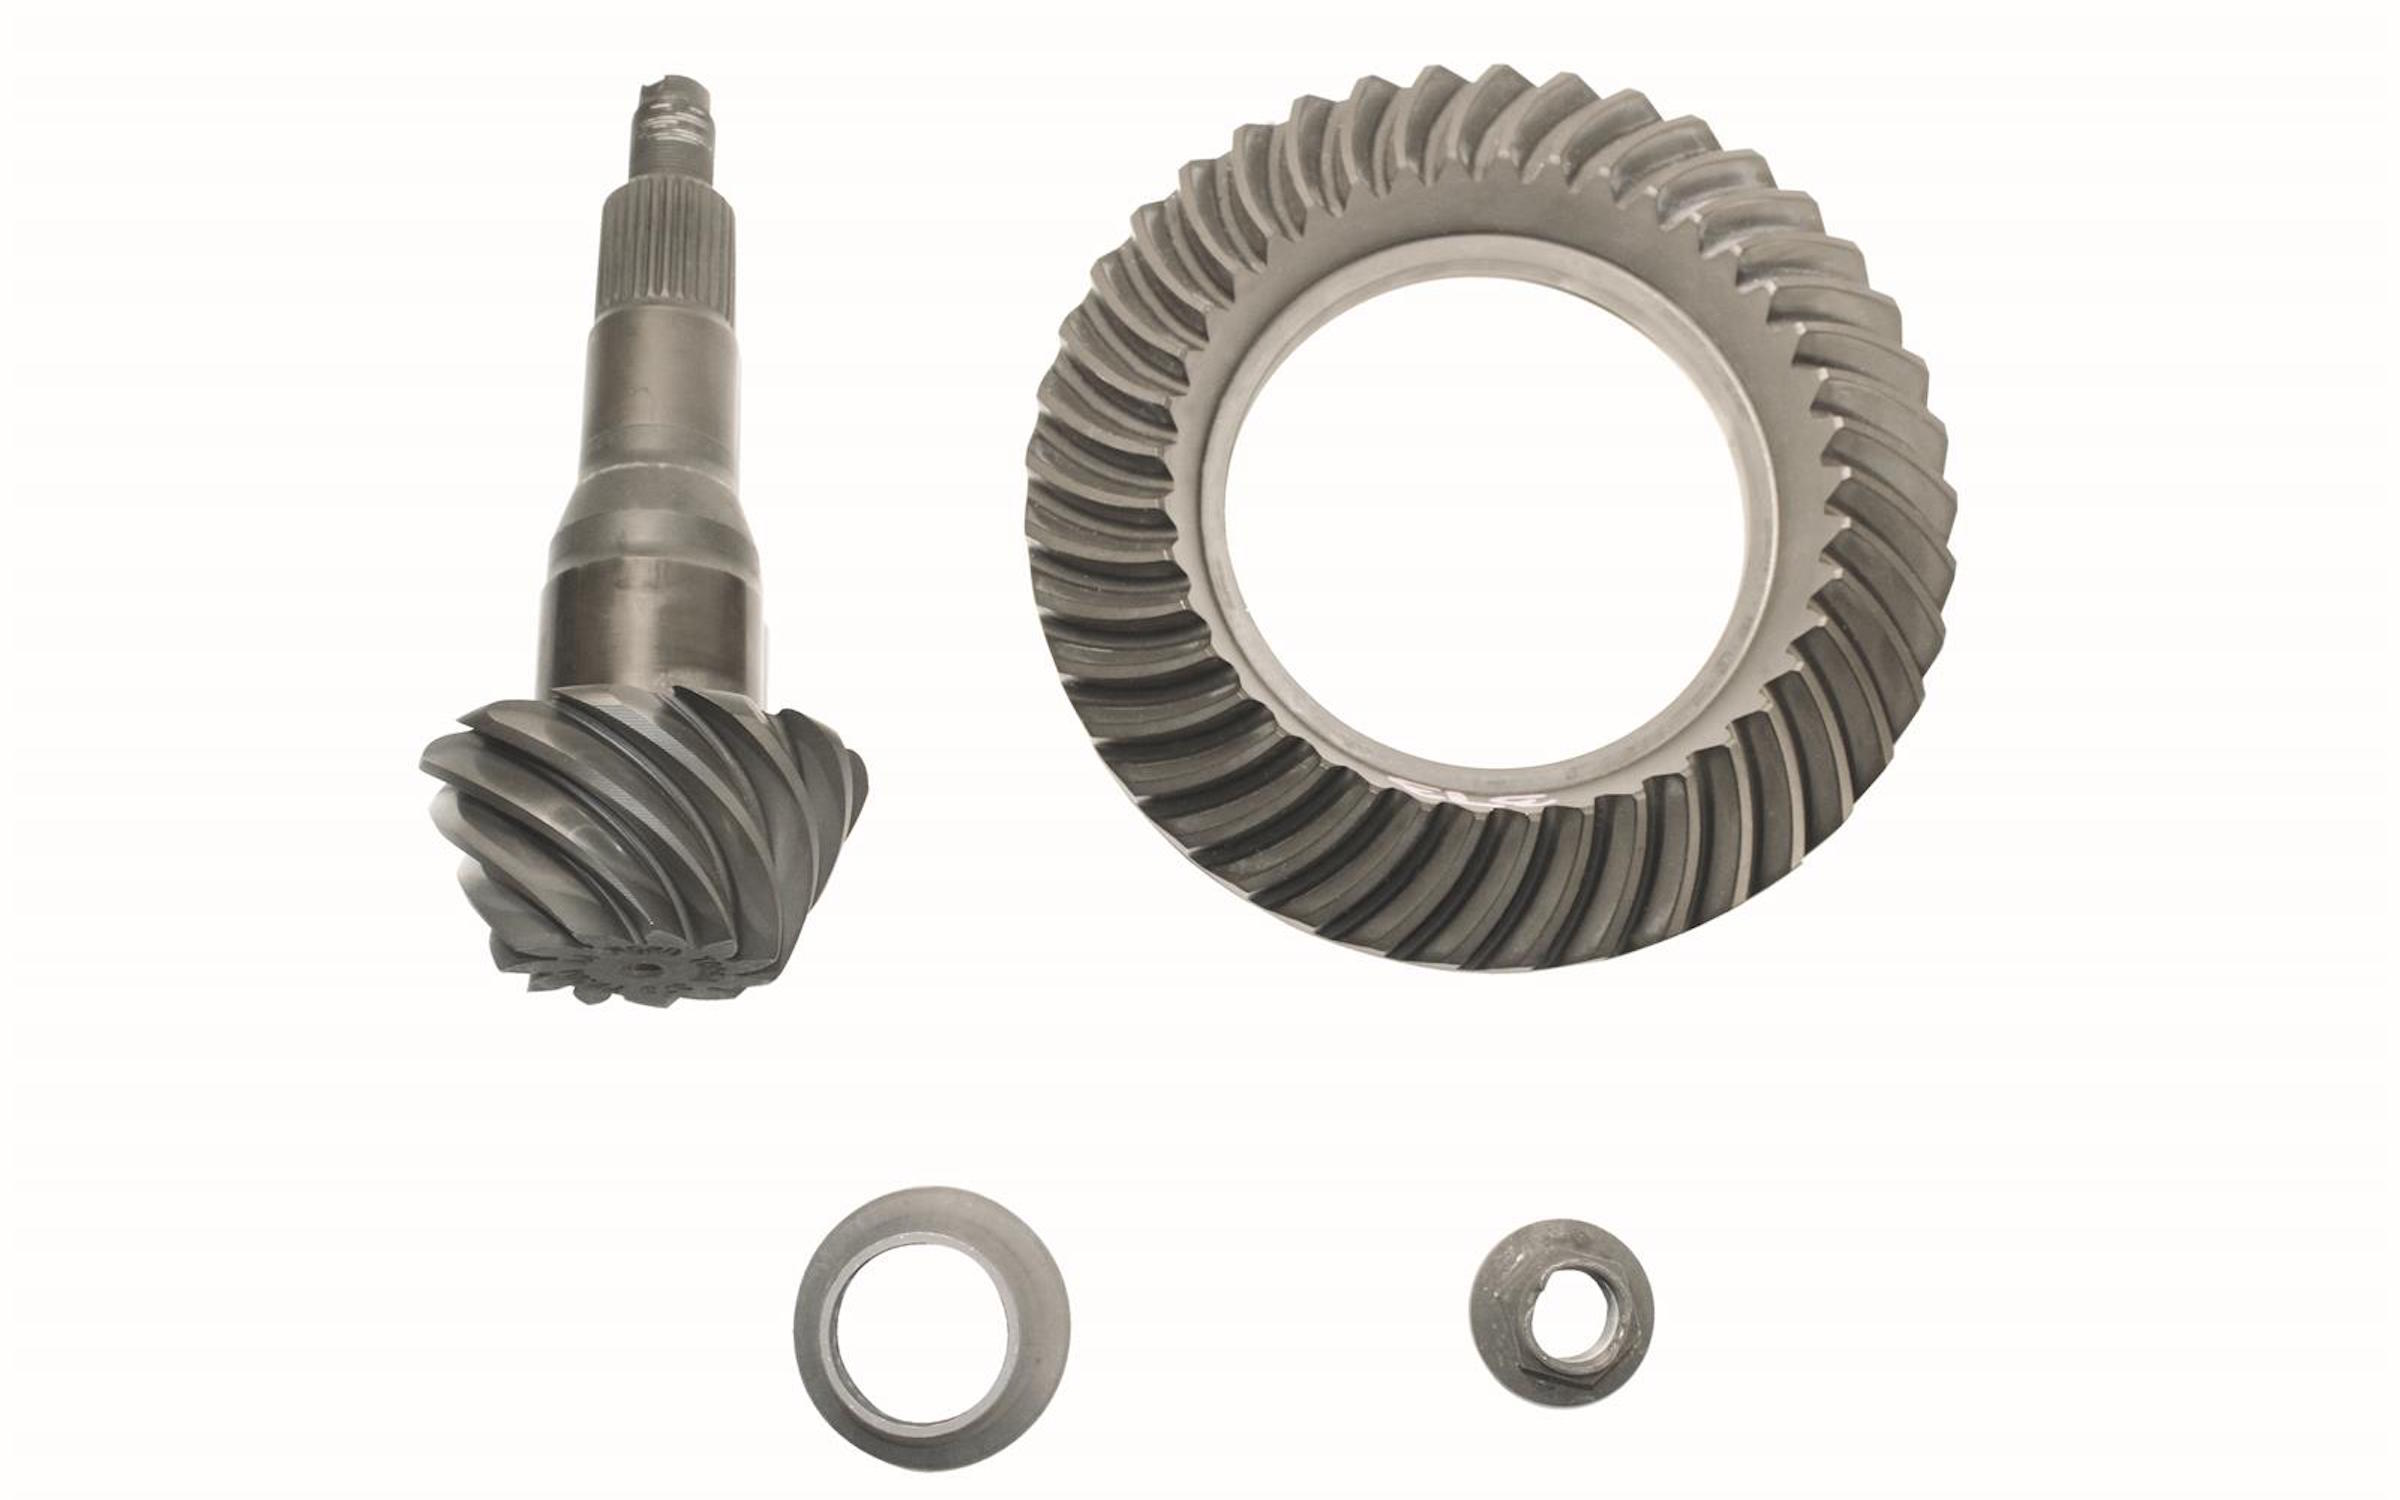
Speaking of the better part of the powerband, we are also swapping out the base-model 3.15 rear gear ratio in favor of a set of 3.55 gears from Ford Performance Parts. This Super 8.8 gear swap should get us off the line quicker and keep our Coyote in a more favorable spot in the rev range. However, the new ratio won’t be too much gear when we hit the road course or start cranking up the boost in Phase 2.
To further maximize our available power, we decided to round out our driveline mods with one of the oldest tricks in the book — a ratio change. By moving up from the factory 3.15 rear gears to 3.55 cogs from Ford Performance Parts, we will put the Coyote in its RPM happy spot sooner, which should really help us on the drag strip. We aren’t going beyond 3.55 because the car has to perform on the road course, and it is getting a lot more power in Phase 2. (Photo Credit: Summit Racing)
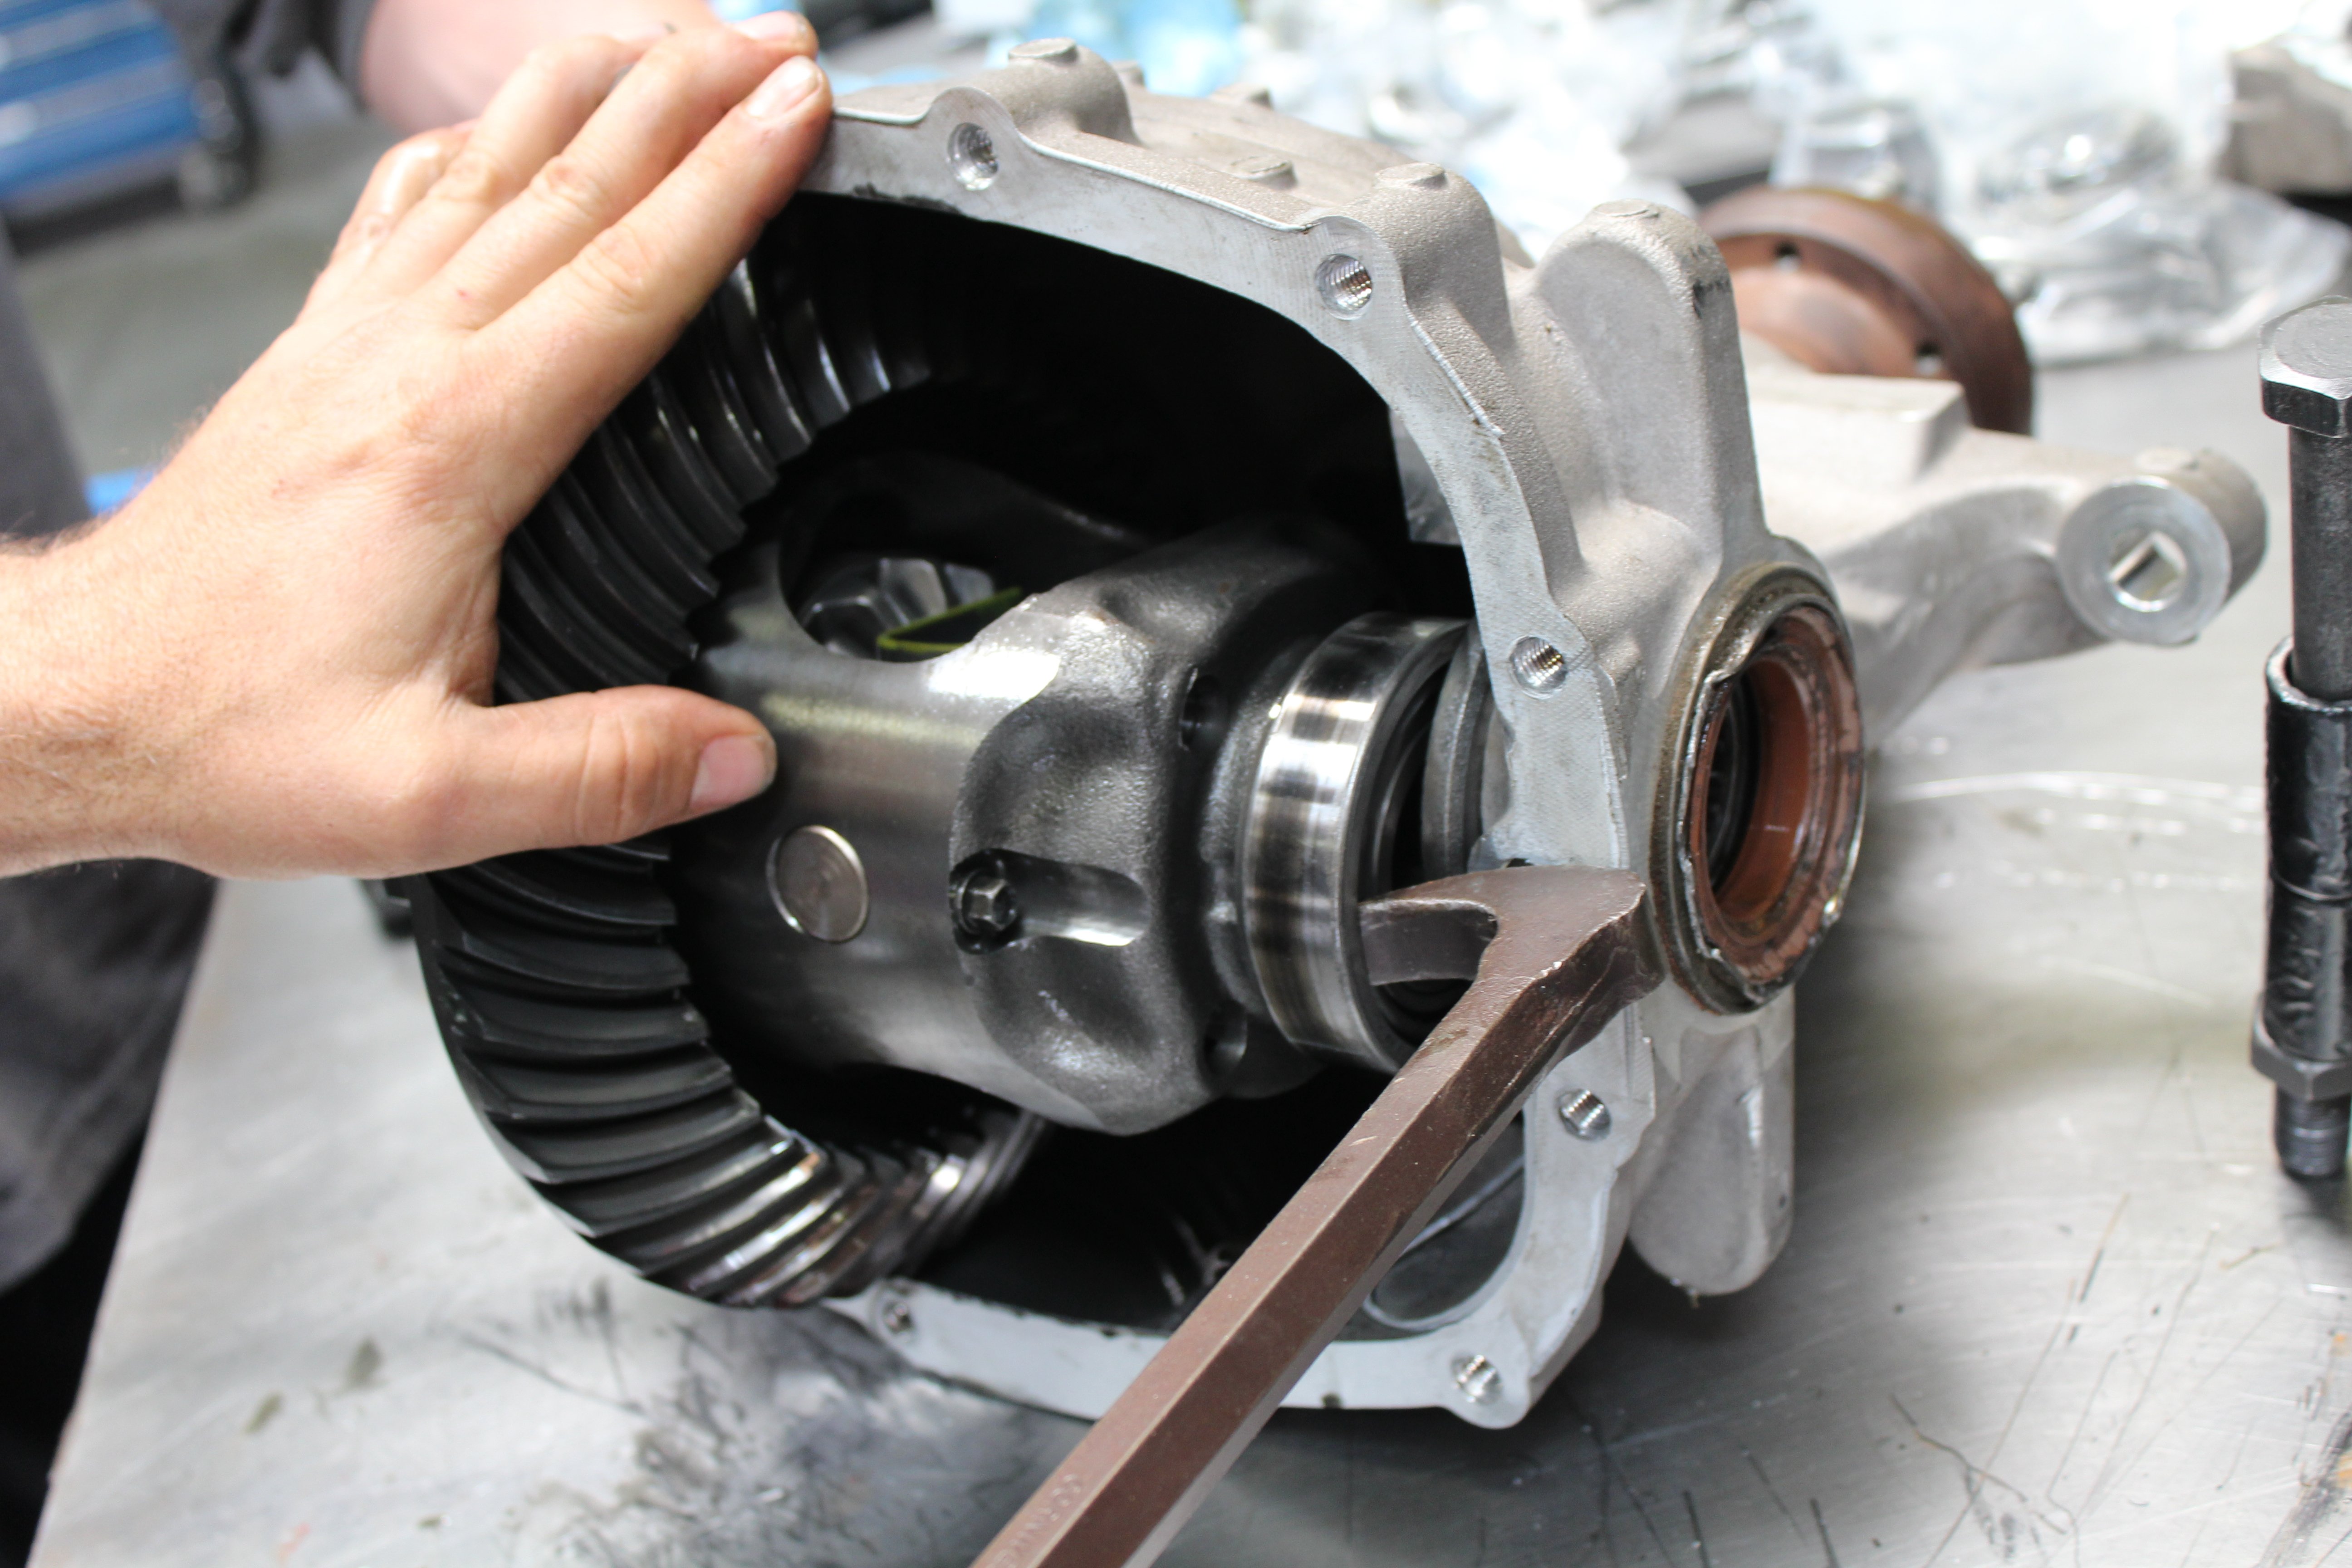
Swapping out the factory 3.15s in favor of a set of Ford Performance 3.55 gears necessitates draining and dropping the Super 8.8 housing. We also discovered that non Performance Pack cars will need to swap carriers, as the base carrier is not compatible. Swapping gears is a complex process that is likely best left to a pro, as there are a lot of finer setup points to ensure they are quiet and durable. With the operation complete, we reinstalled the diff and filled it with Royal Purple Max Gear 75w140 gear lube to prep it for our $5K testing.
Putting Down The Power
With more performance and better delivery of that output from the transmission, it’s critical to apply all that to the pavement. While the S550 platform makes for the best handling Mustang to date, that doesn’t mean there isn’t room for improvement.
“Out of the box, the S550 is pretty good, but that does not mean it can’t be better,” Glen said. “Even though it is not so much a weak point but more so of an opportunity for better performance, I would have to improve the differential bushing. By utilizing our diff bushing inserts we can greatly reduce the amount of movement that is occurring and reduce the wheel hop that happens from the movement.”
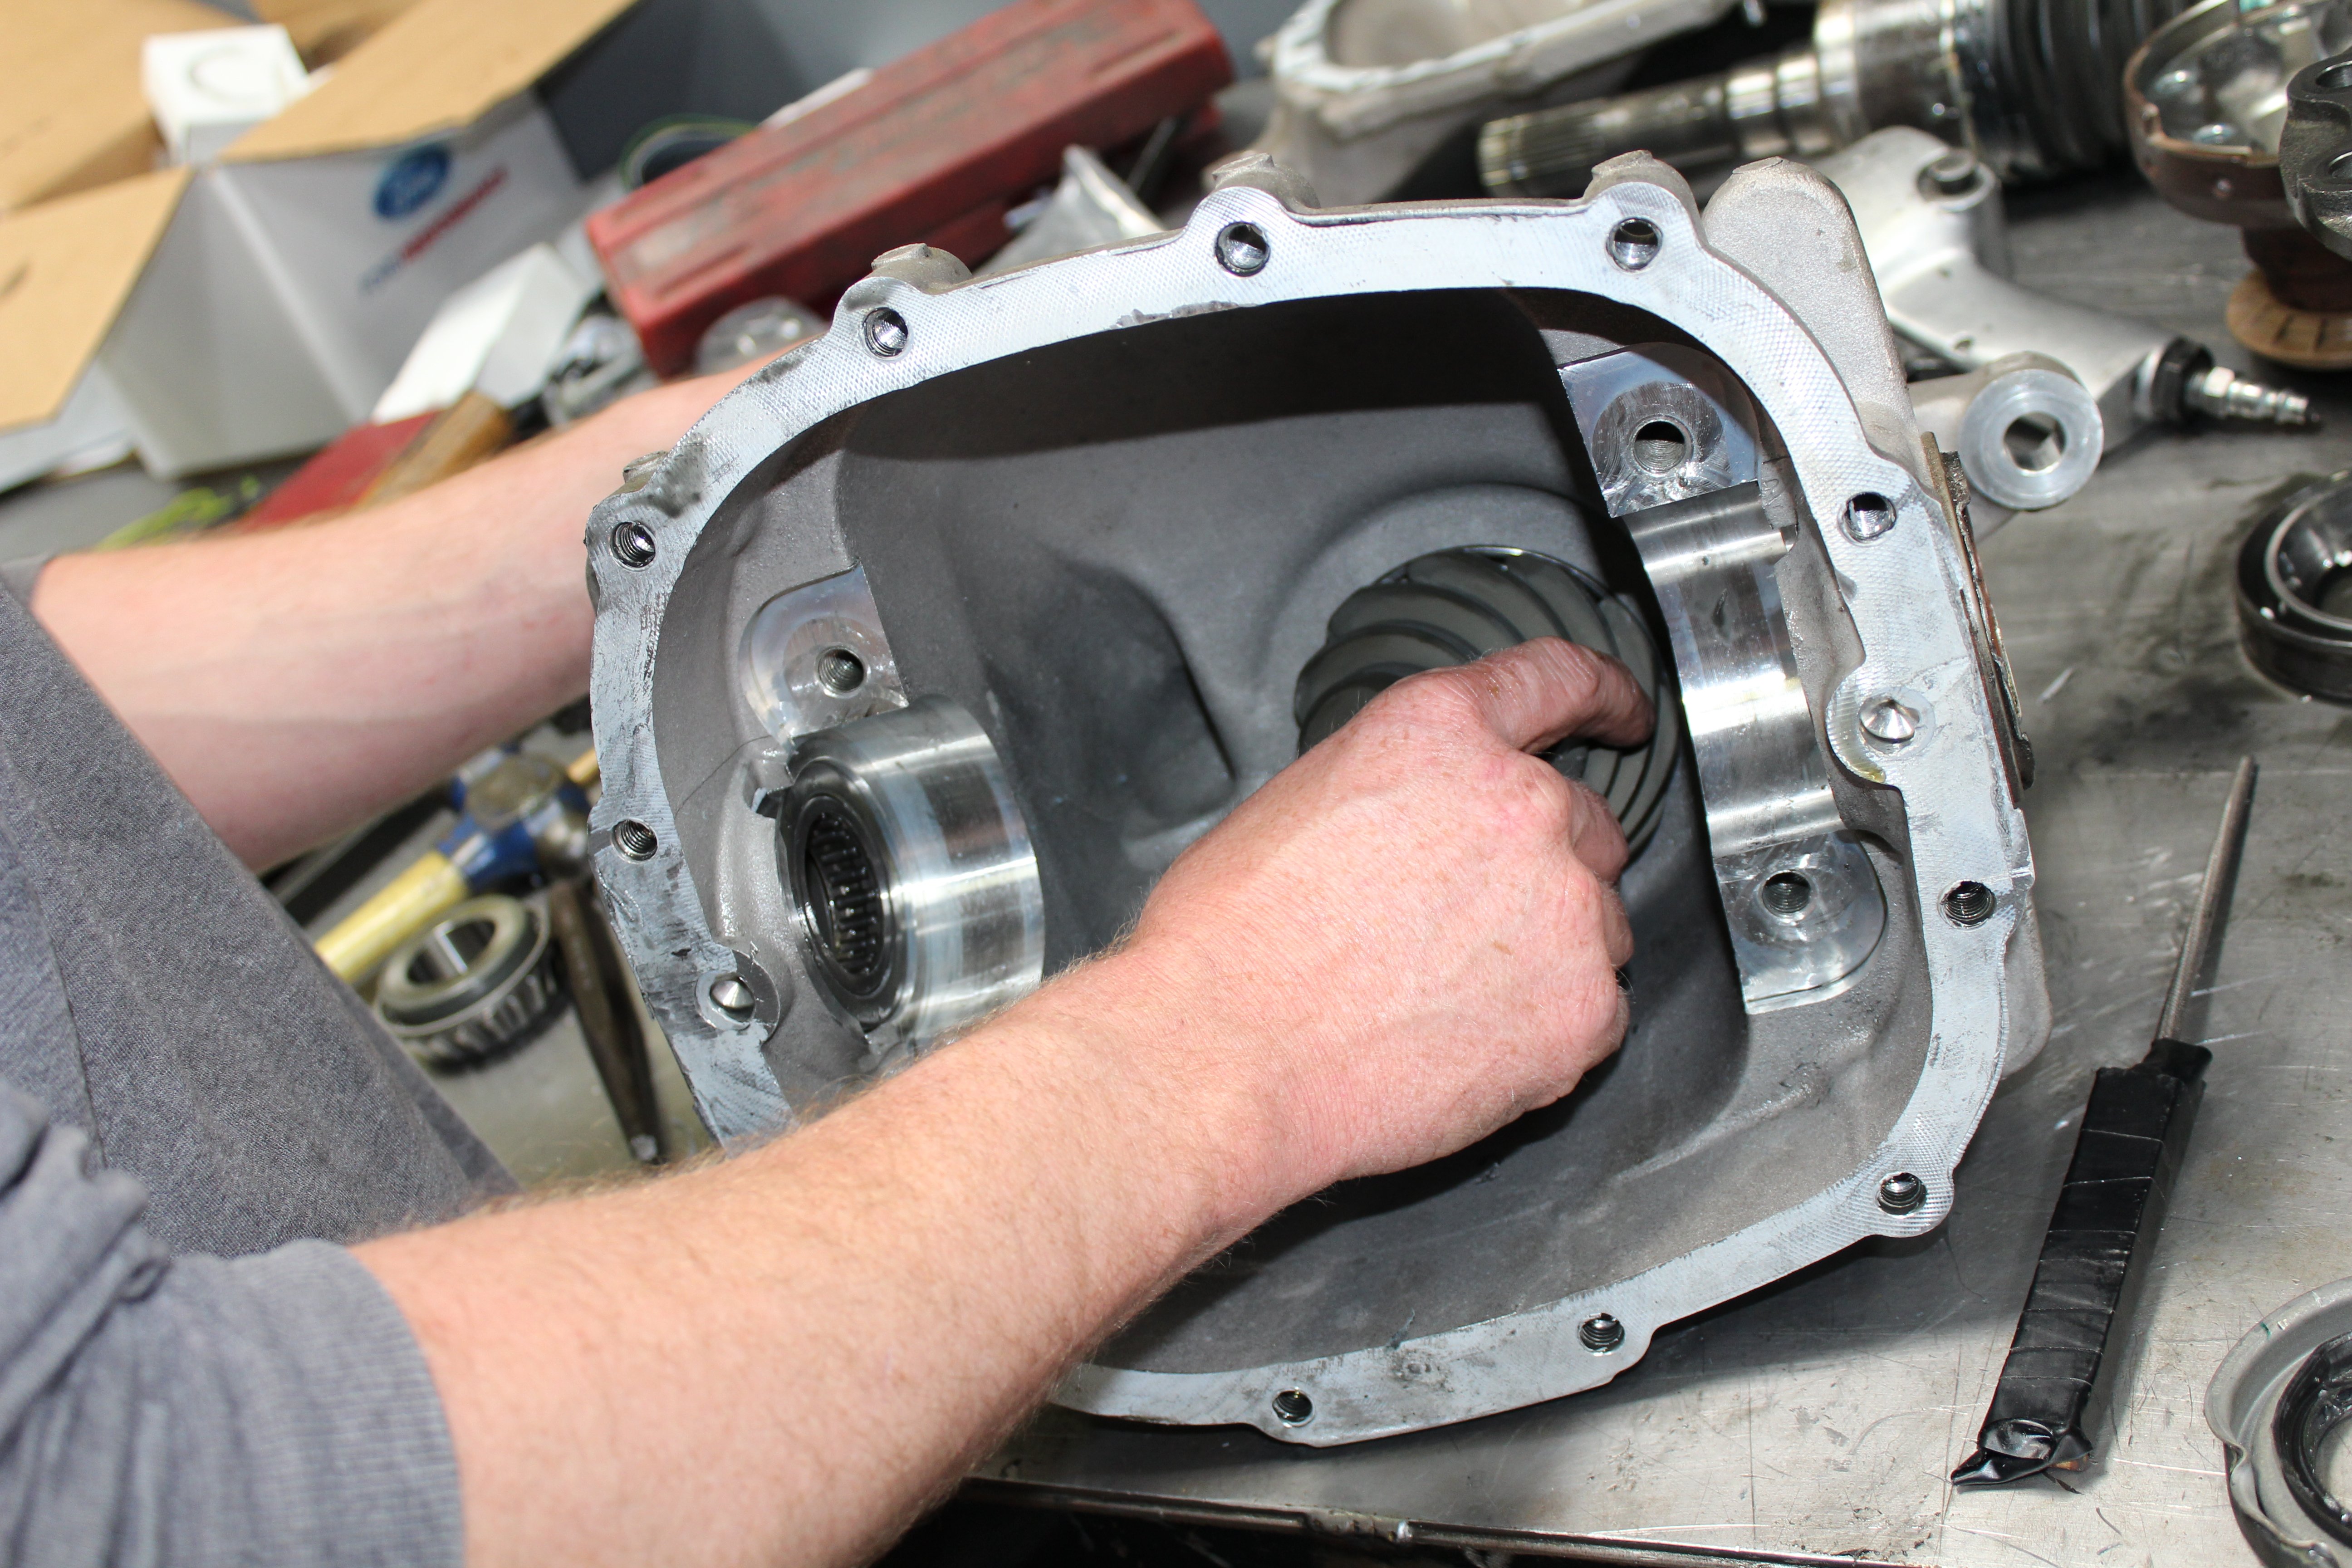
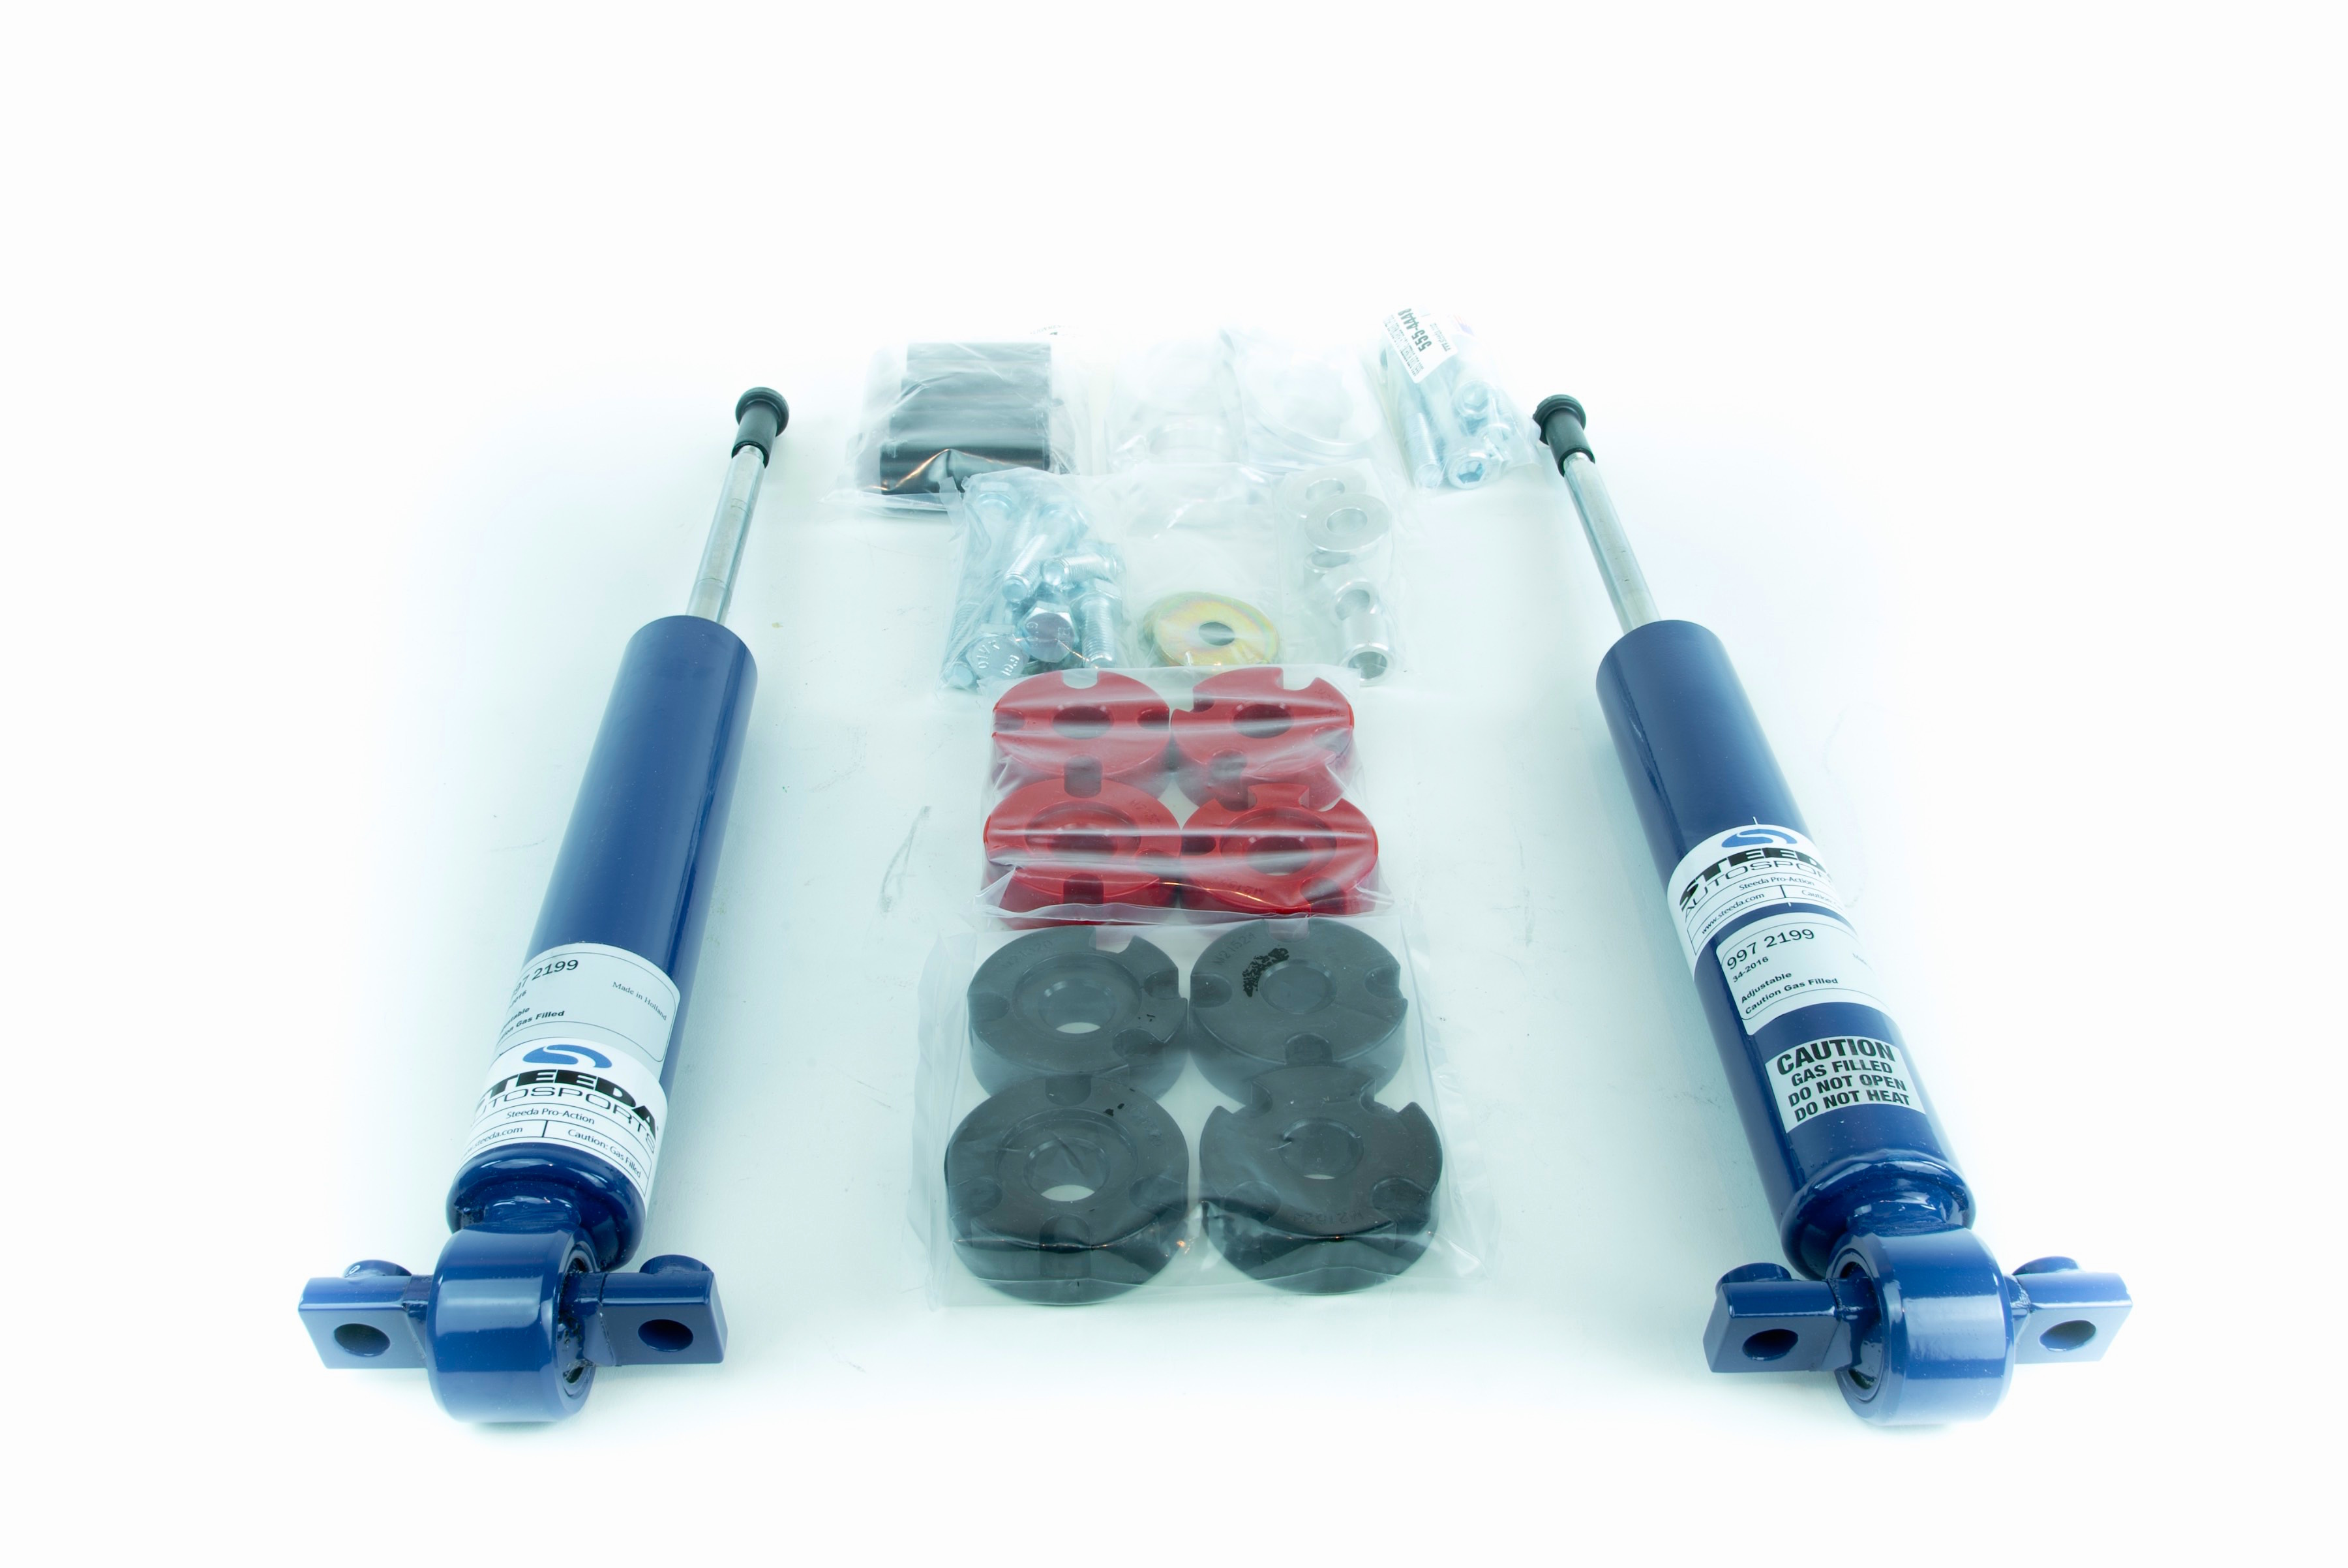
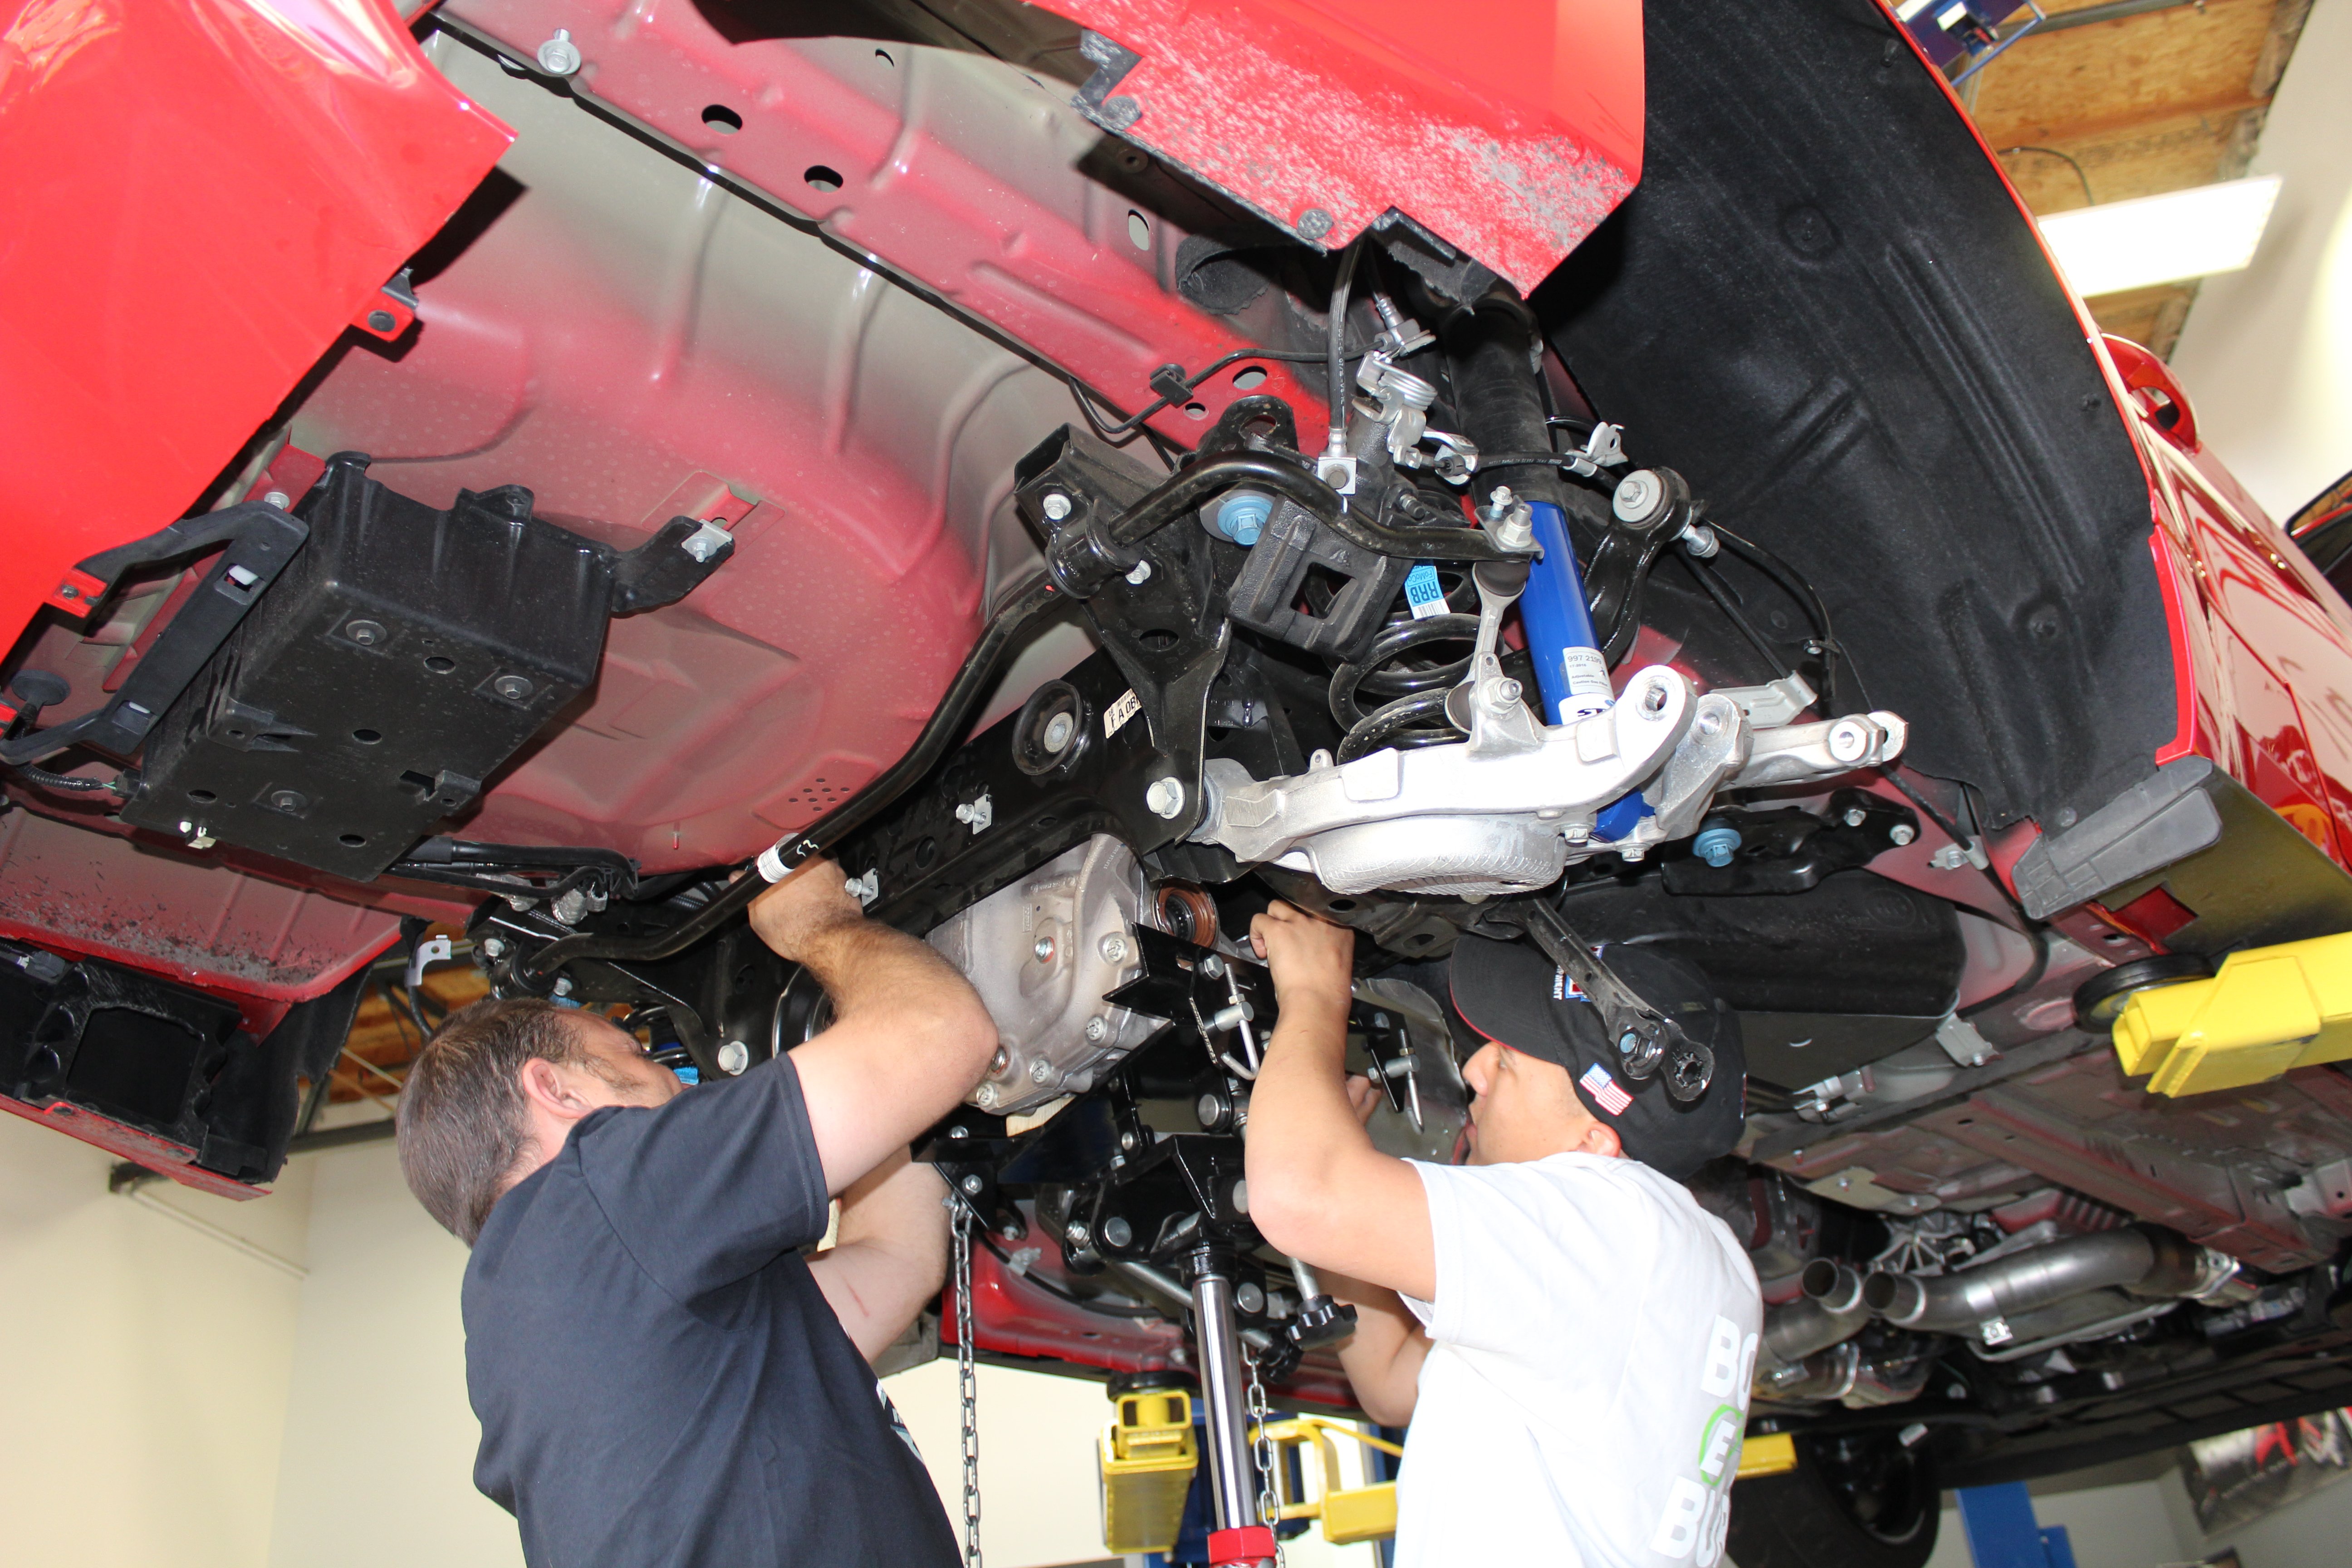
With scant room in our Phase 1 budget, we opted to start fortifying the rear suspension to improve our drag strip performance. We are adding Steeda’s adjustable differential bushing inserts and bushing bolt upgrades to keep the diff under control and protect our stock halfshafts. We are also adding Steeda’s Pro Action adjustable rear shocks to add some adjustability for the track.
We weren’t able to address as much of the suspension as we wanted to in Phase 1 due to the constraints of the budget, so we focused on building a foundation we can expound upon more aggressively when we get a fresh $15,000 to spend in Phase 2. As such, we went for some affordable differential upgrades and some adjustable rear shocks that will allow some adjustment at the track and pair with the fronts next time around.
“The diff-bushing insert system will aid in allowing the car to get better traction coming off of corners where typically you would experience some wheel hop when exiting a slower corner during throttle application,” Glen explained. “The diff-bolt upgrade kit is simply a safety part, which will ensure that the abuse from both the drag and road racing will not leave you on the side of the course with broken parts. Finally, the Pro Action shocks in the rear will help fine-tune some handling initially but will really come into play for Phase 2.”
With the differential out for the gear change, it afforded an easy opportunity to install our Steeda diff bushing inserts and swap out the rear shocks. The bushings are dead simple to install in the factory rubber bushings, while the shocks are a simple remove and replace operation.
“The diff bushings will help limit the diff movement which should result in increased traction and grip from a standstill,” Scott added.
Of course, competing against a lighter car with an active suspension means that building a foundation for Phase 2 is a crucial part of the Phase 1 modding plan.
2017 Mustang GT Phase 1 Mods
• BBK Performance 1 7/8-inch long-tube headers in polished silver ceramic (PN 18560; $649.99)
• BBK Performance high-flow performance mid-pipe w/ catalytic converters (PN 1816; $429.99)
• BBK Performance O2 harnesses and hardware kit (PN 16332; $59.99)
• DiabloSport inTune i3 handheld tuner (PN 401345; $379)
• Ford Performance Parts GT350 intake manifold (PN M-9424-M52; $1,086.99)
• Ford Performance Parts GT350 cold air intake and 87mm throttle body (PN M-9603-M50; $549)
• Ford Performance Parts 3.55 ring and pinion set (PN M-4209-88355A; $189.99)
• Reische GEN2 170-degree performance thermostat (PN FORD-50; $57)
• Steeda S550 Mustang adjustable differential bushing insert system (PN 555-4443; $99.95)
• Steeda S550 differential bushing bolt upgrade kit (PN 555-4448; $29.95)
• Steeda Pro Action adjustable rear shocks (PN 555-8156; $458.90)
• TCI Automotive 6R80 lock-up torque converter (PN 457010; $998.97)
Total: $4,989.68
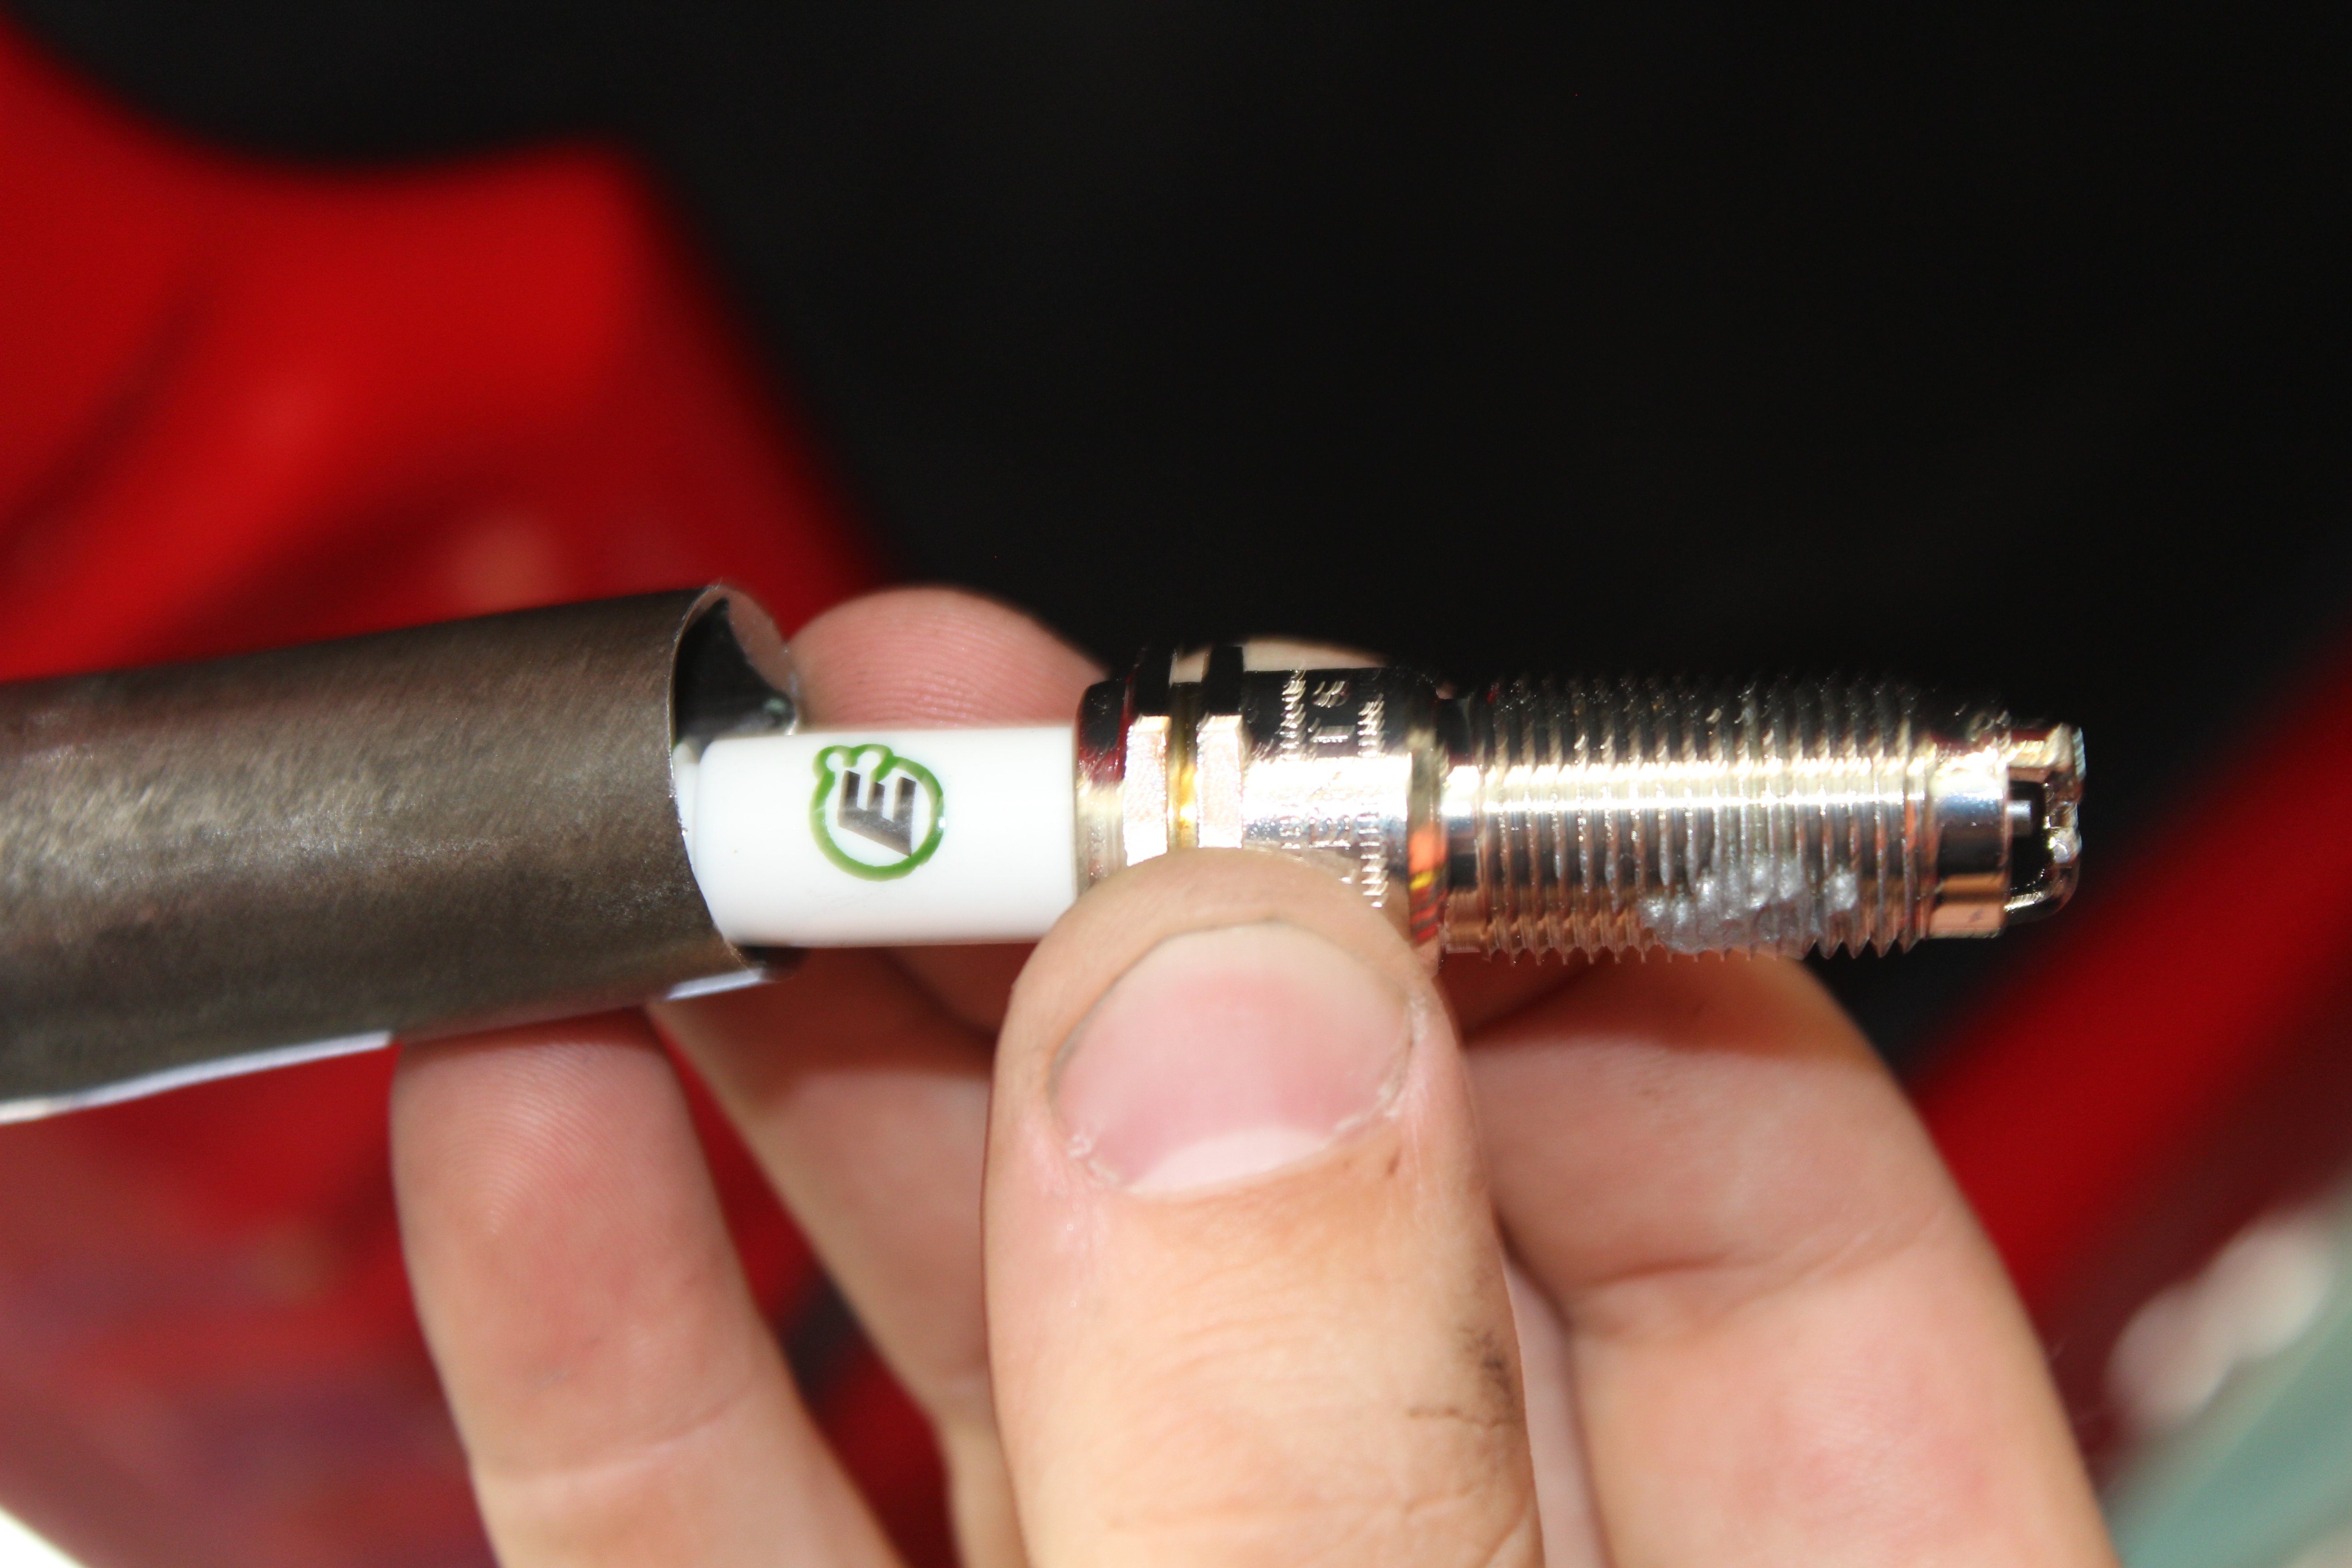
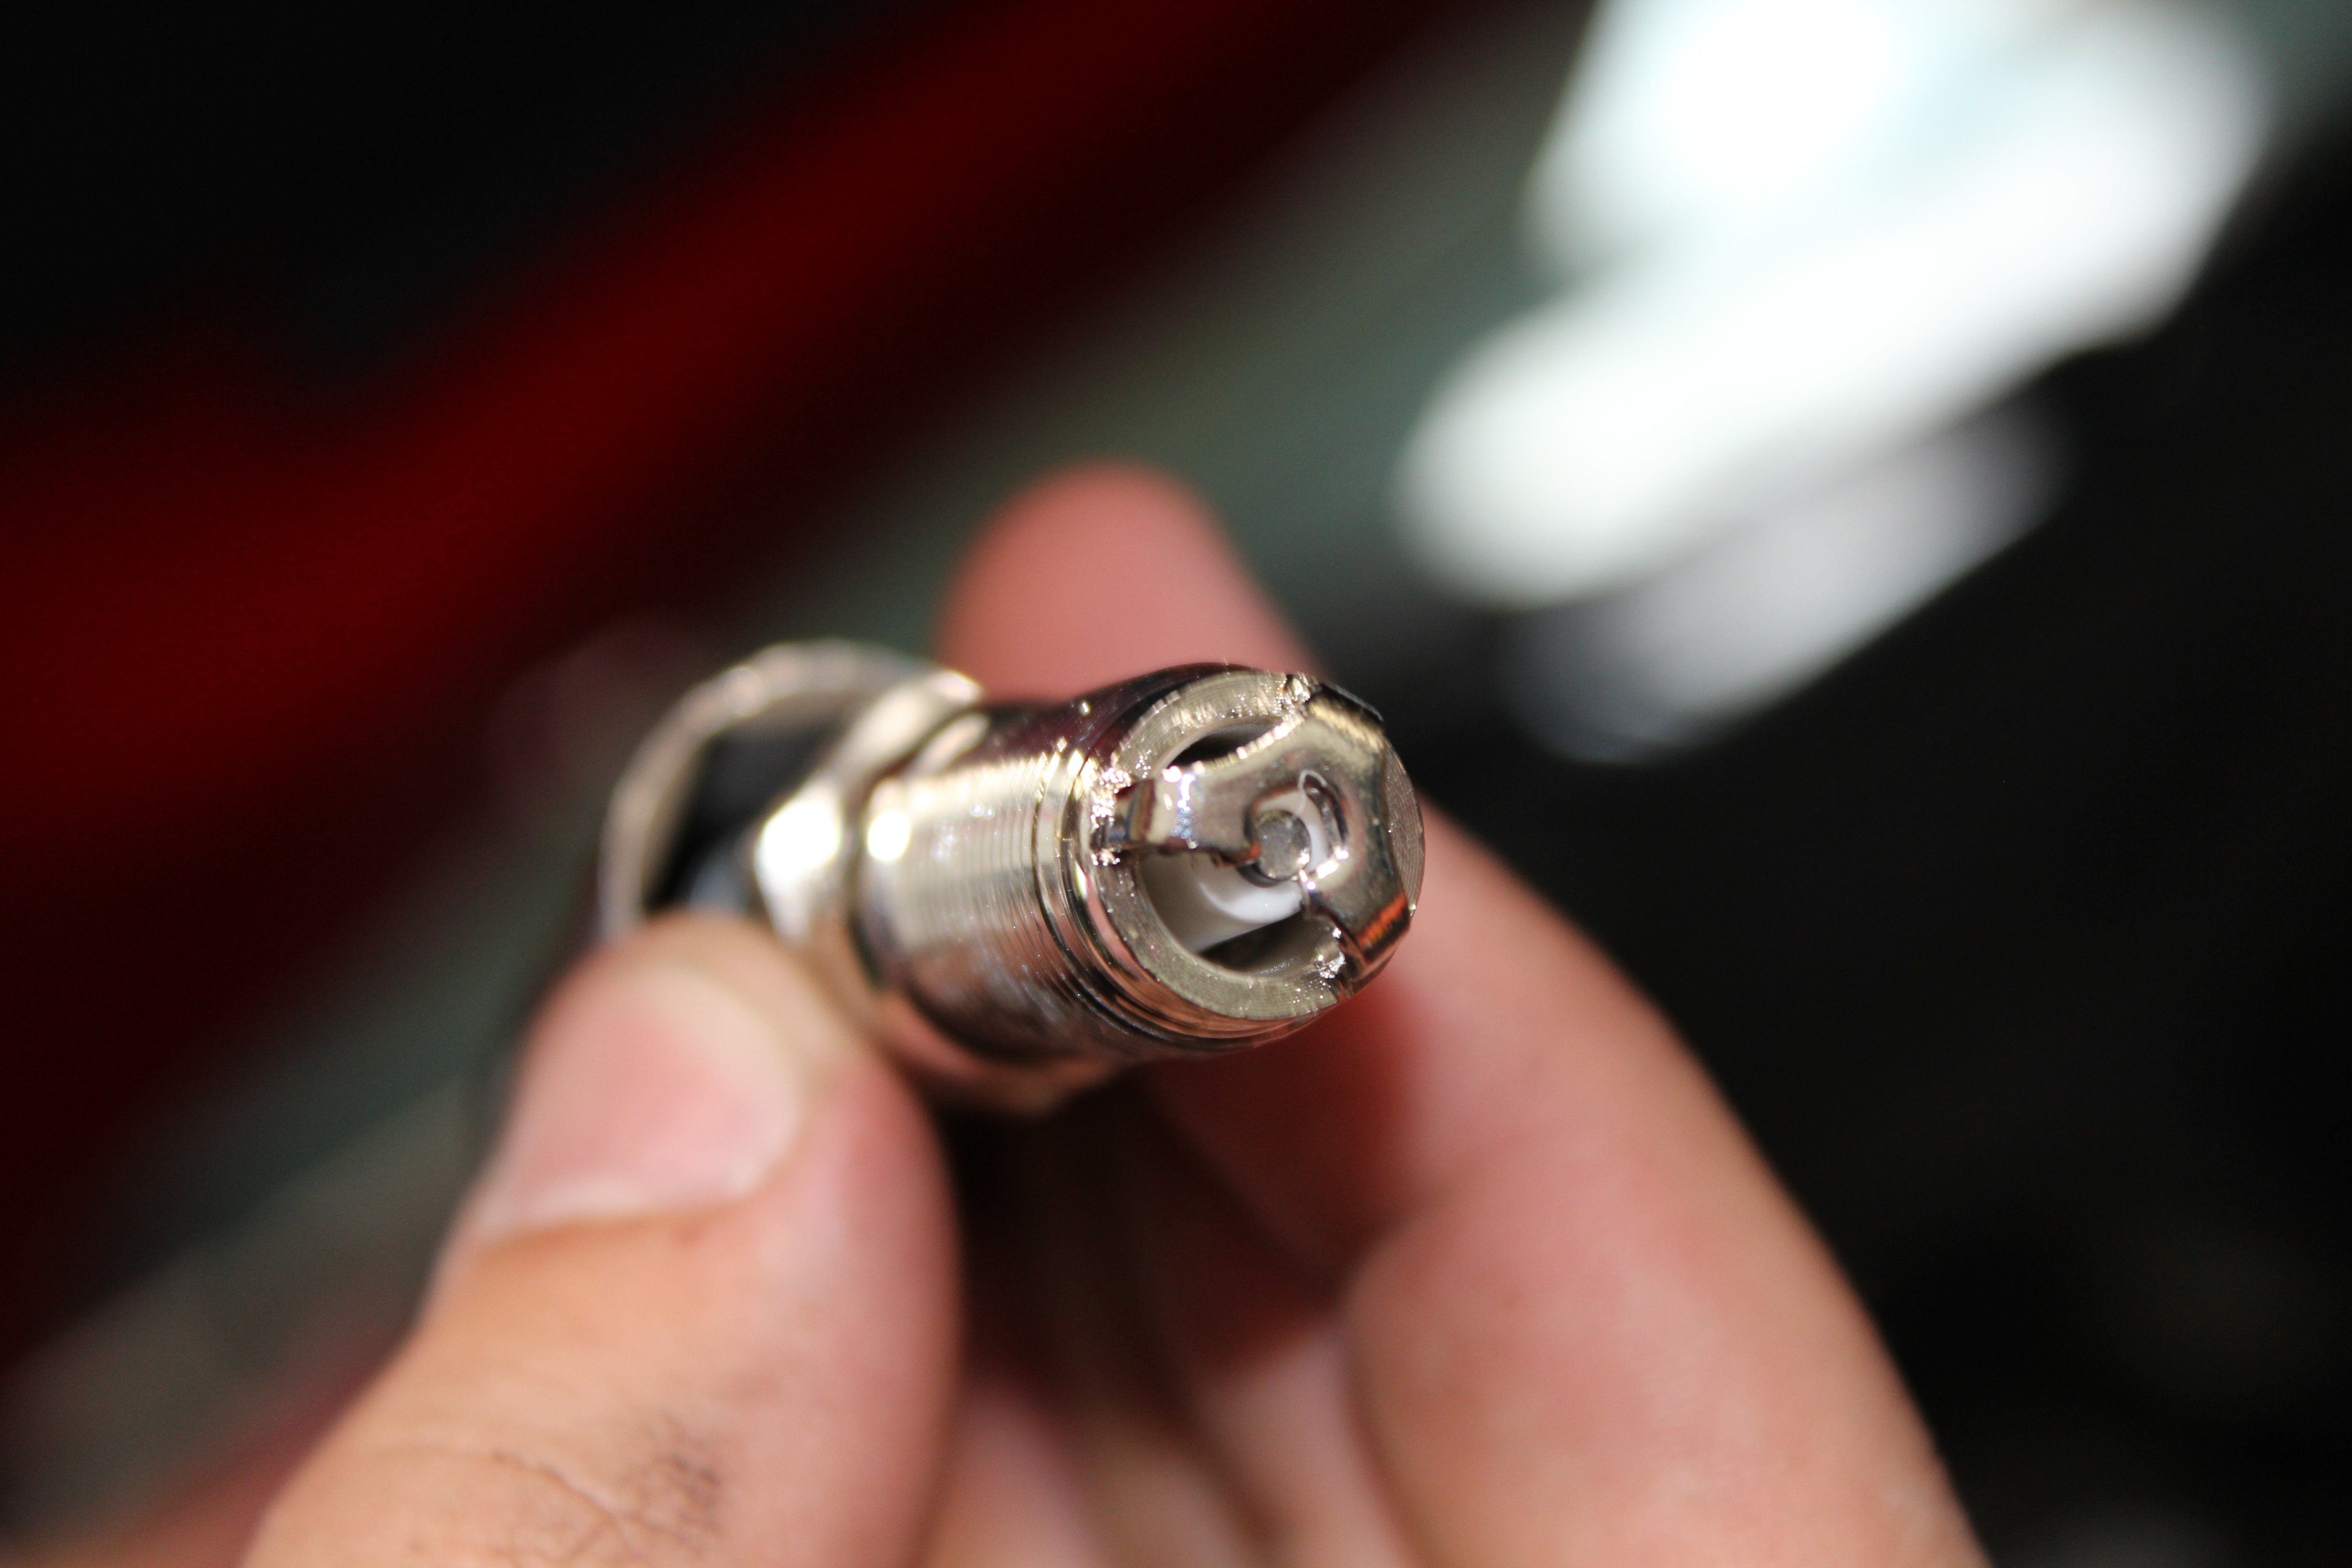
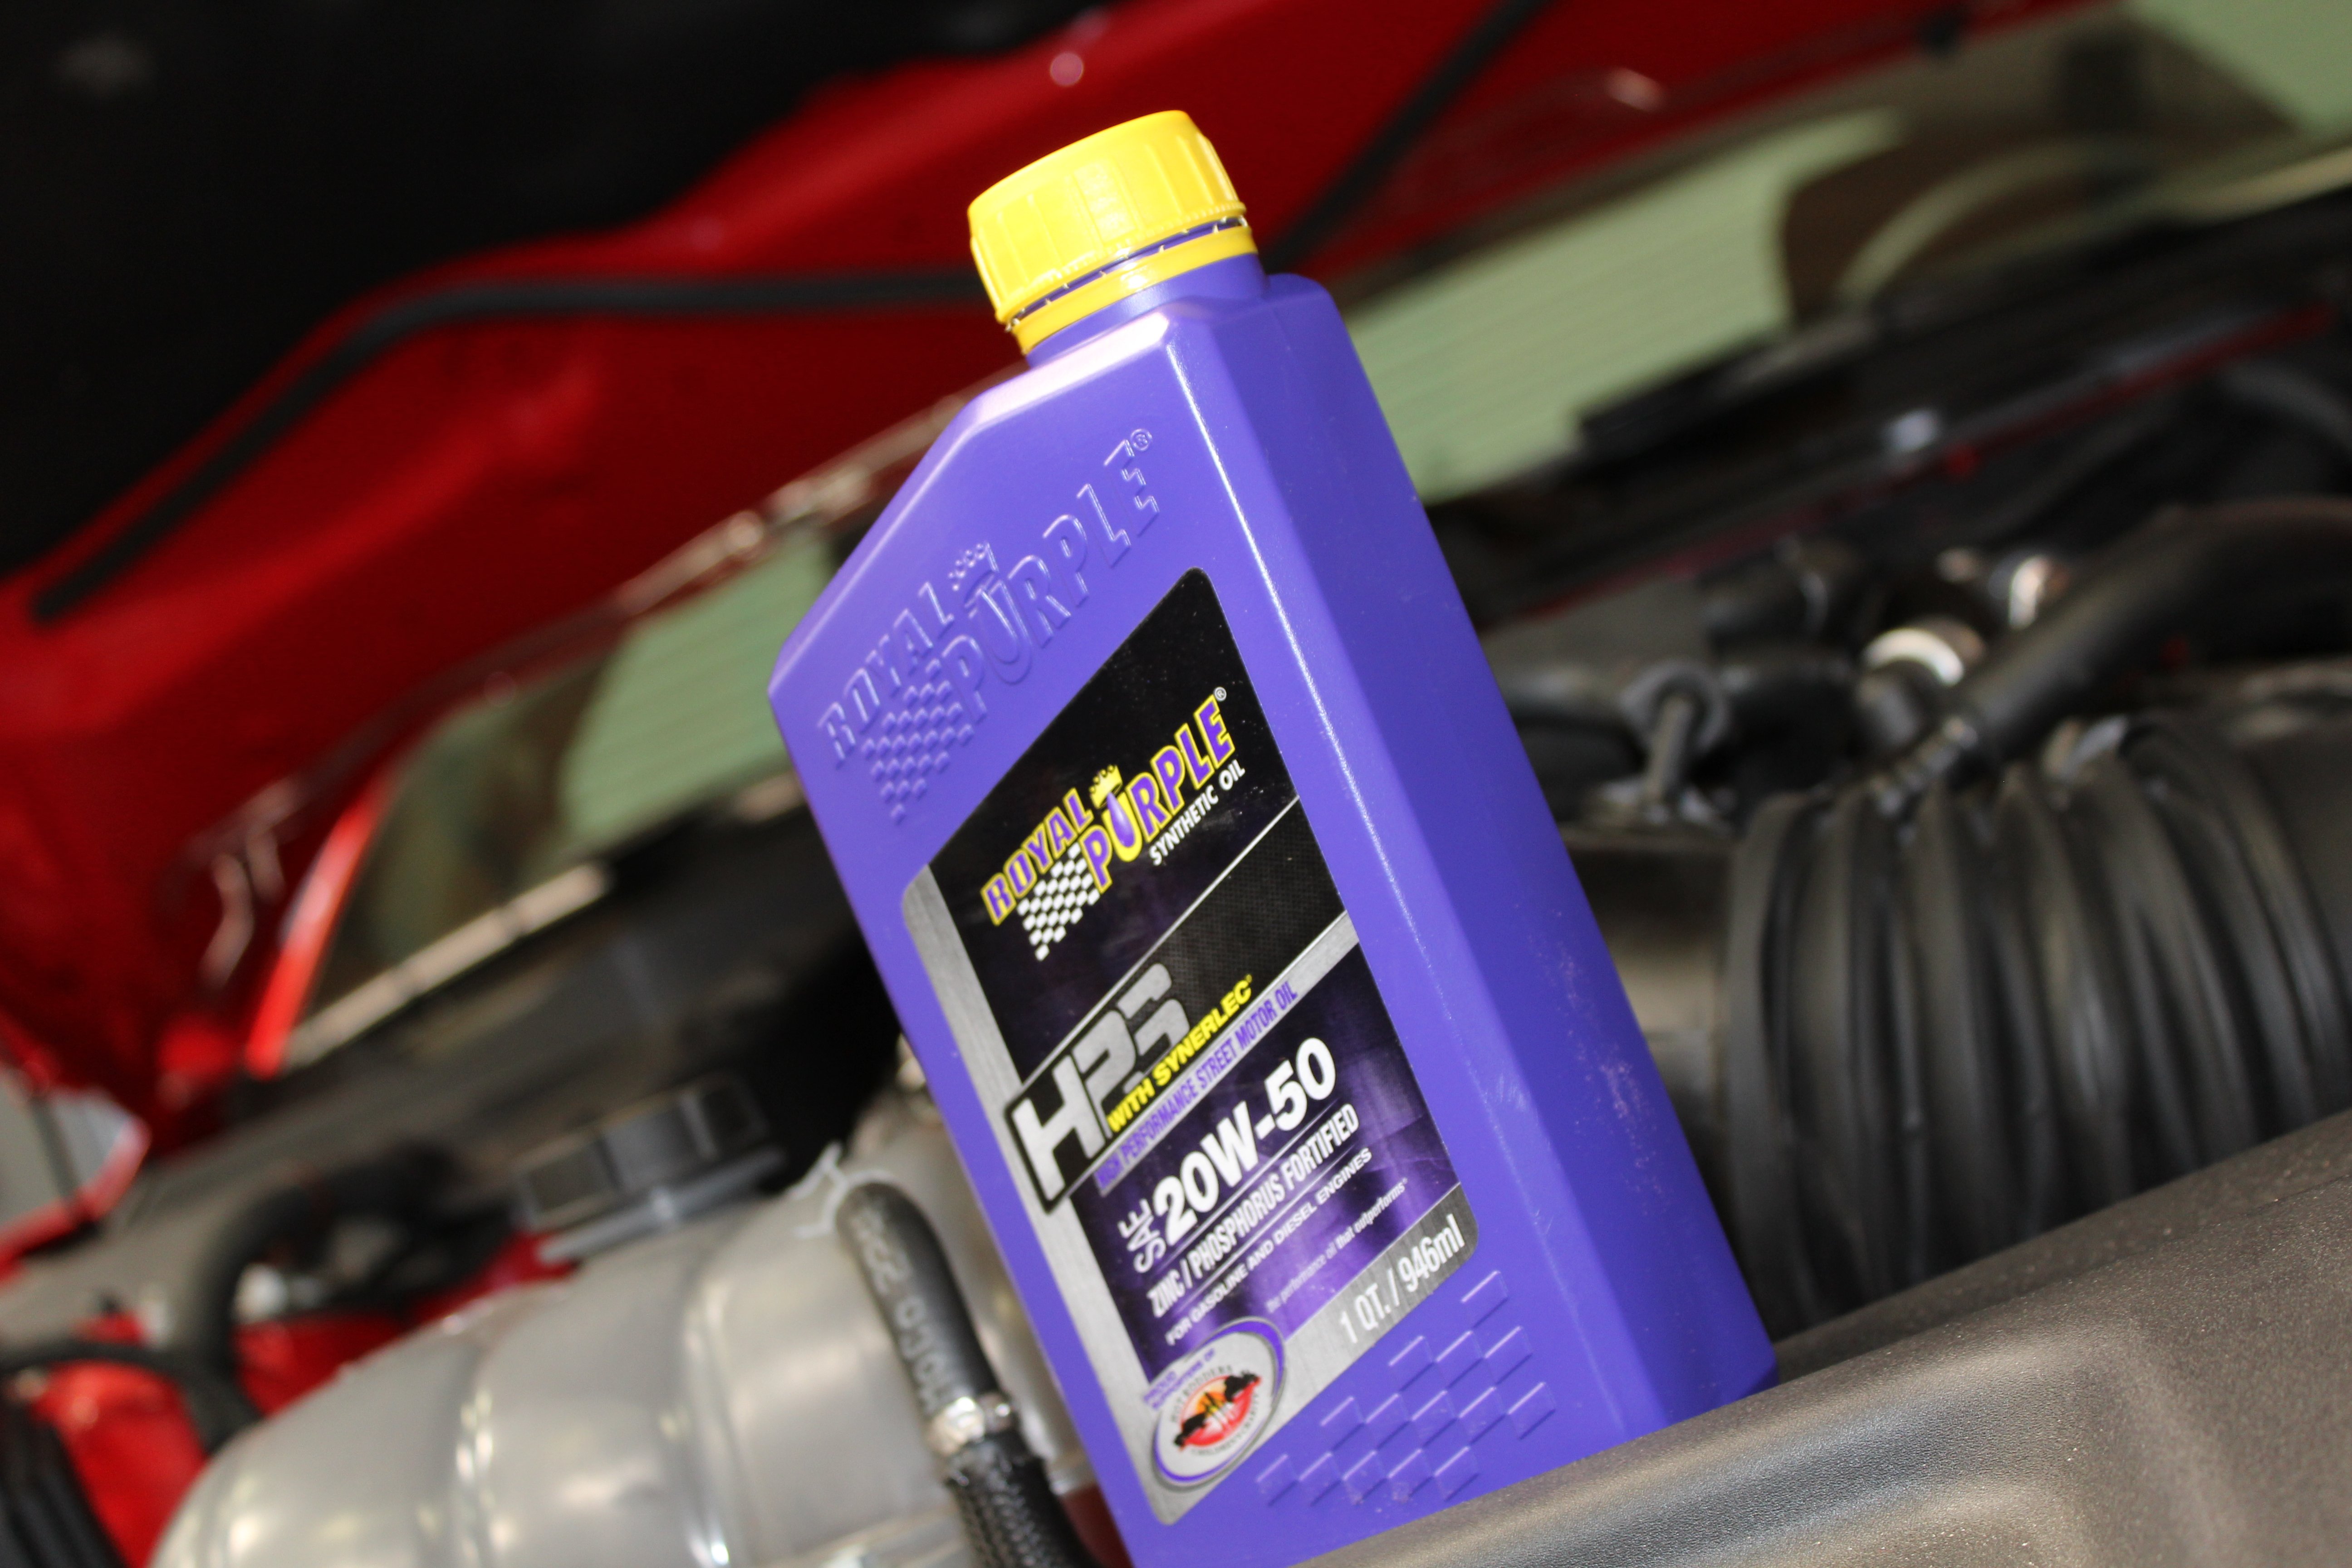
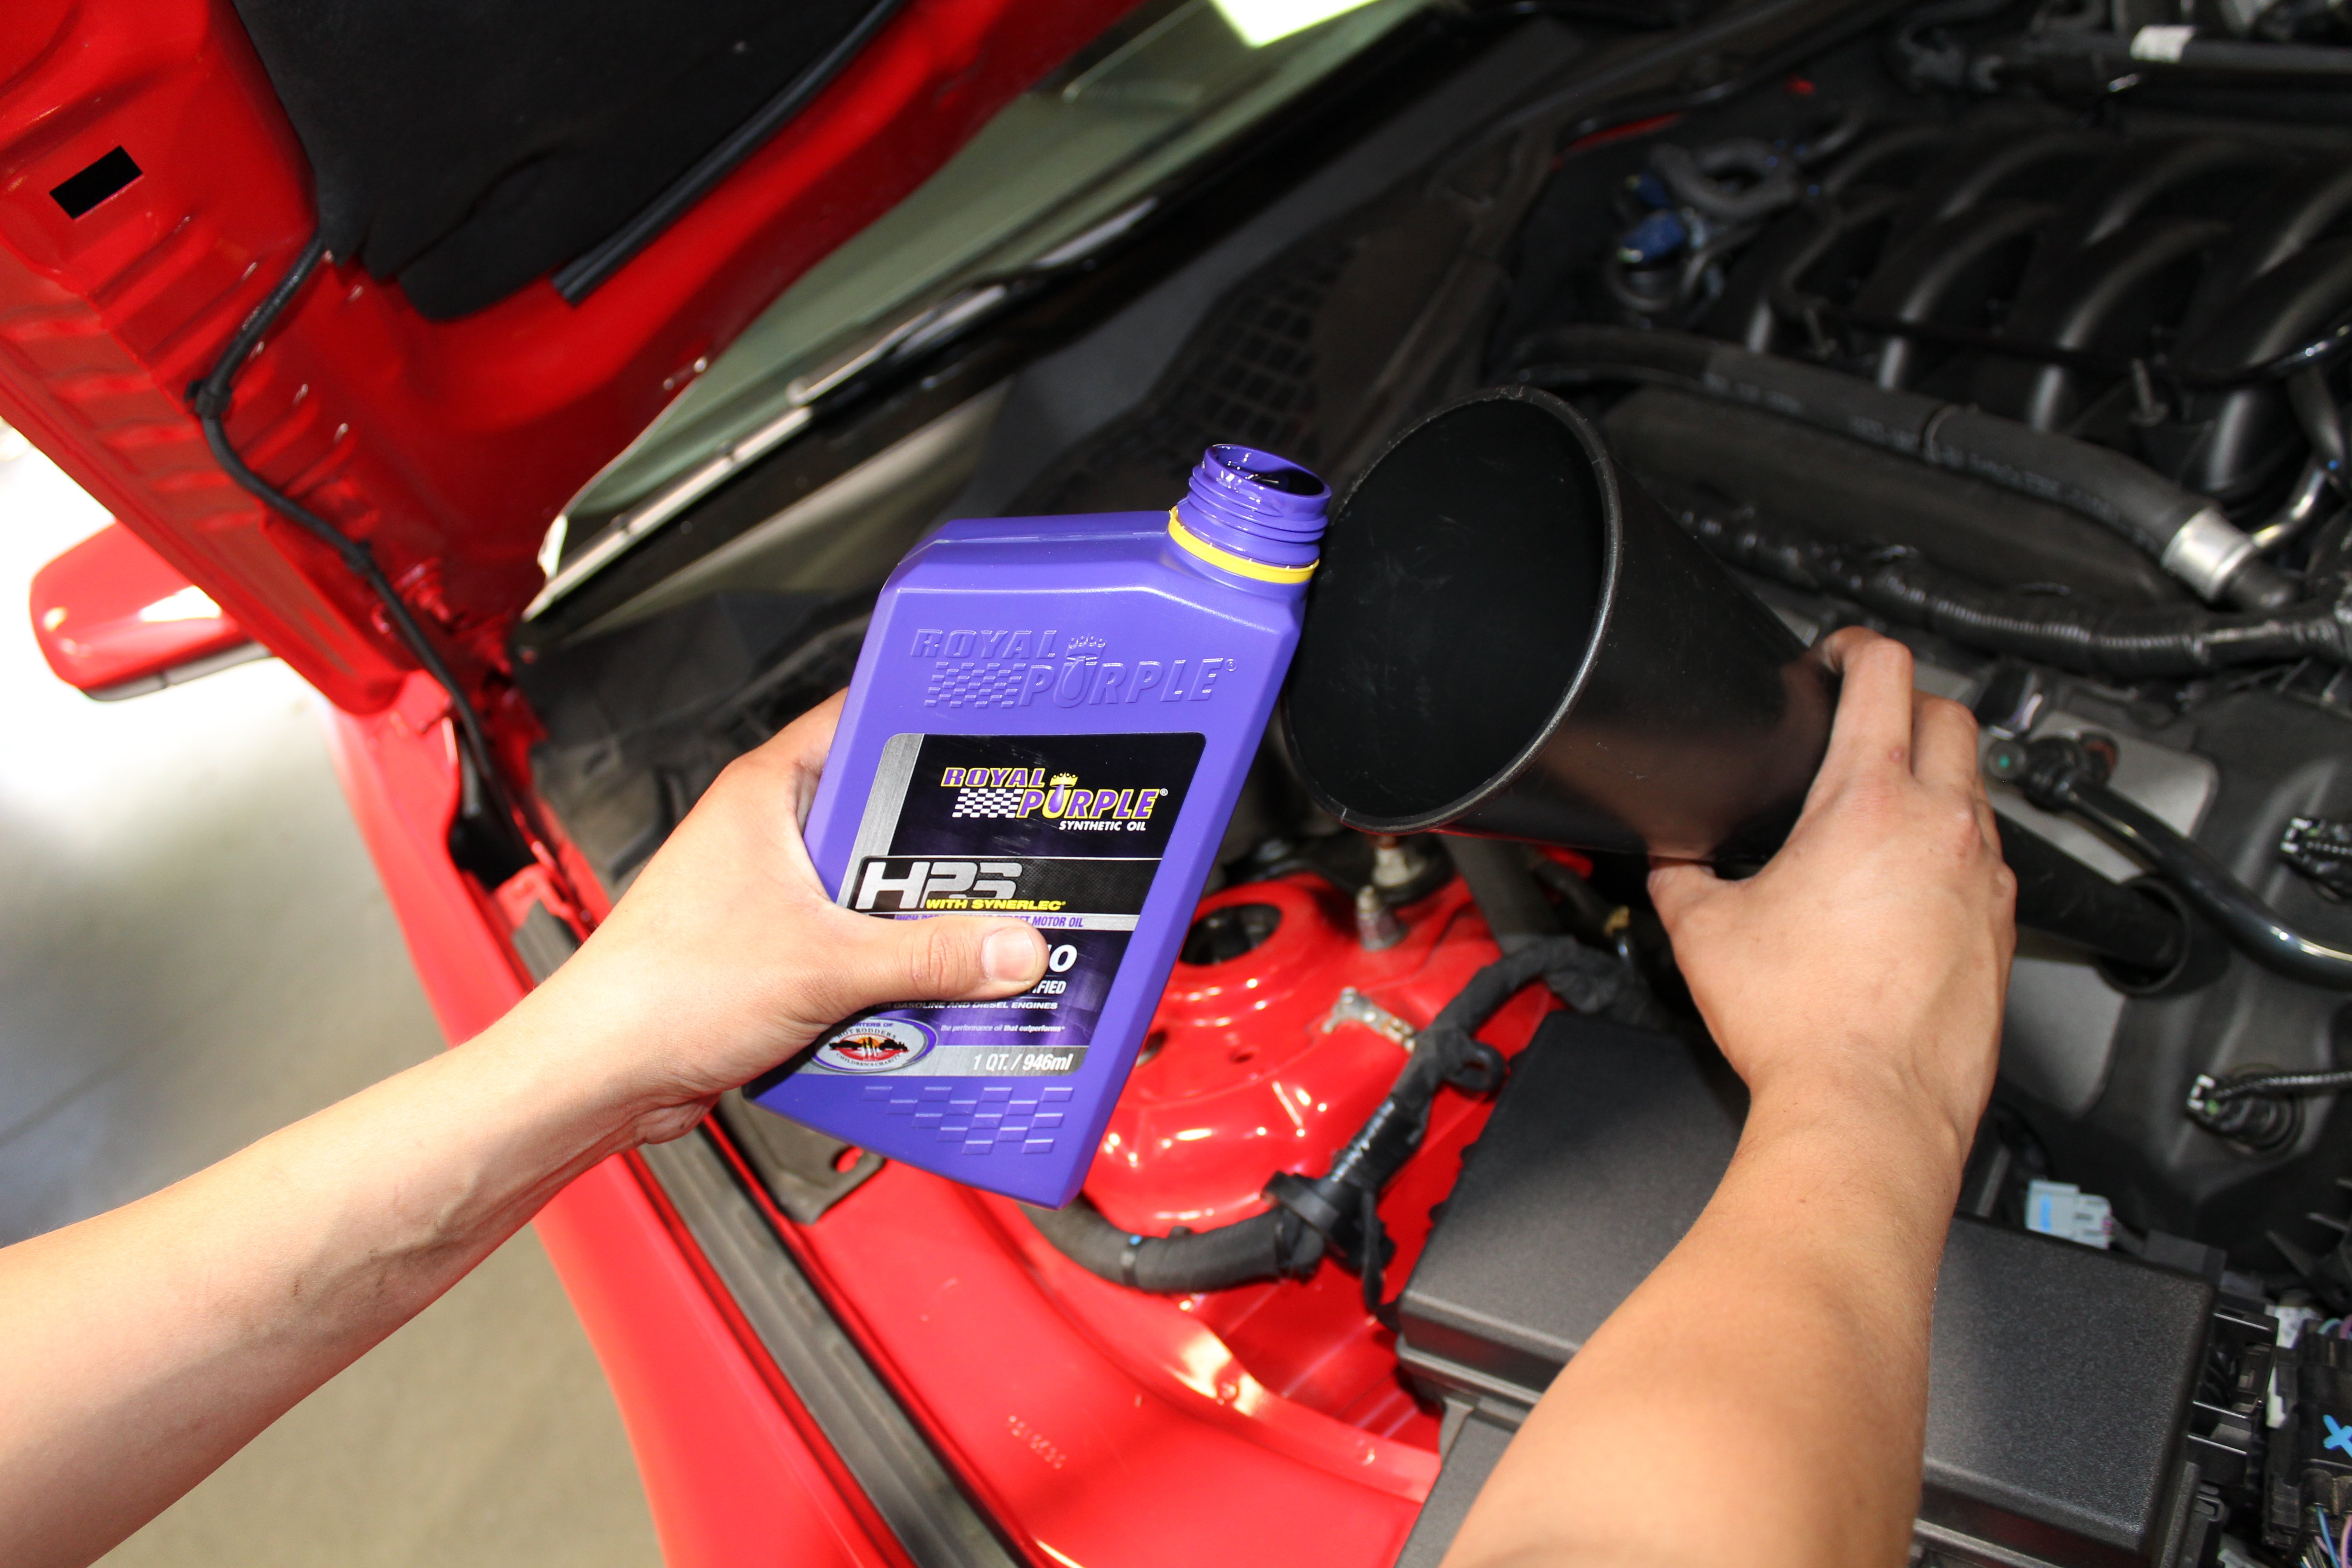
We rounded out the upgrades by installing a fresh set of E3 spark plugs (PN E3.74) and filled the crankcase with Royal Purple 5W50 oil. The plugs are said to increase power, reduce fuel consumption and improve hydrocarbon emissions, while the oil is said to reduce wear and improve piston sealing for more power. We can definitely use more power to take out the Camaro, but we want to keep that oil clean, so we also installed one of Royal Purple’s synthetic filters.
“The suspension upgrades will allow us to put the power to the ground for the drag strip and help us on the road course with all that extra added power to keep it planted during the turns,” Fred added. “Meanwhile, the intake manifold and throttle body will allow us to rev the boosted Coyote to the moon while the headers let the engine breathe and help dissipate the exhaust gases to lower the cylinder-head temperatures.”
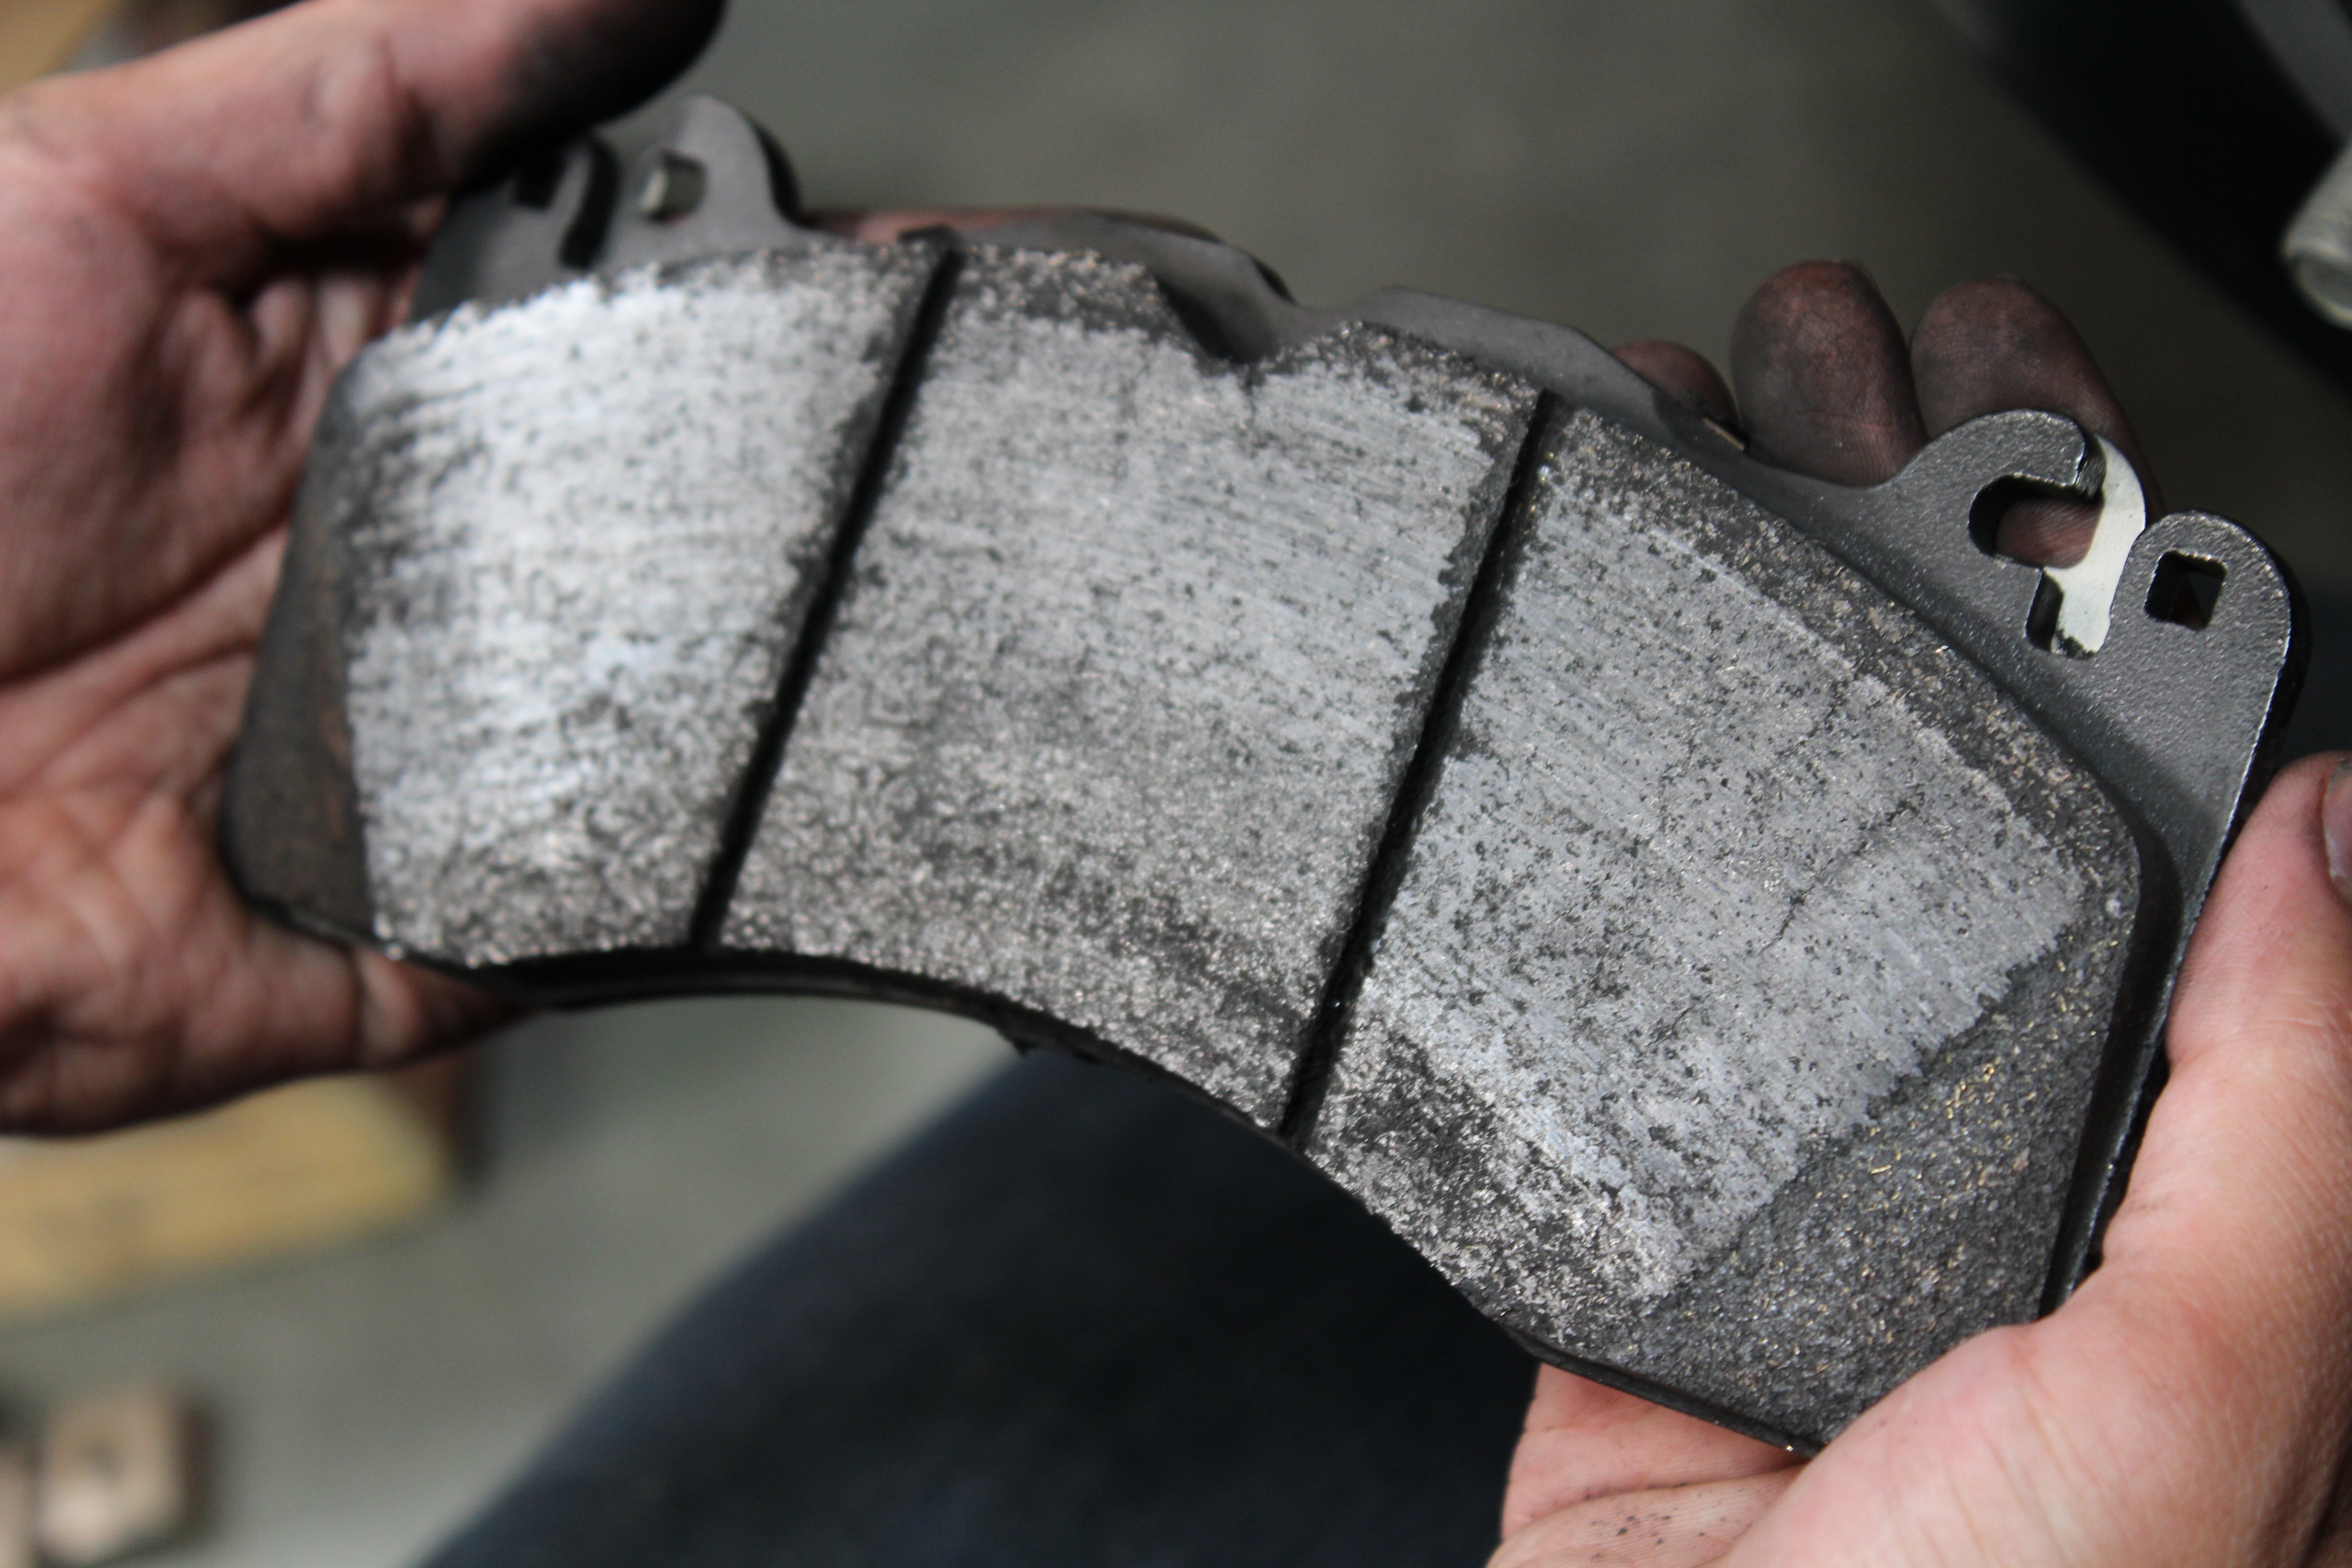
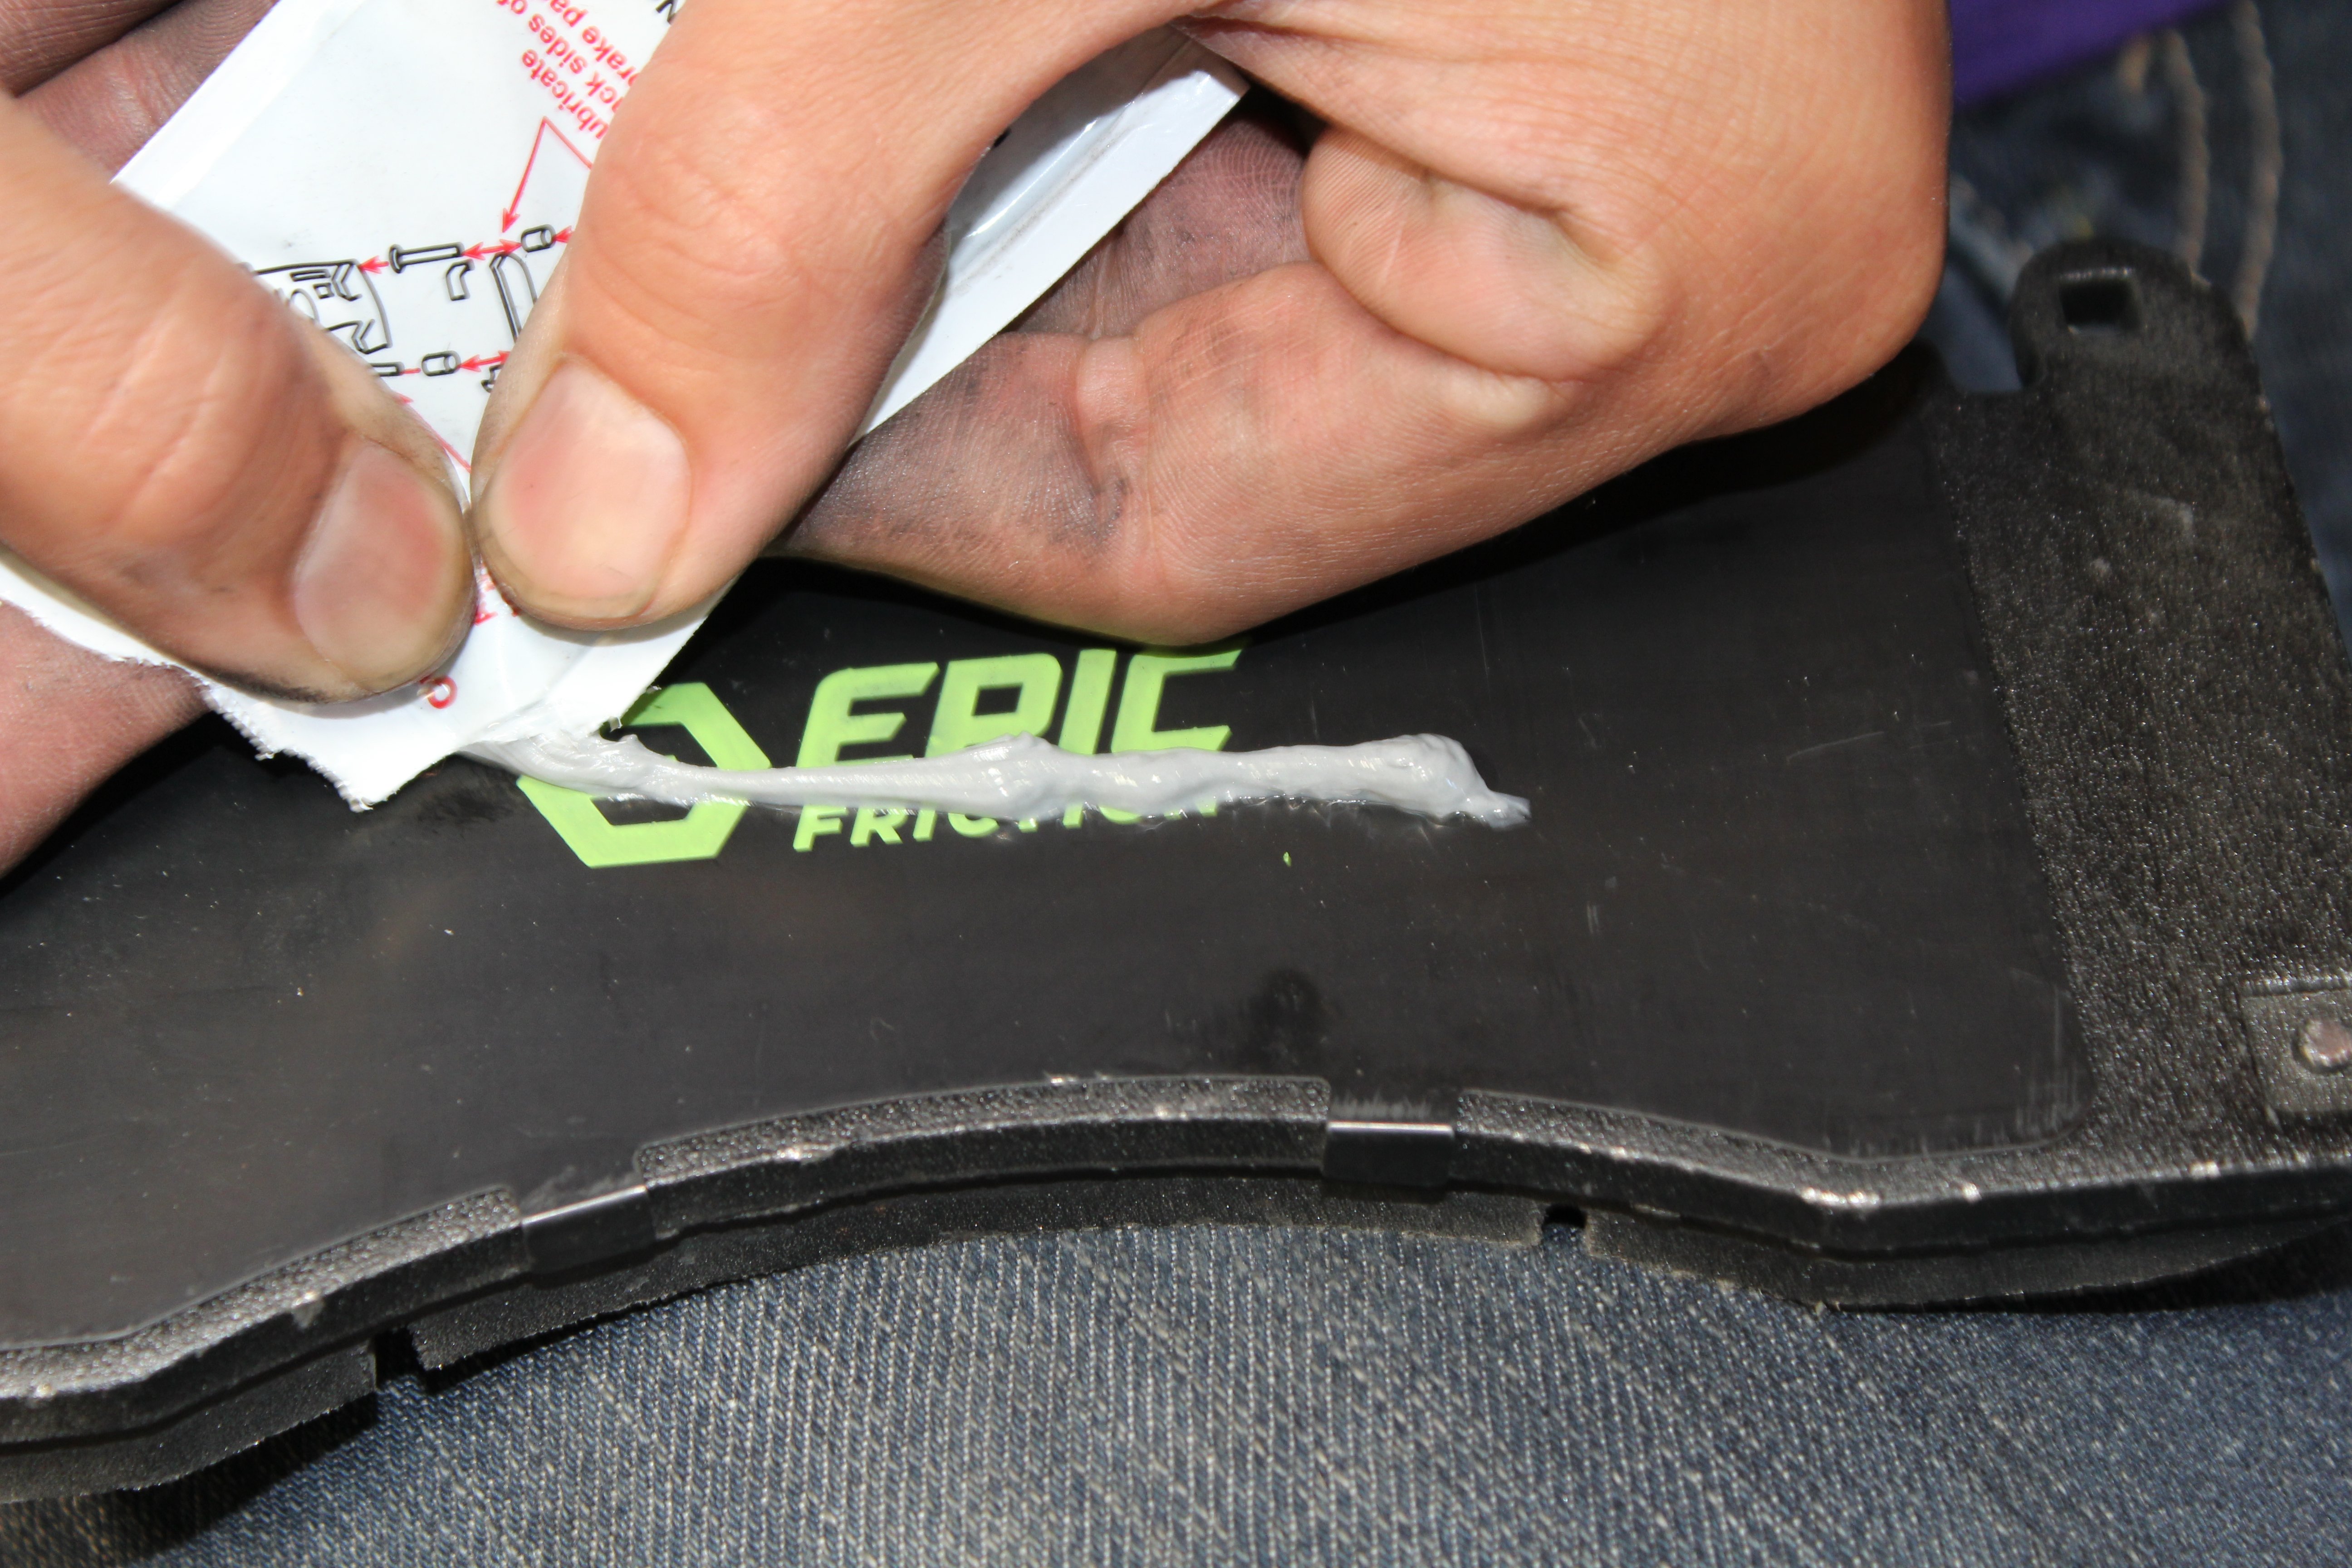
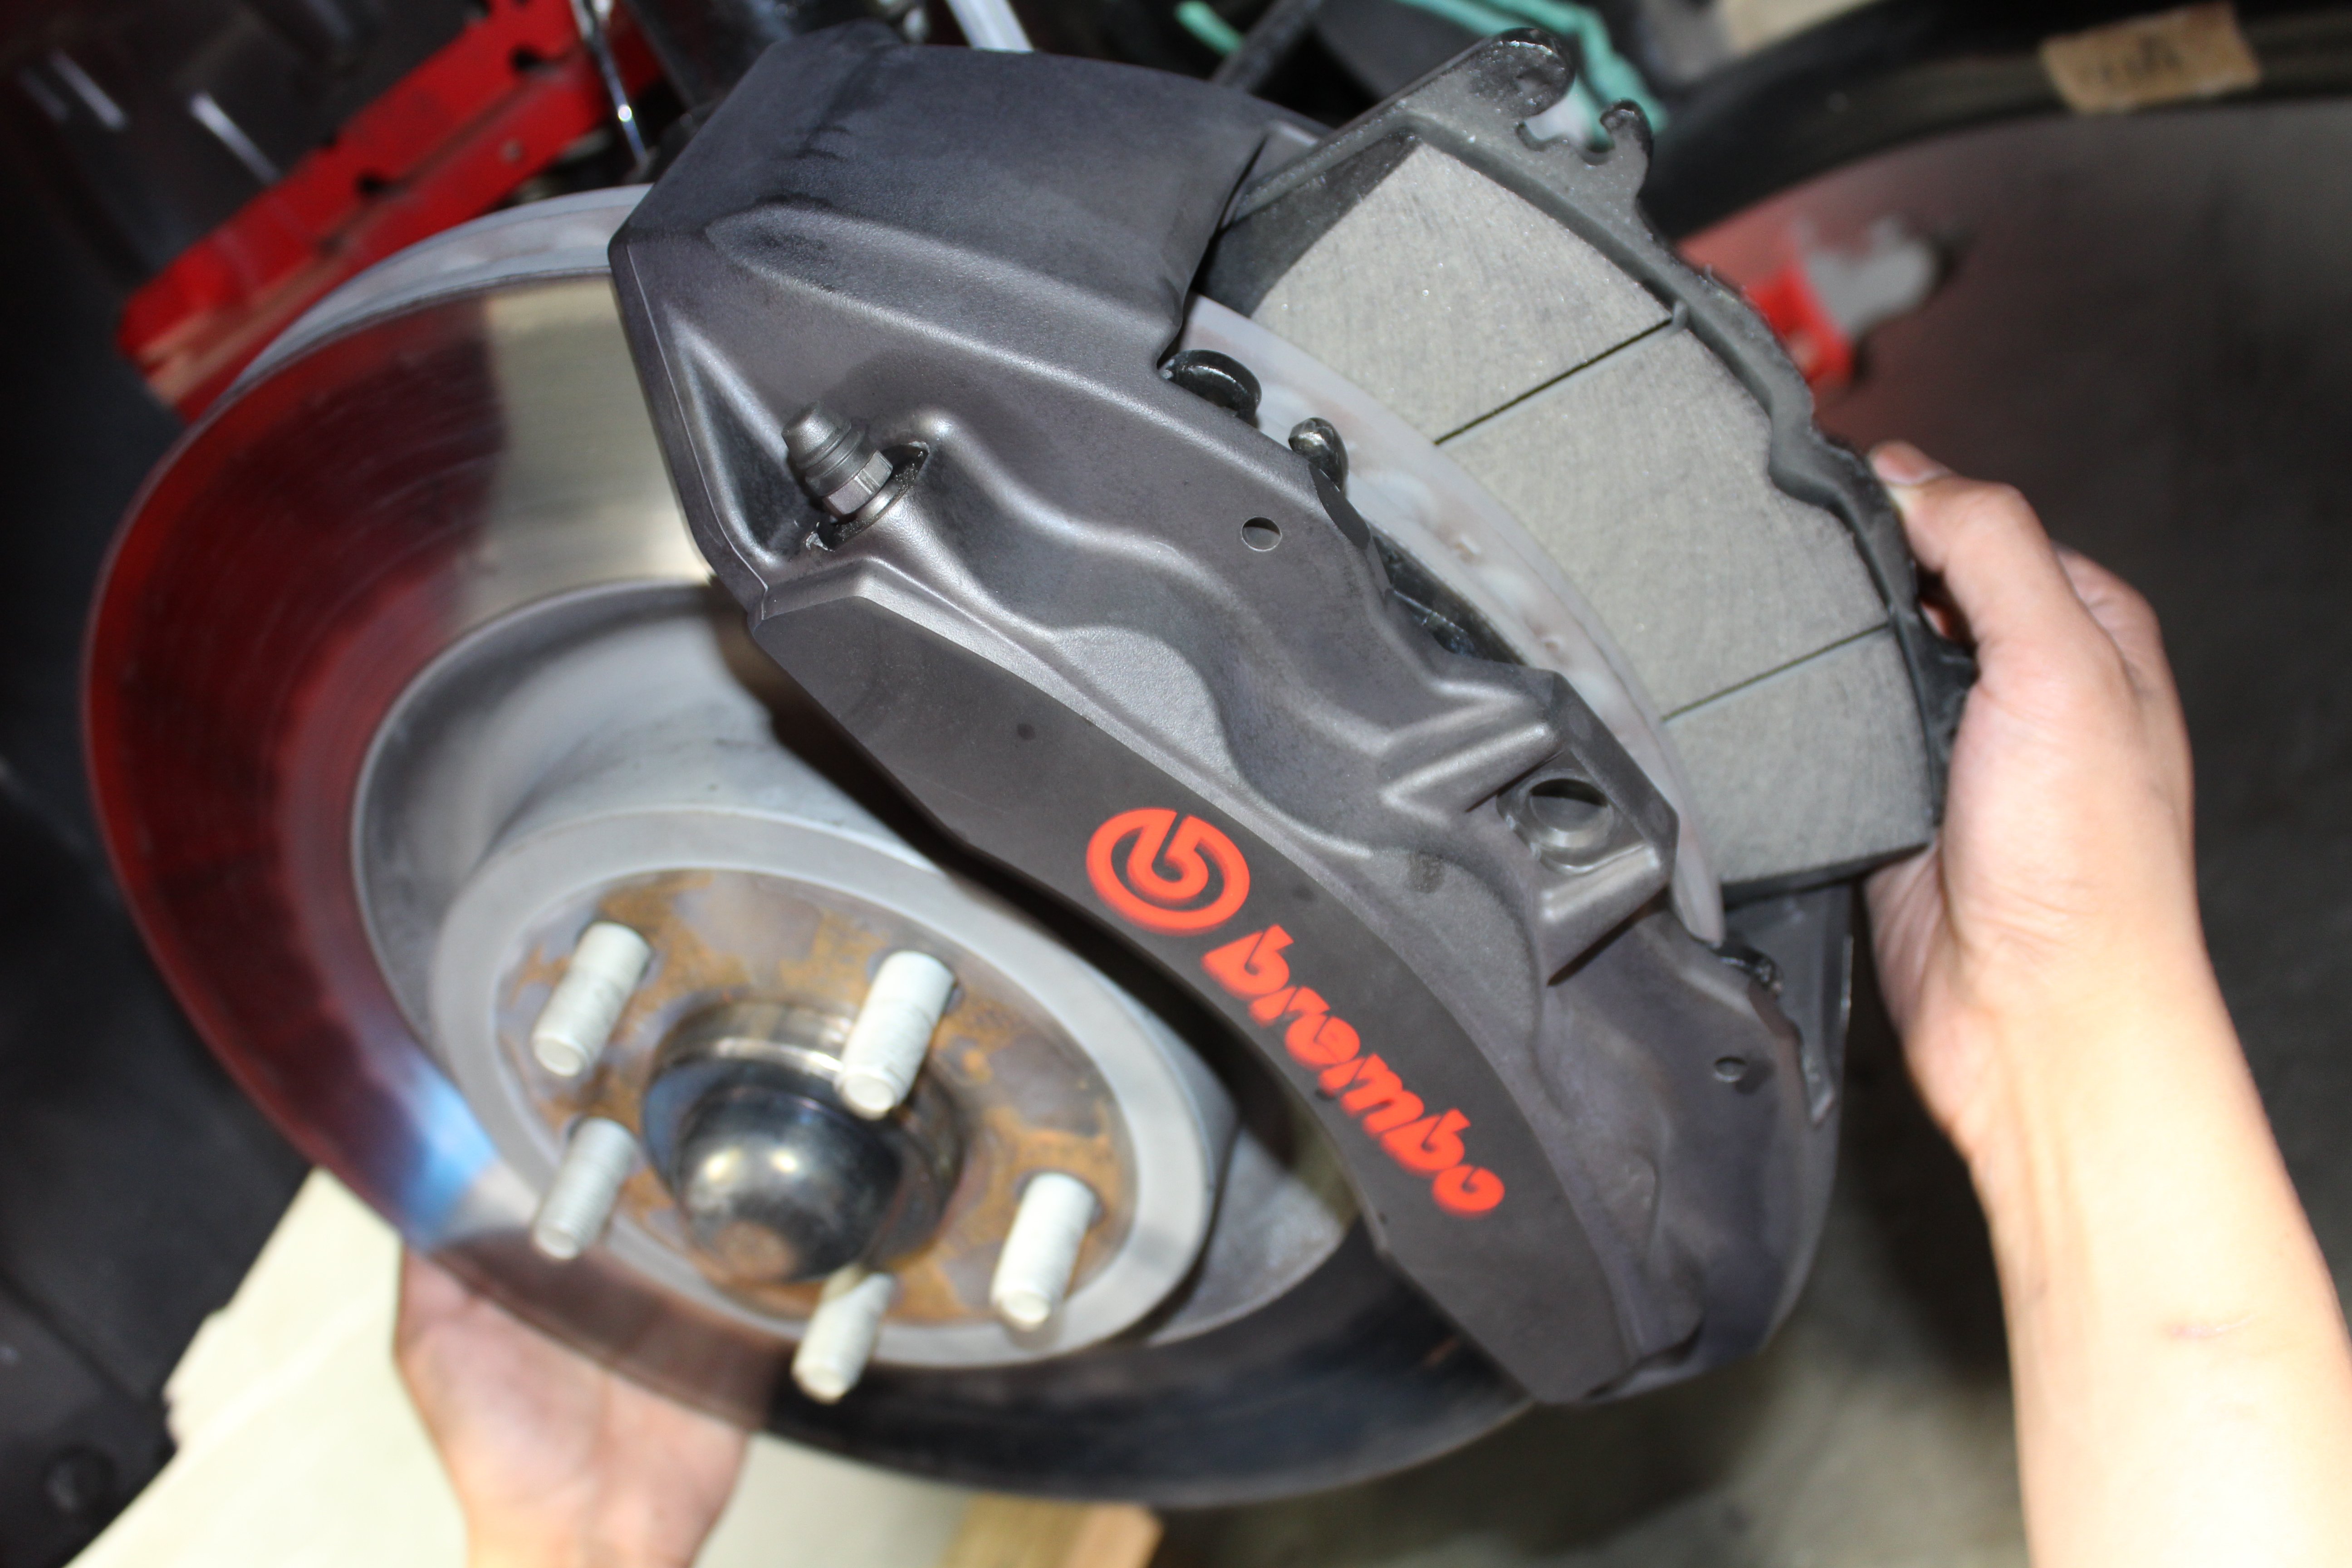
During our Mustang’s baseline testing, its stock Performance Pack pads got trashed, so before heading into the first-round of post mod-testing, we installed a set of Epic Friction’s high-performance pad (PN EF3F and EF2R), which are designed to improve our stopping distances while remaining quiet and keep the brake dust output low.
Of course, to see exactly how our first phase delivers in all the competitions and what we have planned for Phase 2, you will have to stay tuned to FordNXT and the Horsepower Wars site. This competition is backed some of the biggest names in the automotive aftermarket — including ARP, BMR Suspension COMP, Covercraft, DiabloSport, Dyna-Batt, E3 Spark Plugs, Holley Performance Parts, Mahle, Mickey Thompson, ProCharger, QA1 Royal Purple, Summit Racing, TCI, Weld Racing, and others — and it’s going to be a wild ride over the next few months as these ponycars continue the battle.
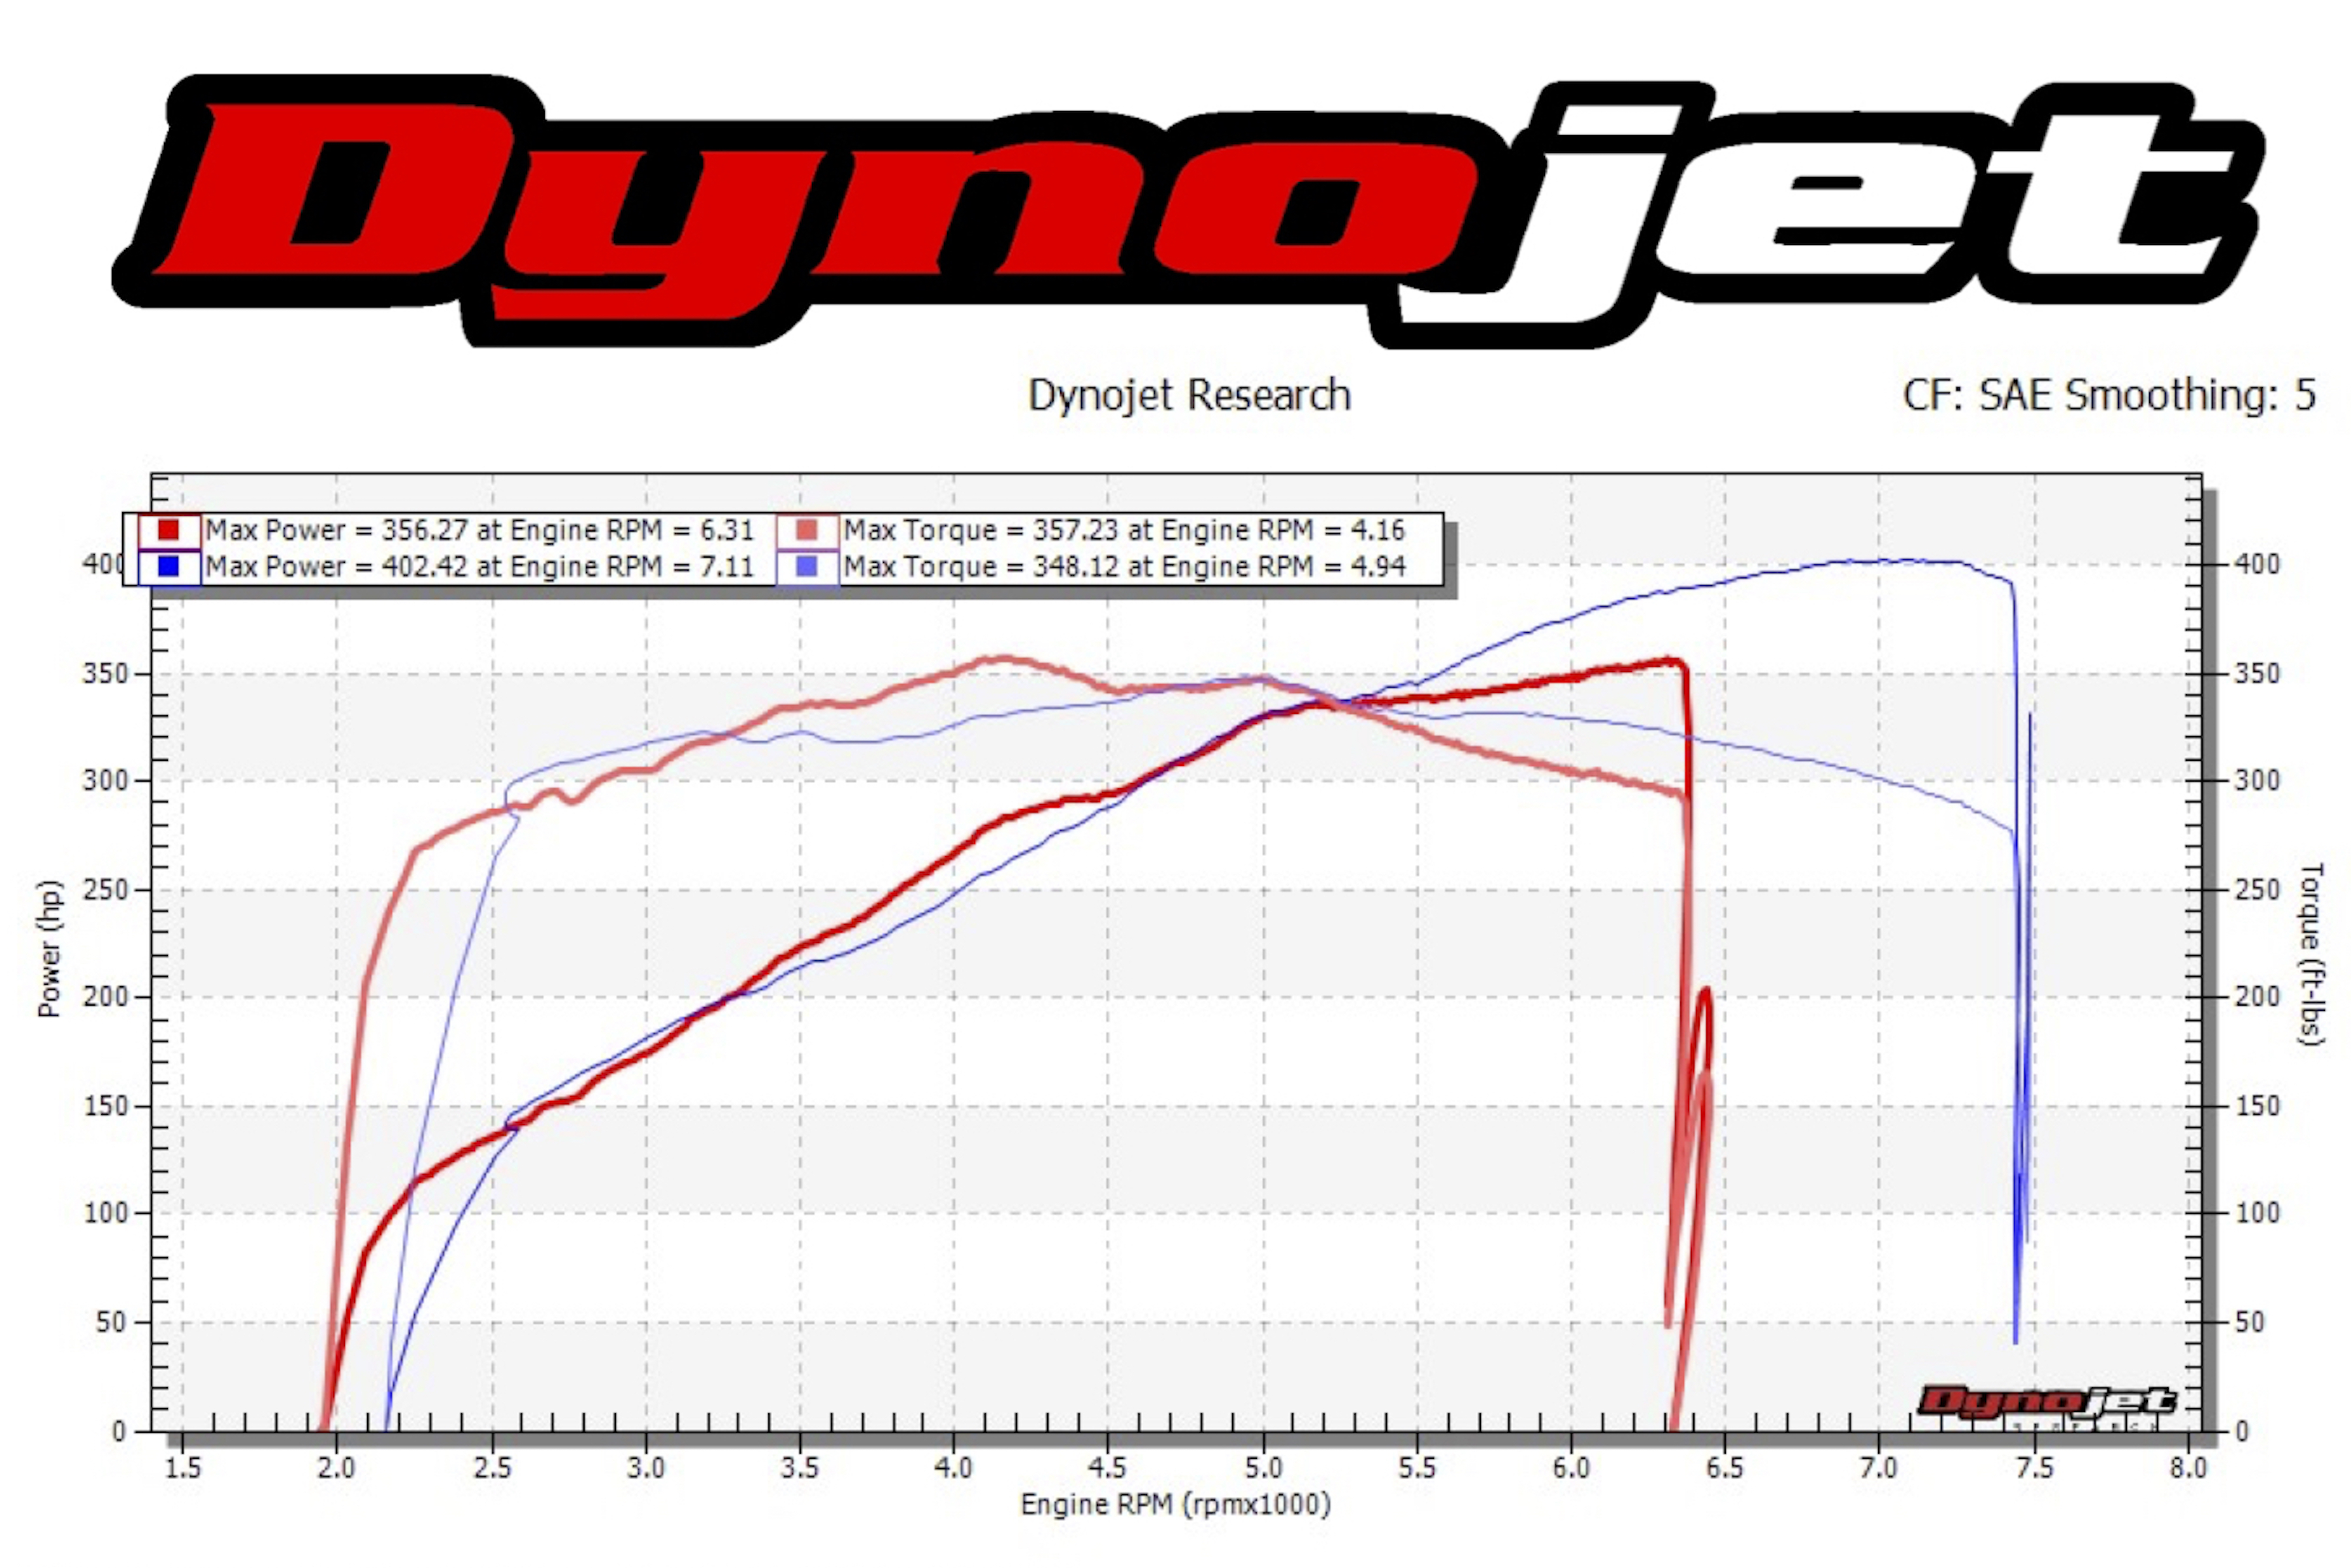
As a result of this $5,000 round of mods, our 2017 Mustang GT picked up 46.15 horsepower at the wheels. It did give up 9.11 lb-ft of torque in a quest for high-winding performance, but it’s the power that counts here. To see how it stacked up the Camaro competition, be sure to read our comparison story.