With Fox body Mustangs now surpassing the 20-year mark since their production ended, the need for many of these cars to have their interiors restored is more apparent than ever. Fortunately LateModelRestoration.com specializes in virtually everything for 1979 and newer Mustangs. In this case they provide many new, and reproduction pieces necessary to give any Mustang’s interior a makeover worthy of a cable TV show.
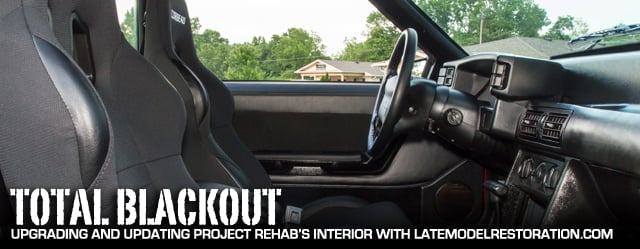
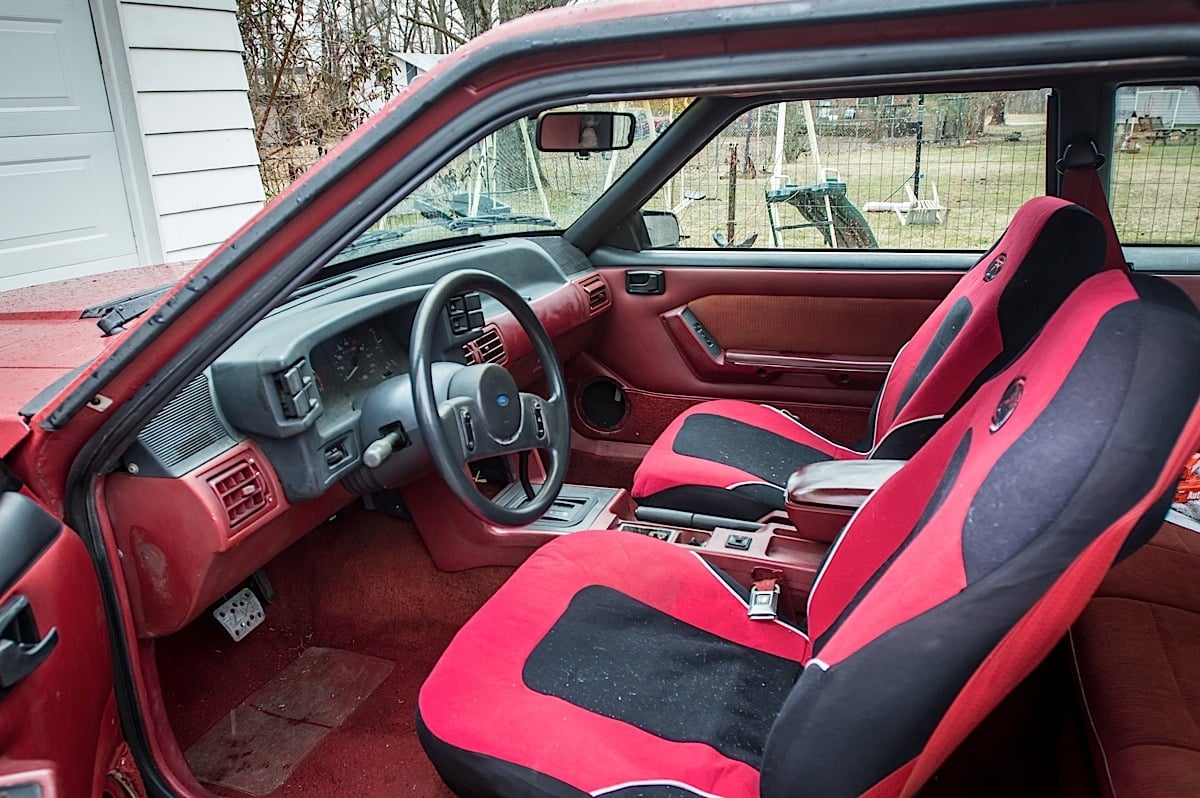
Our 1988 Mustang, Project Rehab, could definitely use an interior makeover. The car’s original scarlet interior has suffered more than it’s share of years of neglect, abuse, and outdoor living. Restoring and restyling the interior of a car can have a dramatic impact on enjoying time behind the wheel. LateModelRestoration.com provided us with everything necessary to bring our Fox’s interior back up to showroom quality. While there might be an argument for retaining the scarlet interior color, we’d prefer to take the Henry Ford approach in this case – any color you want, so long as it’s black. So not only are we replacing many of the worn out pieces and parts on Rehab, we’re also converting the interior to a color that’s less likely to induce road rage.
Rehab’s Scarlet Interior may have been stylish back in 1988, but years of wear, and UV damage have made it disgusting and ugly. The parts store seat covers and brake pedal weren’t exactly doing anything for us either.
Why LateModelRestoration.com
We sell Fox body Mustang parts because we have an extreme passion for these Mustangs. At some point, almost every employee has owned a Fox Body Mustang. -Jeff Jimenez, LateModelRestoration.com
LateModelRestoration.com was eager to help us with our interior restoration project for Project Rehab. We spoke with the company’s Jeff Jimenez about why Fox body Mustangs are so important to them, “We sell Fox body Mustang parts because we have an extreme passion for these Mustangs. At some point, almost every employee at LatemodelRestoration.com has owned a Fox body Mustang.”
Ford stopped making most new parts for the Fox body long ago. However, LateModelRestoration.com purchased much of the tooling available to continue to manufacture those parts. “Many of our 5.0Resto parts are made from Ford original tooling. Just because the Ford original parts are no longer available from a dealer doesn’t mean you can’t have Ford Original parts. 5.0Resto has spent the last 14 years working hard to bring Mustang enthusiast quality restoration parts,” says Jimenez.
Teardown
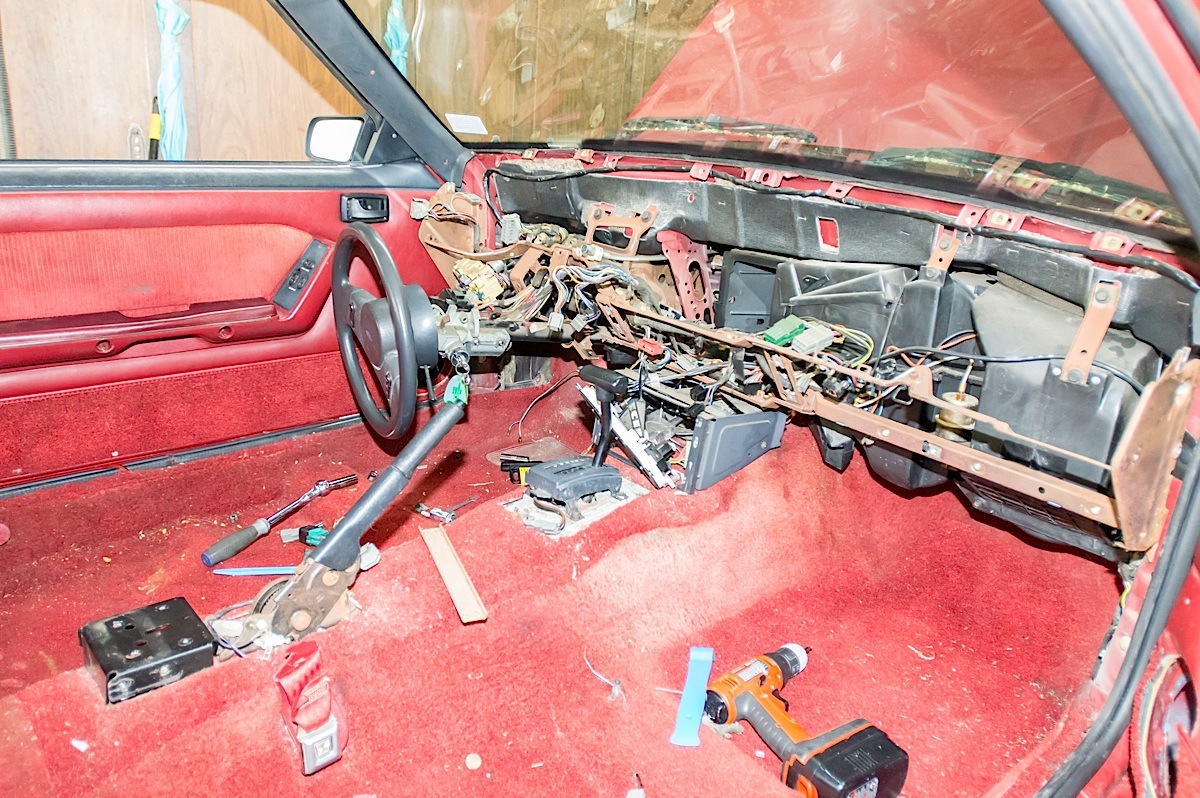
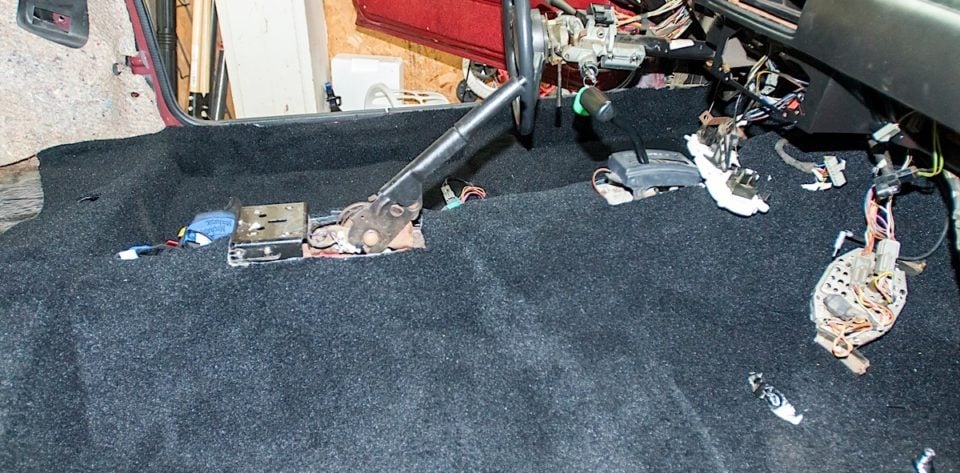
Tearing down the interior in a Fox body is a little time consuming, especially if you’re accustomed to working on late-model Mustangs. There a large number of screws, bolts, nuts, and clip fasteners holding everything together. We began by getting the stock seats out of the way, followed with the center console. With the console removed we took out the instrument cluster and the plastic dash shell.
We began tear down by removing the seats, console and plastic dash, leaving the dash frame in place. If you need to replace the heater or evaporator core, now is the time to do it as you’ll never have better access.
We then removed all of the interior trim surrounding the carpet and headliner, even the rear seat panels. Finally we pulled out the the carpet, headliner, and package tray.
Three Holes
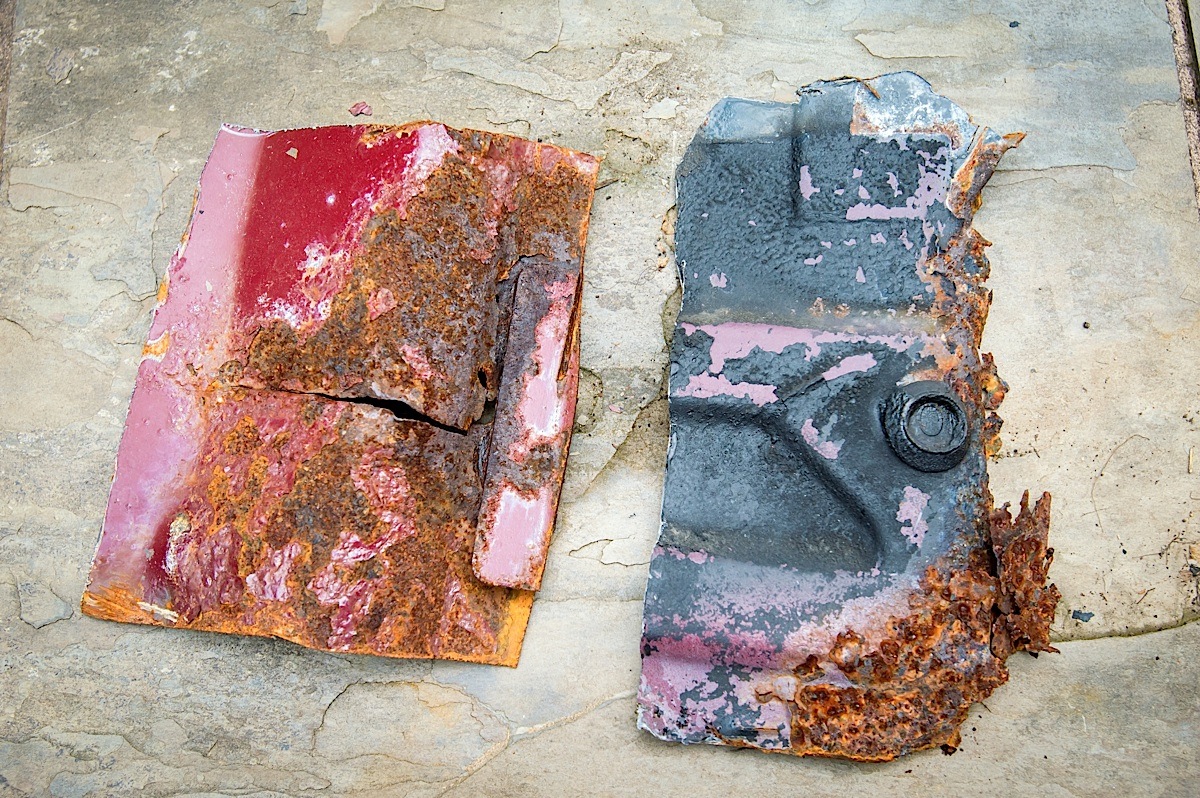
Initially when we purchased Project Rehab we thought we had one minor soft spot in our floor pans. Upon tearing out the interior we found that there were three holes in the floorpan that would have to be addressed. Editor Creason spent the better part of a day working on his welding and fabrication skills to cut out the old rot and secure new metal.
These are what remains of two of the three rusty sections of floor pan we cut out of the car. As you can see someone had sprayed cheap rubberized undercoat on these areas in a vain attempt to stop the rust
We could have opted to replace the floor pans, but that is a much larger job. It’s also a great deal more expensive and something not in our plan for Project Rehab. Since the remainder of the floor pan is in good condition we simply chose to take the patching route.
New Color
Paint or Dye?
Jimenez recommended either locating a factory black dash and console shell, or finding another way to recolor those parts.
After consulting with some friends in the automotive paint and restoration business, the general consensus was to use automotive exterior black paint. We loaded a cheap HVLP spray gun with paint and went to work. It took about a quart of mixed paint to cover the dash and console with three coats. The end results look great and we should have a lasting finish on our dash and console.
LateModelRestoration.com sent us a large quantity of their interior spray dye, part number FV7 which we used on our rear panels, A-pillar trim, and kick panels. As with any paint work the secret here is good prep. We cleaned each part individually and then wiped it down with a solvent based cleaner before applying the dye. This gave us the best overall results and should last a long time.
In talking with Jimenez about the dash and console, he recommended either finding an OEM black dash or an alternative to the dye. Apparently some customers had issues with the dyeing the dash and console.
Taking this advice, we chose to use automotive exterior paint. It provided a relatively quick and easy way to paint the two large pieces with their complex curves.
Seats
Project Rehab was originally equipped with base model cloth seats. 25 years later, those seats have definitely seen better days. The recline mechanism was broken on both front seats giving them the notorious “gangsta lean”. They were also covered with cheap parts store seat covers…and when we removed those we found out why. We nearly gagged at the fade, wear and tear, and enough dirt to make us regret not going through a high level decontamination after every drive
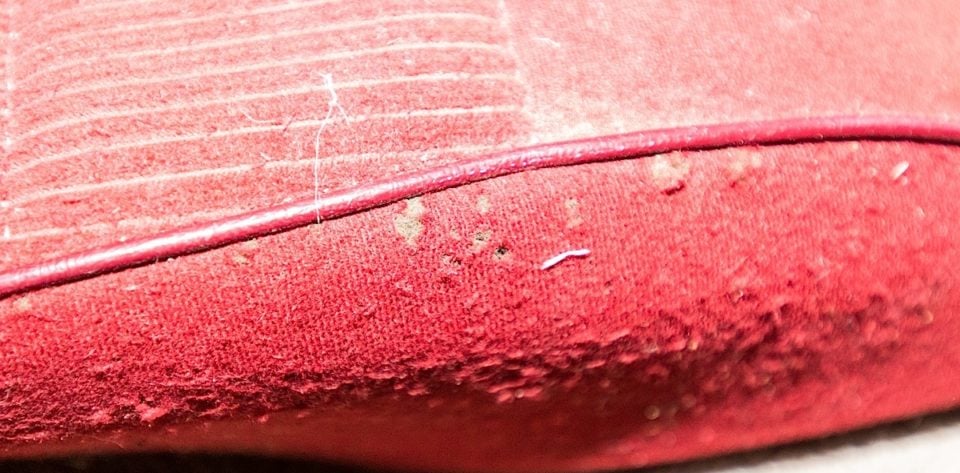
Our rear seat upholstery had definitely seen better days. Fortunately the foams were undamaged and ideal candidates for reupholstering.
The rear seats were a weird looking combination of orange and mauve due to years of sun exposure. The foam was in decent condition, with no real signs of wear – probably from a nearly complete lack of usage.
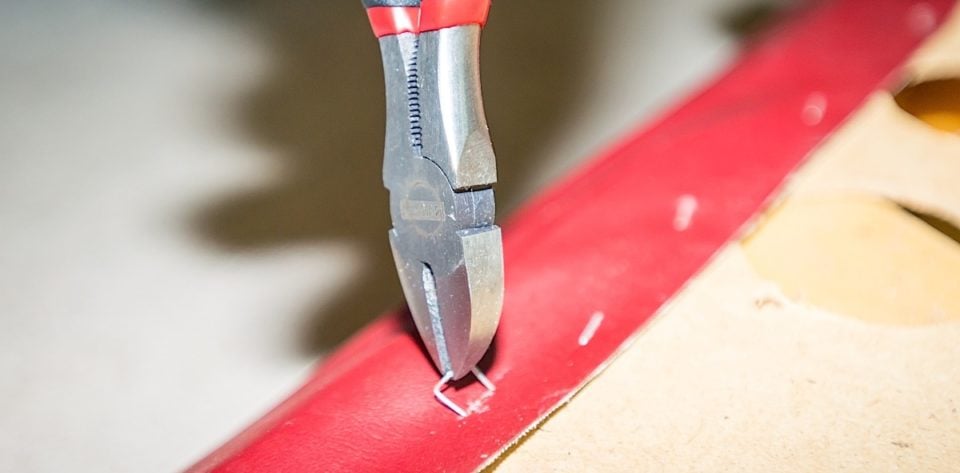
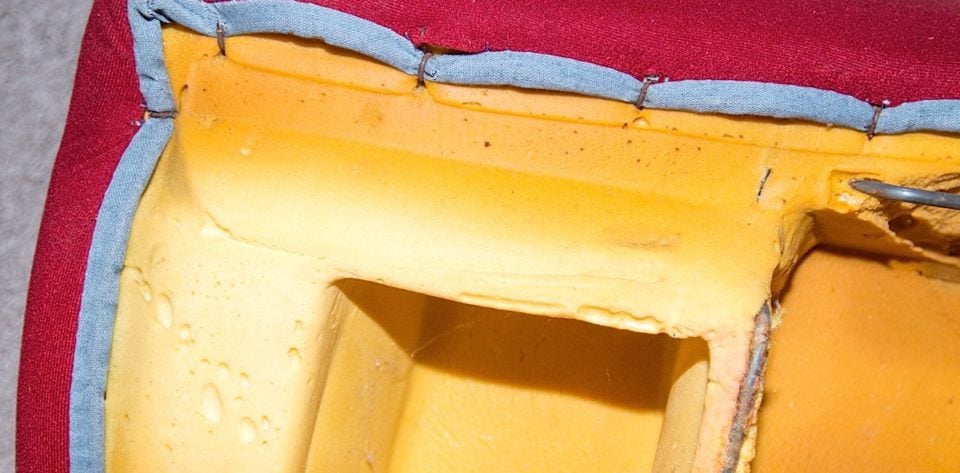
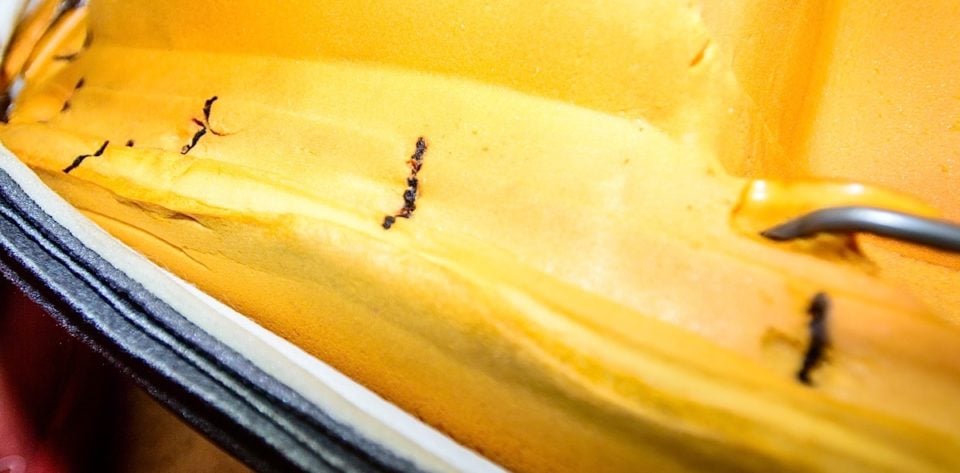
Left to Right: There are two methods for retaining the rear seat upholstery. The seat back upholstery is retained by staples, while the seat cushion upholstery is retained by hog-rings. We spent more time removing staples and cutting the old hog-rings than we did installing the new upholstery. Also we marked the location of the hog-rings on the old seat foam. There are gaps in the metal structure within the foam that give the hog-rings an attachment point. It is critical that those gaps are located and used to attach the new upholstery.
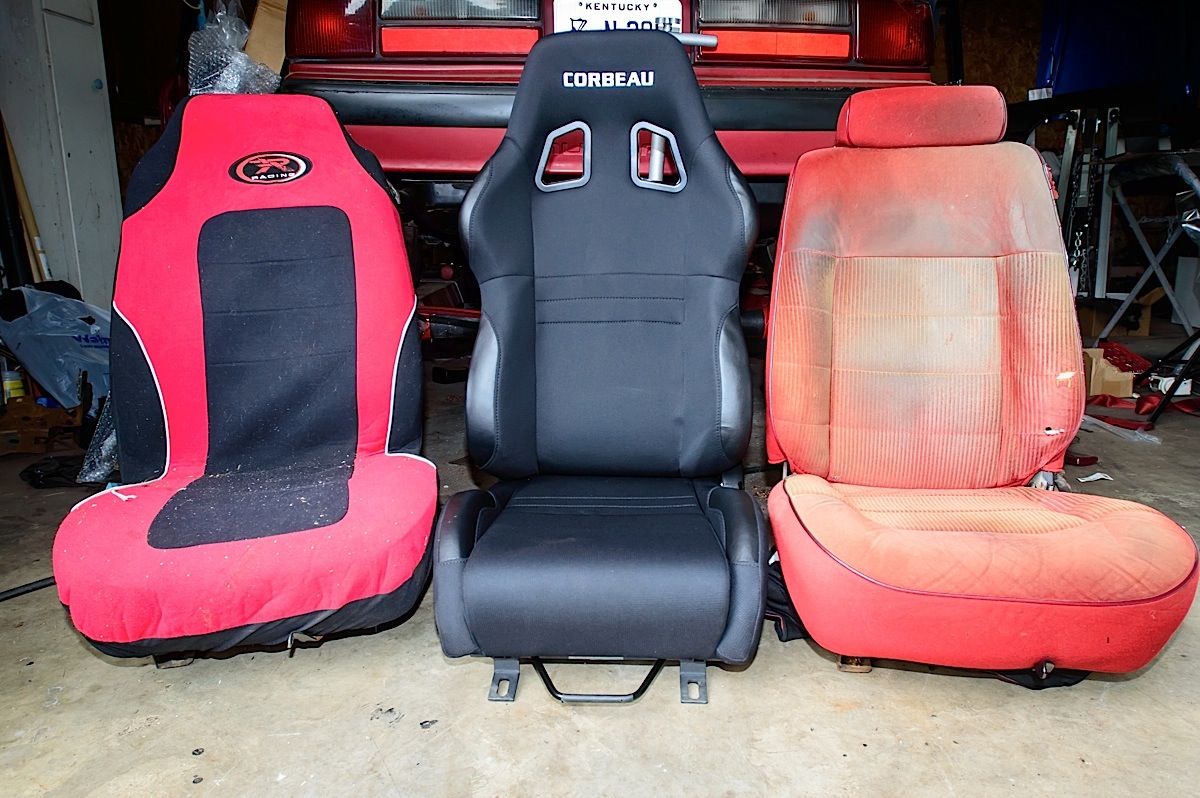
LateModelRestoration.com sent us a set of Corbeau A4 front seats in black cloth, along with matching upholstery for our rear seats, this starts out as a kit with the Corbeau GTS seats, however we upgraded to the A4’s. The base part number for this kit is: CS-20301A-K. This new upholstery kit came about as part of a partnership with LateModelRestoration.com and seat manufacture Corbeau. “We knew that the Corbeau seat material did not match the factory rear seat material. Since we knew that Corbeau seats are such a good replacement option to severely worn out Fox Mustang seats we developed the Corbeau seat package that includes rear Corbeau upholstery. We wanted to ensure Mustang enthusiasts get a package that can provide new performance seats for the front and matching style for the rear,” says Jimenez.
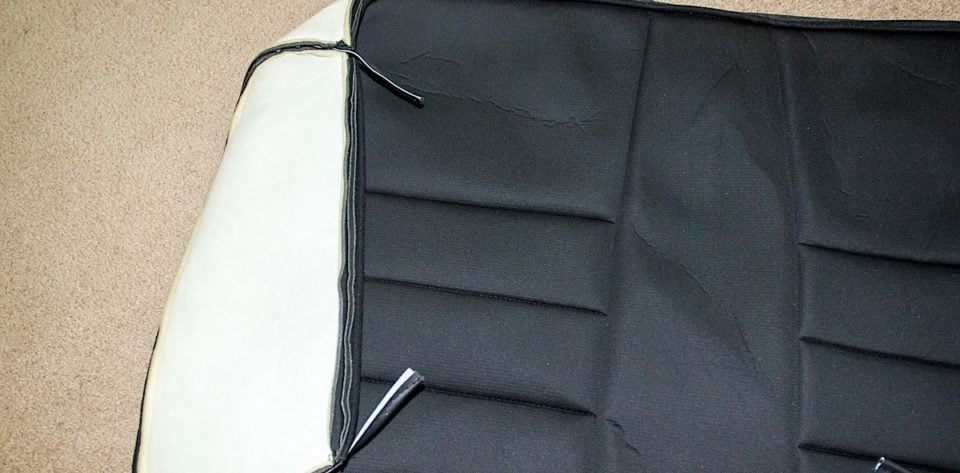
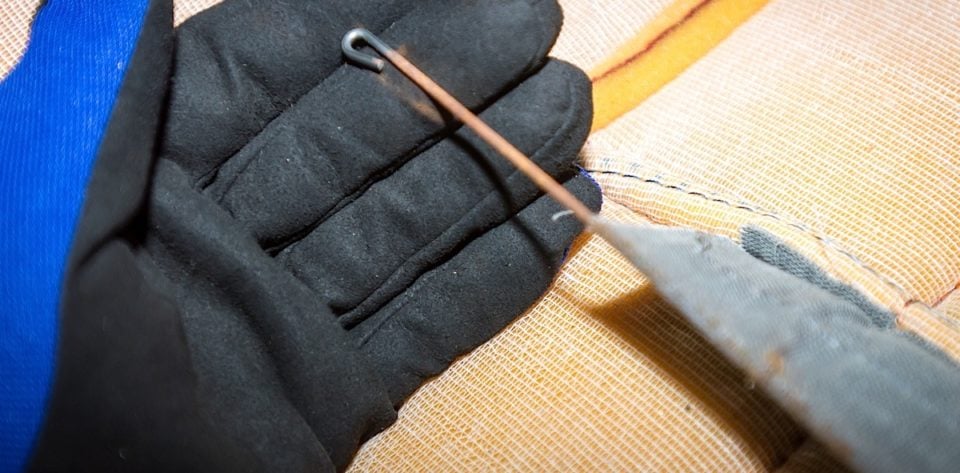
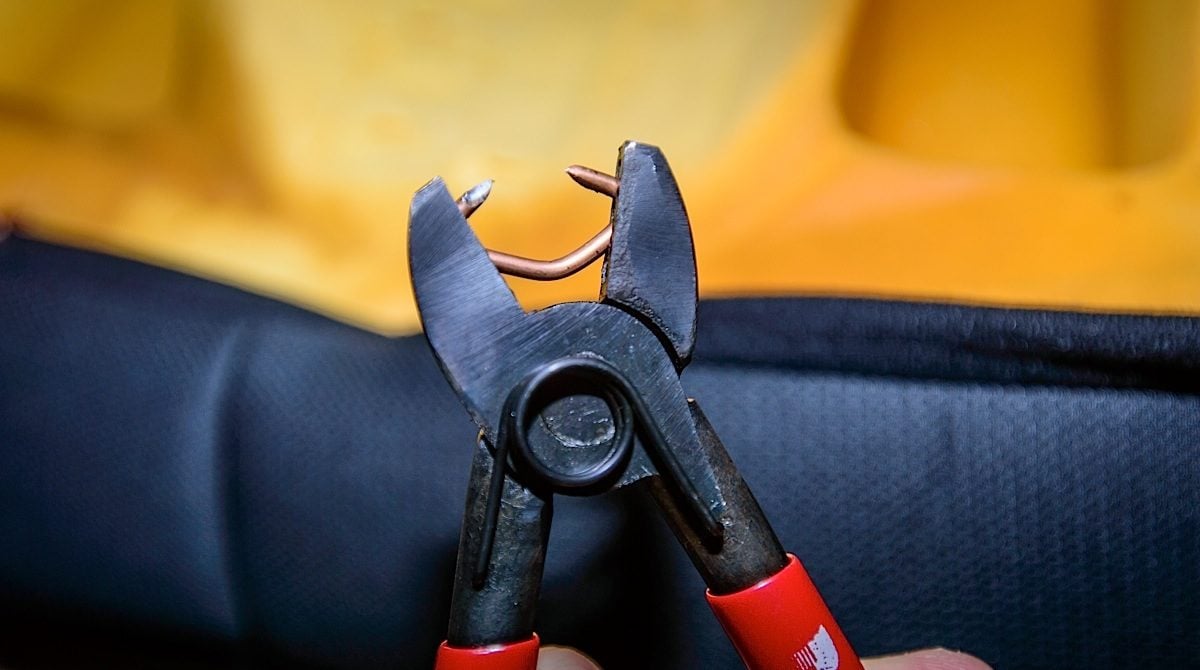
Left and Center Left: The rear seat upholstery simply slips over the seat foams. Only a staple gun is needed to install the seat back upholstery. Center Right: The seat bottom cover also attaches into grooves in the seats as well as on the underside. These metal rods need to be transferred from the old seat cover to the new Corbeau cover, this ensures the upholstery stays in place. Right: Hog-ring pliers are cheap, we bought these for five-dollars, and a box of 100 hog-rings for three dollars. The pliers hold the ring, all that's needed to attach the upholstery to the foam is to apply firm pressure in the correct location with the open pliers and hog ring, the squeeze the pliers to close the ring. When done properly this provides a solid and sturdy connection.
The A4 seats not only look great, they’re also extremely comfortable and their side bolsters provide great support. They also feature leg supports in the seat bottom that is deeper than our original base seats, allowing for greater comfort, especially on long drives.
Left: Our front seats how we found them, with parts store covers. Center: Our new Corbeau A4 seat from LateModelRestoration.com, Right: The reason the parts store covers were installed in the first place, the old seat upholstery was torn, dirty, faded, and worn out.
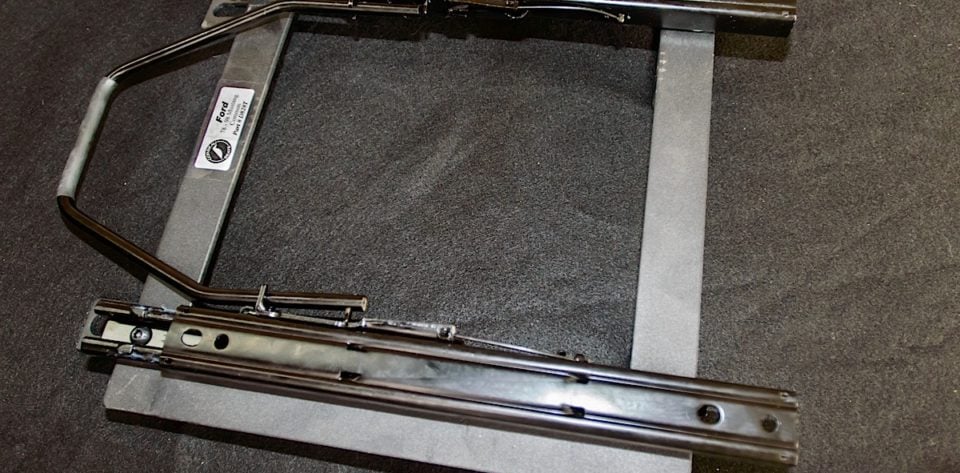
We also received the correct seat tracks to install our seats on, ensuring a safe installation as well proper operation and seat height. Reupholstering the rear seats took only a couple of hours to do properly and the front seats installed in about a half hour…including the time it took to install the seat tracks.
Left: These seat tracks from Corbeau provide safe mounting for our seats, an adjustable seat track, and the proper seated height. Right: This close up of the rear seat upholstery shows that it is the same fabric as what covers our A4 seats.
Carpet
… We wanted to ensure Mustang enthusiasts get a package that can provide new performance seats for the front and matching style for the rear. -Jeff Jimenez, LateModelRestoration.com
Carpet takes a beating in any car; your shoes grind dirt, dust, rocks, and oils into it. Drinks get spilled, fast food goes flying, and it has to bear your weight as you enter and exit the car. It’s also a nasty place for water to remain in the event of something like a heater core leak. We found evidence of moisture in Rehab’s carpet near all of our rusty areas, this was likely due to outdoor wet weather exposure combined with the holes from the rust.
LateModelRestoration.com sent us new carpet for Project Rehab. This carpet is manufactured by Auto Custom Carpet, and is made from better than OE materials. The backing material and jute-backing sound deadener are also better than OE quality. This black carpet is an inexpensive upgrade, and is part number ACC-8293CP-BLK.
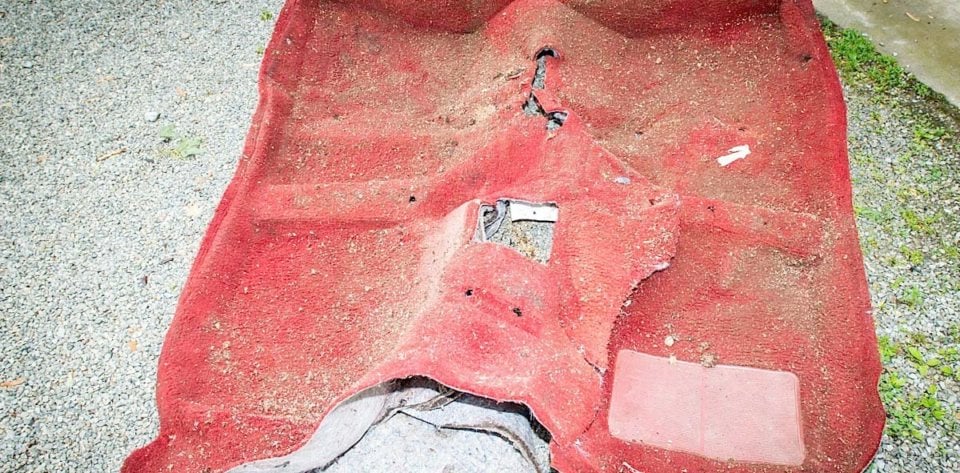
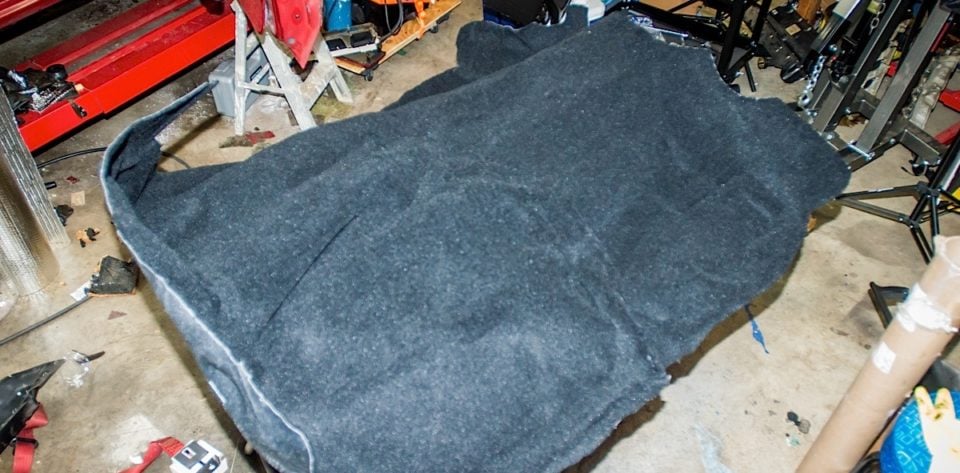
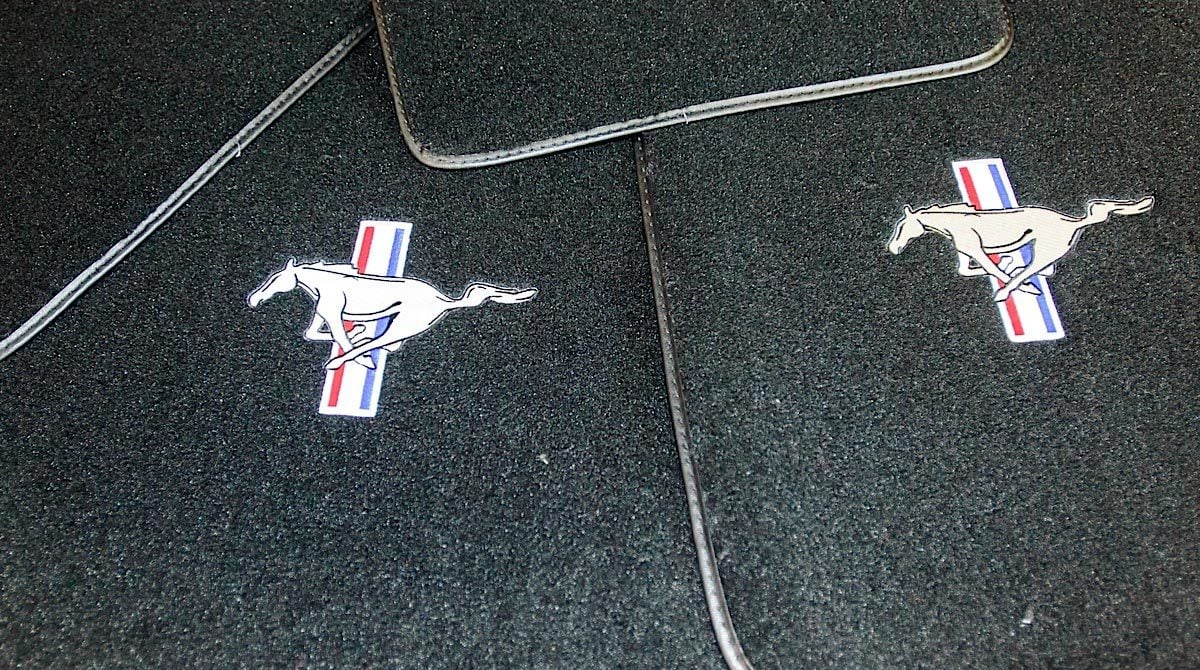
Left: Our original scarlet carpet. Looking closely you can see how faded it is by looking around the area where the console covered it for years. Center: Our New ACC carpet from LateModelRestoration.com. This carpet already has the jute backing sound deadener installed and is molded to fit the car perfectly. Right: LateModelRestoration also sent us a set of these cool Mustang insignia embroidered floor mats. These are higher than OE quality mats, and will not only look good but help protect the carpet for years to come.
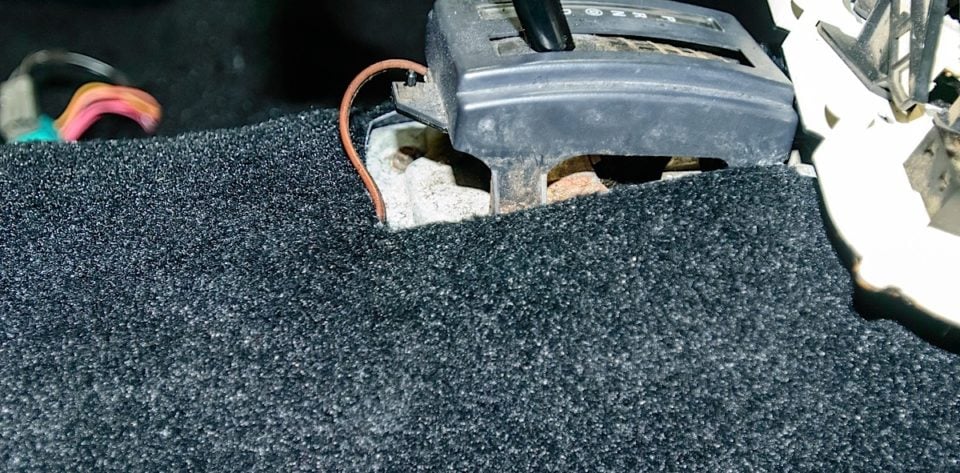
The new ACC carpet is already molded to fit the interior of the car, we simply had to cut a few holes for the seat bolts, seat belts, shifter, parking brake, and console mount.
Installing new carpet requires trimming out the areas for the shifter, parking brake, electrical connectors, seat belt bolts, and seat mounting bolts. We used the old carpet to get rough measurements and then cut small holes to begin with. Once we had the carpet in the car we carefully trimmed until we had precisely the right amount of room for proper installation.
When taking on a project of this size, installing the carpet first is a good idea. Not only does it make the most sense because of all the trim that will follow around it, it also prevents you from damaging newly refinished or installed parts during installation.
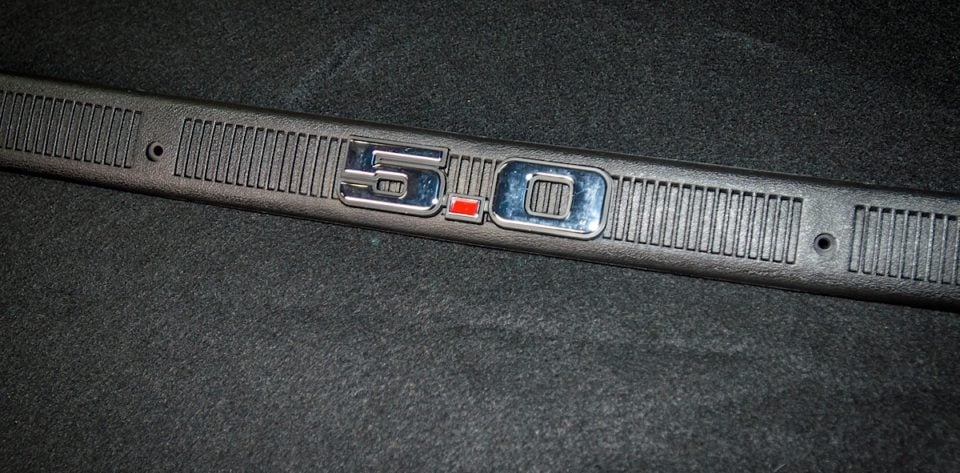
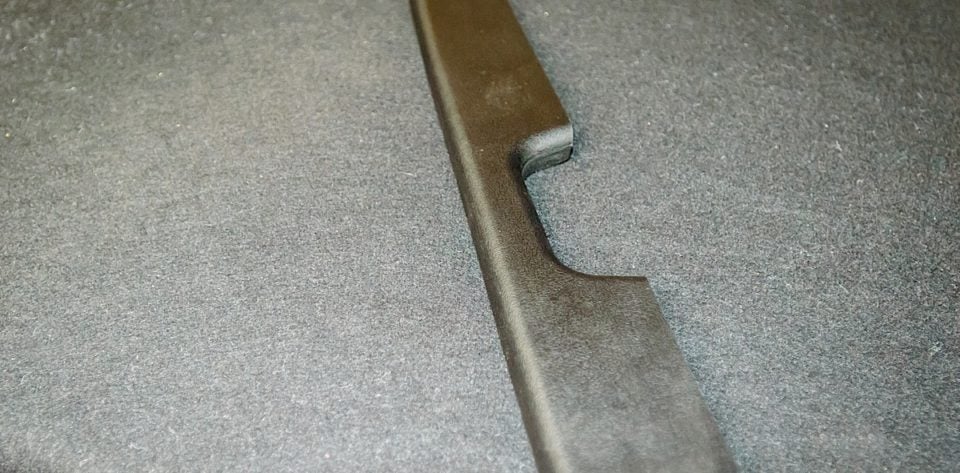
Left: Door scuff plates are often forgotten on this type of project. These take a beating on a daily basis, and we recommend replacing them over trying to dye or paint them. LateModelRestoration.com sent these great looking new scuff plates with a centered 5.0 badge part number LRS13208-BF. Right: Time, UV rays, and wear take their toll on seatbelts, don't skimp and try to dye old ones. Replacement is a bolt in operation and takes only a few minutes.
Overhead and Behind
Rivaling our A4 seats on the cool factor are the 5.0Resto brand headliner and package tray. We have replaced these components in the past on other Fox body cars. With both parts great care has to be taken to remove the old material from the thin cardboard or composite wood backing. All of the old glue must be scraped away, then repairs made to any damage areas and install new material, which must be trimmed to fit.
LateModelRestoration.com has taken the hassle out of this tedious and messy job. They sent us a new headliner, and package tray already installed on their boards. What makes this even better though is that both are installed on upgraded board material. Rather than use a composite wood or cardboard material, the pieces are made of vacuum moulded ABS plastic. This material is sturdier than the original, won’t crack easily, and will outlast the original headliner. There’s also no guessing as to if the headliner is laid out properly, or if the fabric was glued on correctly.
Our headliner came as a kit with new sunvisors, and is part number: LRSSV1559-K. Our package tray part number is: LRS46668P.
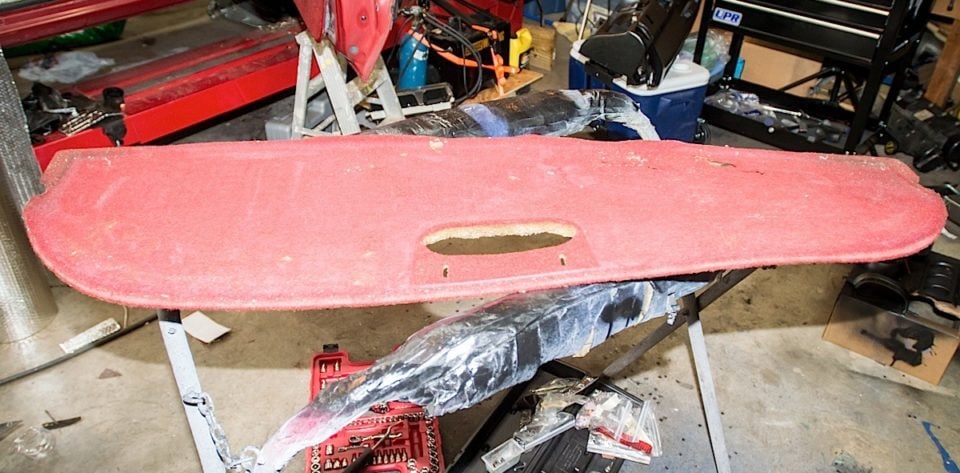
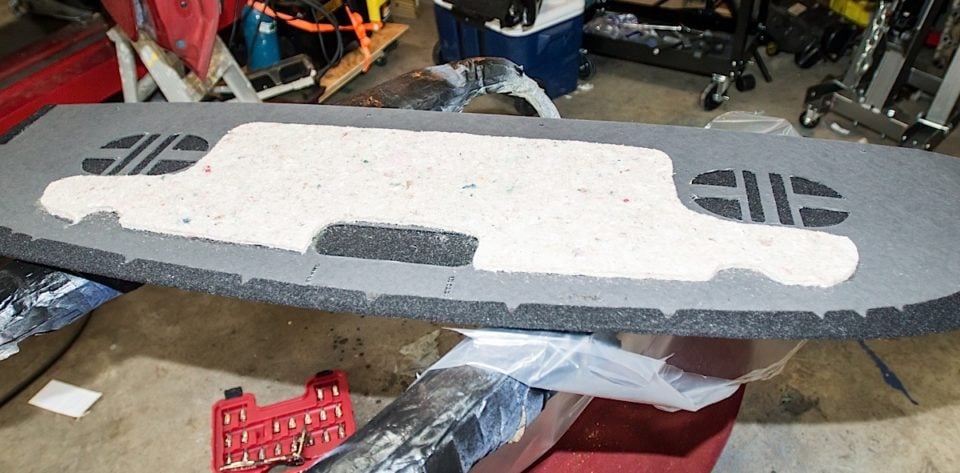
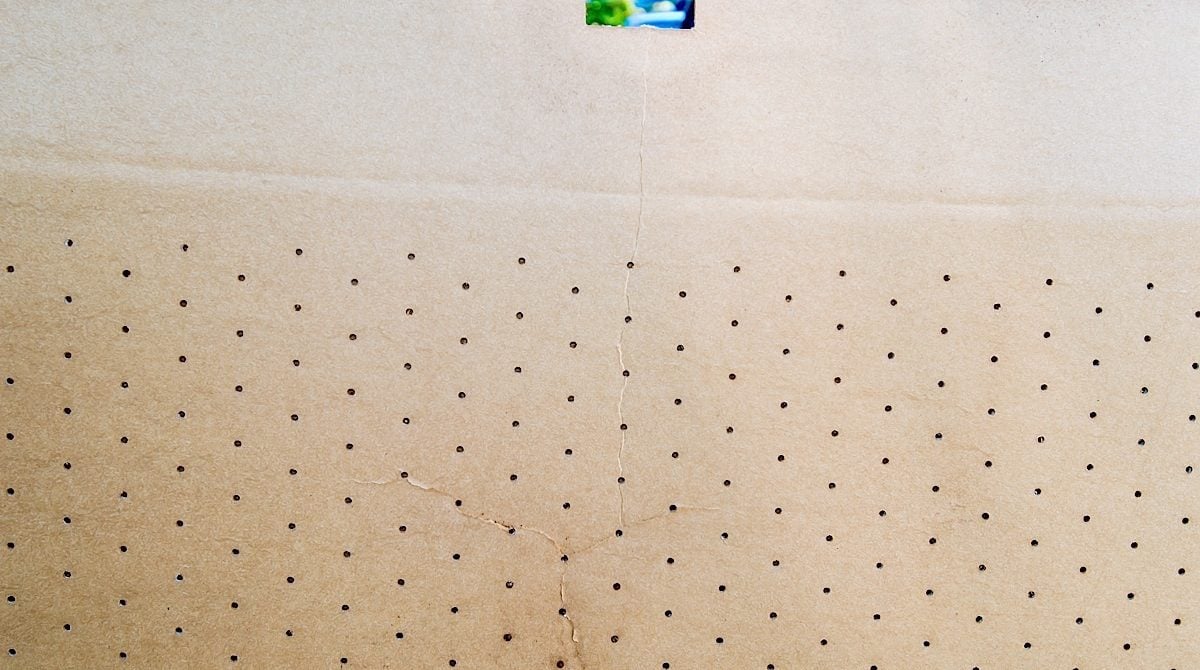
Top: Our package tray was literally disintegrating. It was faded, full of holes, and the old wood/fiber backing board was literally flaking away. Bottom: Our new LateModelRestoration.com package tray features high quality materials including high quality cloth, and is backed with ABS plastic. We cut out the hole for our third brake light and easily installed this part.
The same holds true for the package tray. We also noticed that our original package tray and headliner had perforations in the backing material. There are no such perforations present in our replacement parts, meaning they look like they will also provide slightly better sound deadening, another added benefit.
Going Back Together
Jimenez recommends for a project of this size to make a check list and put it in chronological order of how the interior should go back together. This breaks a large project such as this into smaller segments or goals and ensures you aren’t taking things apart a second time because you forgot something.
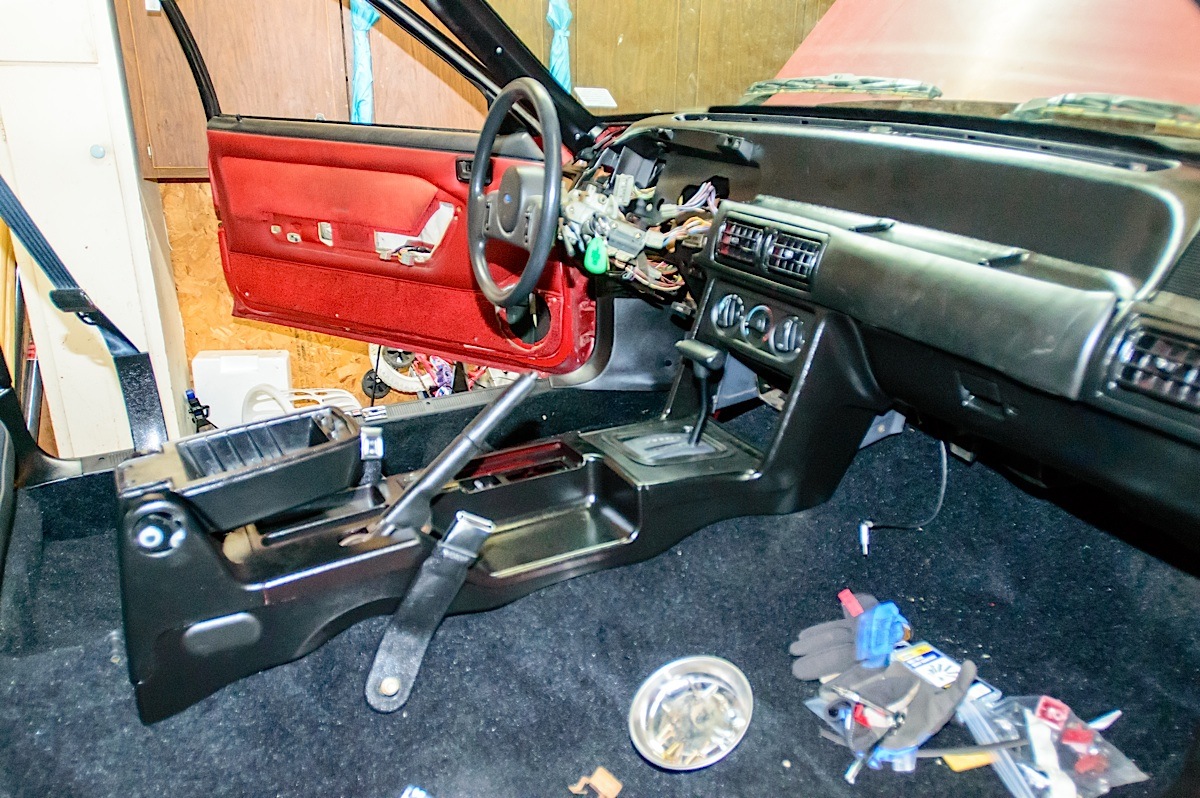
The first thing to reinstall after the carpet and trim is the plastic dash shell, followed by rear seat side panels, the console, seat belts, and back seat.
With our headliner, rear panels, and rear seats in place, we went about reinstalling our plastic dash. This is actually easier than you might think – it’s simply held in place with a multitude of screws. Once the dash was in place we reinstalled the console and the associated parts.
Our original headliner was ready to cave in on us; the backing board was cracked, the original adhesive weak, and the entire piece looked terrible.
Center Arm Rest
The center arm rest has long been a subject of debate in Fox body Mustangs. It’s a love it or hate it kind of thing. We like having something there to rest on during long drives, but we will admit it’s a heavy part that can be cumbersome to deal with at times.
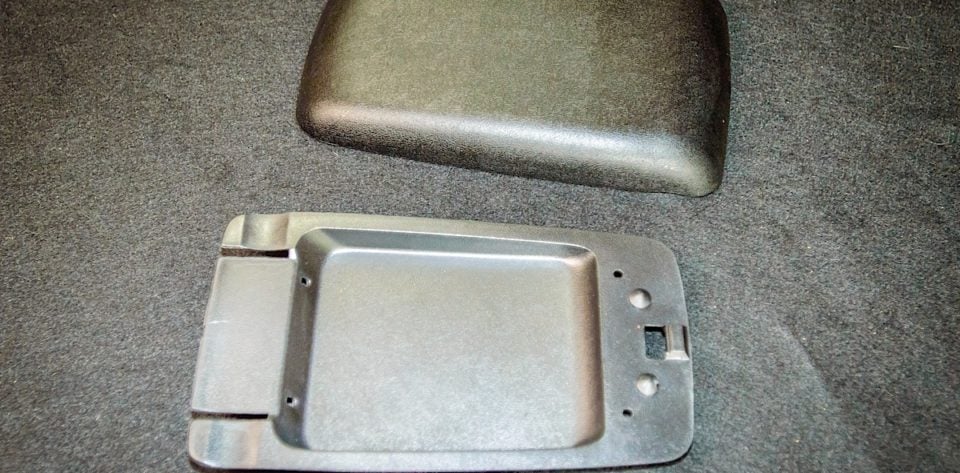
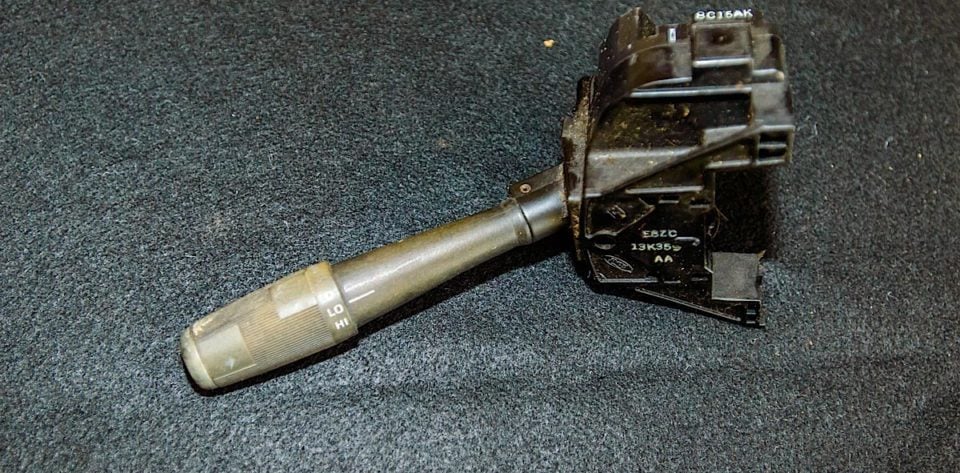
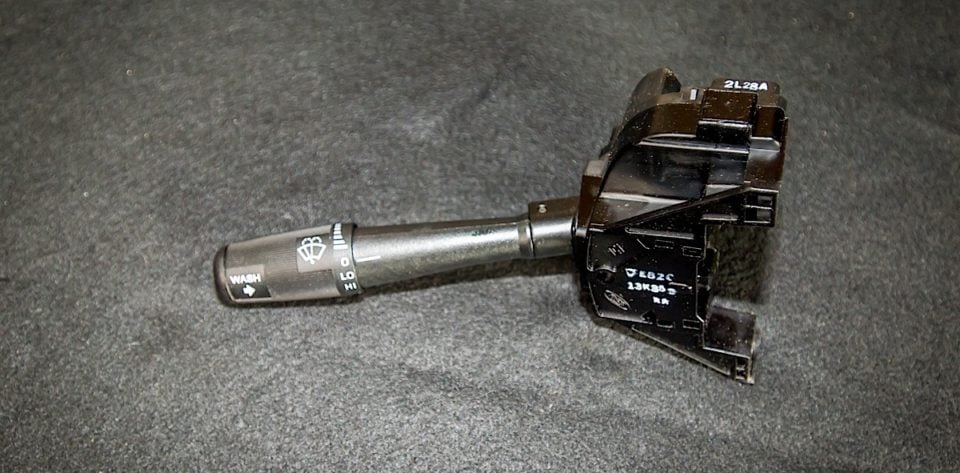
Left: This new center console arm rest is an exact fit replacement for our broken original. Center: Our original combination wiper and turn signal switch no longer operated the wipers. It spun freely indicating it's internal mechanism had broken. Right: LateModelRestoration.com sent us this new Motorcraft replacement switch which we installed and tested in just a few minutes time.
Since this is a part that sees a lot of contact we opted to replace the lid and dye the rest of the assembly. LateModelRestoration.com sent us a new black vinyl lid and matching inner shell kit to repair our old center arm rest part number LRS0624N-K. This piece is just one more item that makes the car feel brand new inside.
Seat Belts
One thing often overlooked on both interior conversions such as ours, and in restorations of older vehicles are the seat belts. Regardless of your opinion, wearing one is mandatory in nearly every state and after 25 years ours were not only the wrong color, but were thoroughly worn out.
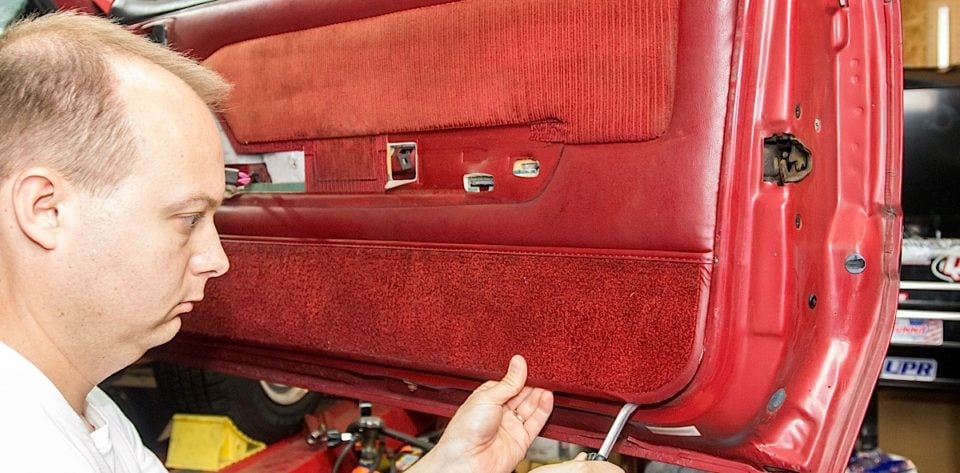
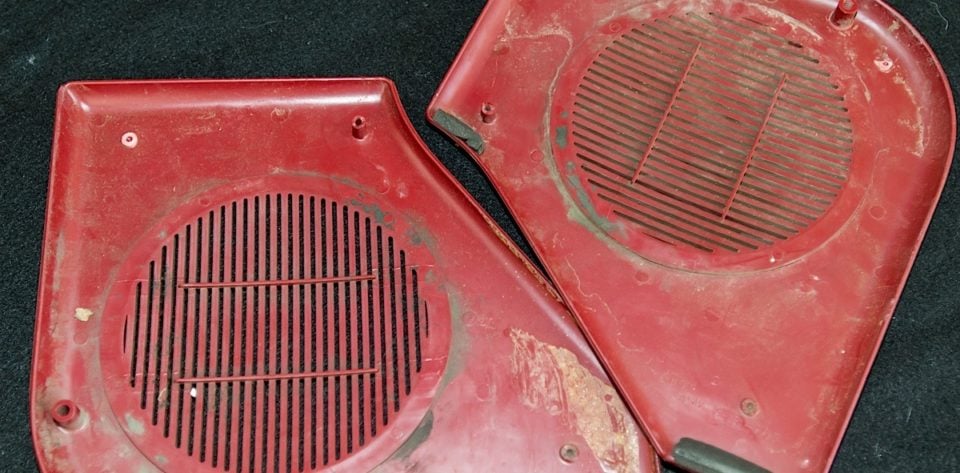
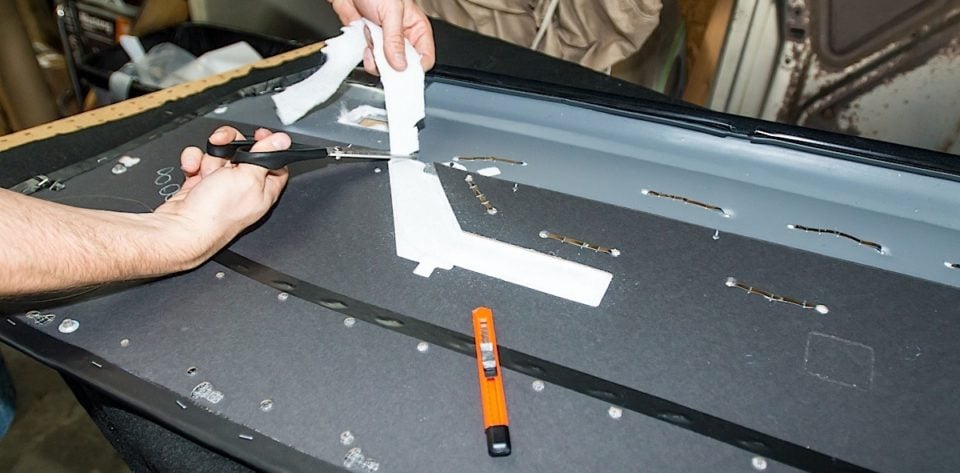
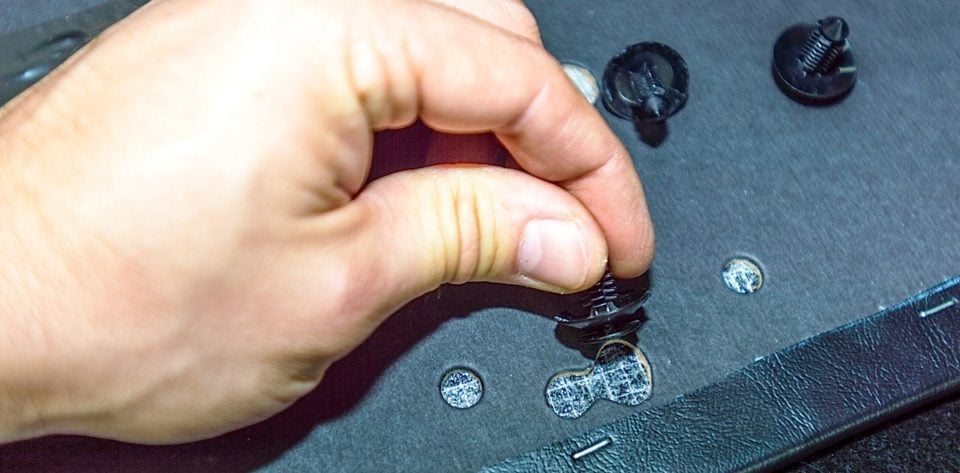
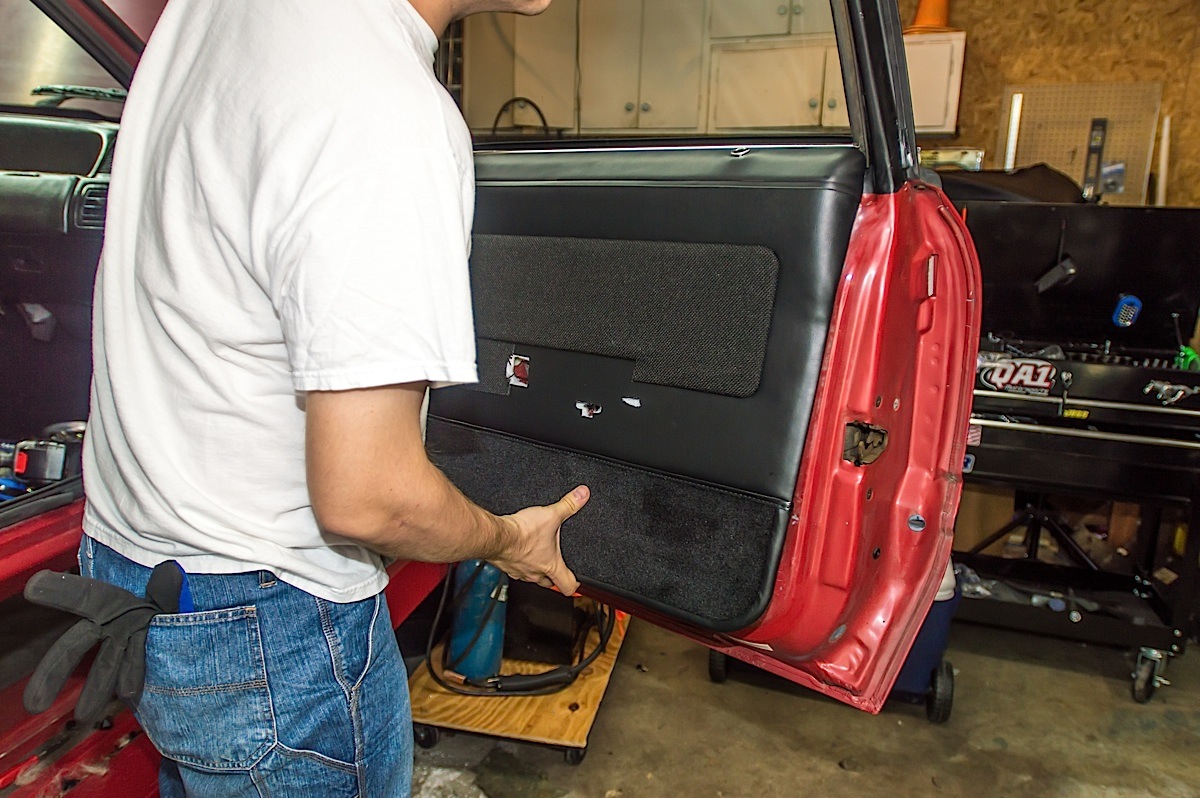
Left: Once the armrests and door handle bezels are removed, the door panels come off by releasing the retaining clips and then lifting up to remove them. Center Left: The speaker grilles were improperly removed long ago, in doing so a previous owner broke the retaining tabs on both the grilles. Center Right: The new door panels must be carefully cut to match the holes in the old panels, this allows everything to hang properly. Right: LateModelRestoration.com sent us a complete set of clips for our door panels, part number LRS-N802900-KIT. Each door panel requires 12 retaining clips.
We replaced all of our seat belts with new ones from LateModelRestoration.com including the buckles. This will ensure that not only do our seat belts match the interior, but they also will keep us secure in the event that we actually need them one day. Our front seat belt set is part number LRS61109-AK, while the rear seat belt set is part number LRS-61168LP.
Installing the ready to go new door panel is a simple matter of sliding it into place and pressing firmly at each clip location to secure the panel.
These belts are made from new material, and are an easy bolt in replacement. They retract nicely, and lock better than any Fox body belt we can remember, even when we were riding in these cars when they were new.
Doors
Our door panels are another set of 5.0Resto parts. We ordered deluxe panels, part number LRS-32942F. These include the panel material already glued to the plastic backing. This too is an upgraded backing over the original factory wood material.
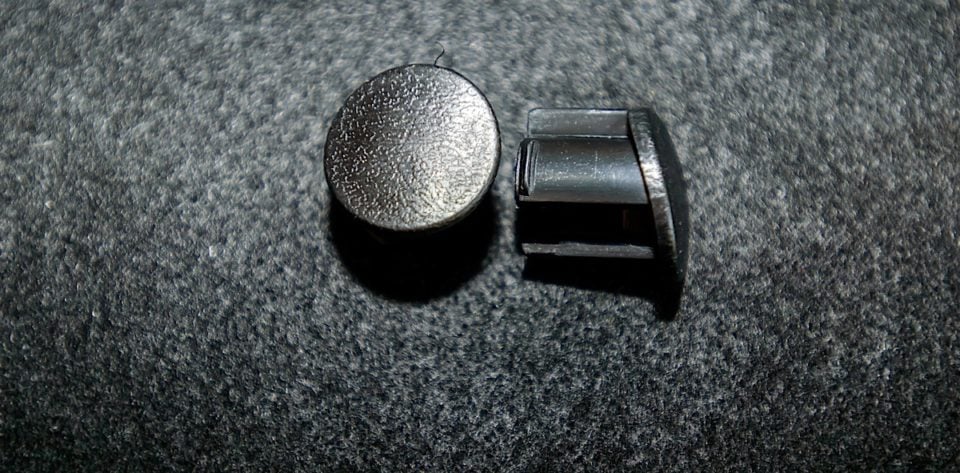
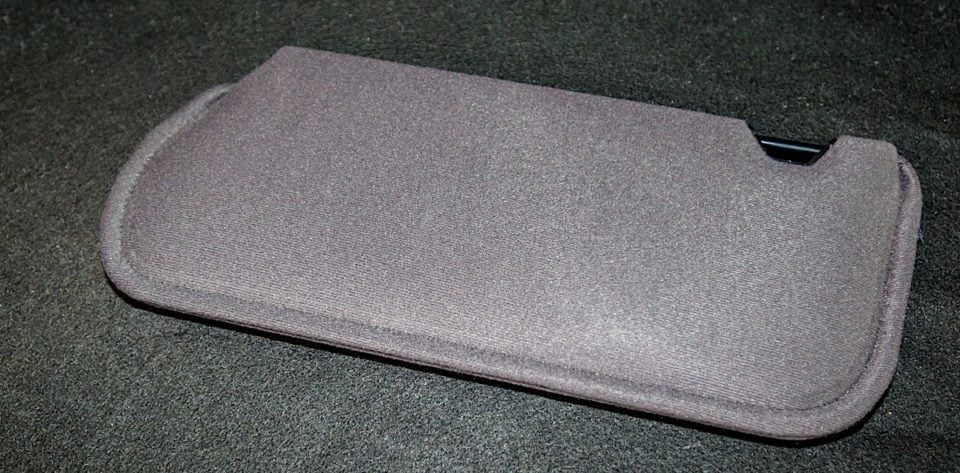
Left: These trim plugs cover the door armrest retaining bolts, there are different part numbers for left and right sides, we used part numbers LRS24057-APR and LRS24056-APR. Center Left: LateModelRestoration.com provided us with new door armrests, also a 5.0Resto part, these are secured to the lower arm rest with screws. Center Right: New sun visors are another often forgotten part on a project like this one. We made sure to order a new pair to match our black interior and headliner. Right: One of the old tattered and beaten sun visors.
Rehab’s old door panels came off easily, in part due to the worn out retaining clips. We also noticed that a previous owner of the car had used six sheet metal screws to secure the driver’s panel at the bottom. He could have easily just replaced the worn clips as there was no physical problem with the doors.
We had dyed our lower arm rest, however we installed new arm rest pads, part number LRS-24141A-K, before installing them on our new doors. LateModelRestoration.com also sent us the matching plugs to cover the arm rest bolts.
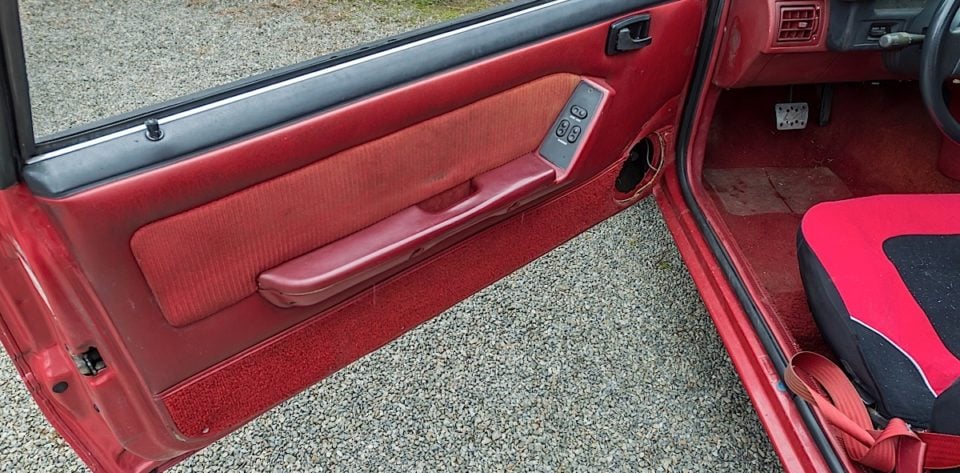
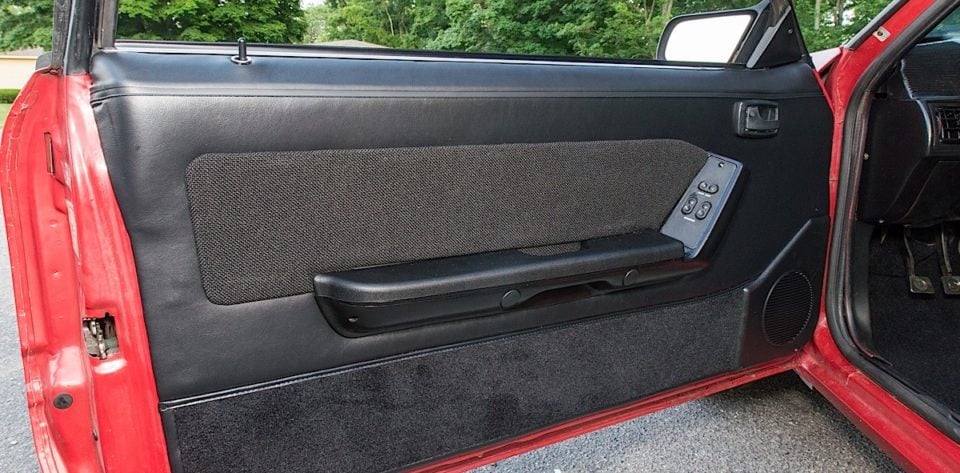
Left: Our original scarlet door panel. Right: our newly installed 50Resto Panel, with new arm rest pad, and included speaker grille.
Column
Project Rehab’s turn signal and wiper switch was literally worn out. The wiper switch would not turn any more, and the condition of the connectors was questionable as well. LateModelRestoration.com sent us a new Motorcraft switch, part number SW2443, to replace our old one. Not only does this switch function better but with our restored interior it also lends to the “like new” appearance.
Interior and trim work is something that any average enthusiast can do. This was a large project since it was a complete interior restoration. We would estimate it took about 40 hours of labor start to finish to do this entire project properly. That includes about 6-8 hours for teardown, and a full day to prep and paint/dye parts, a full day for patching the floor pans, and the rest of the time is spent in careful reassembly. Having the interior of your Mustang looking nice is not only a way to be more comfortable, but even on a ragged looking car like Project Rehab it greatly increases enjoyment of the car.
Part Numbers Used:
- CS-20301A-K: Corbeau Front Seat Kit with Tracks and Matching Rear Seat Cloth
- SW2443: Motorcraft Mutli-function/Turn Signal switch for 87-89 Mustang
- LRS61109-AK Front Seat Belt Kit
- LRS-61168LP: Rear Seat Belt Kit
- ACC7993BLK-110: Floor Mats with Mustang Logo Embroidered
- LRS0624N-K: Center Console Armrest Kit
- MET-FV7: Black Interior Dye
- LRS13208-BF: 5.0 Logo Scuff Plates
- LRS46668P: Rear Package Tray
- LRSSV1559-K: Headliner and Sunvisor Kit
- LRS-3783-C: Dome light lens
- LRS-32942F: Door Panels
- LRS-24141A-K: Door Panel Arm Rest Pad Kit
- LRS24057-APR: Door Arm Rest Plugs Left Side
- LRS24056-APR: Door Arm Rest Plugs Right Side
- LRS-21850BP: Door Lock Knobs
- ACC-8293CP-BLK: Black Carpet For 82-93 Coupe/Hatchback
- LRS-N802900-KIT: Door panel removal tool and new clip set
Trained eyes will notice we dyed a SN95 steering wheel that editor Creason had laying around and put a new leather wrap on the rim. We then installed an airbag delete in the center. This was all to replace the ugly original Fox-body cruise control wheel. Closer inspection shows that we’ve also installed an SN95 convertible rear view mirror and already installed a new pedal assembly for a future project.