It might be hard to believe, but the newest of the Fox-body Mustangs are now 16 years old and wheel choices are getting hard to come by. There are some options out there for 4-lug Mustangs but the selection of both factory and aftermarket wheels just doesn’t compare to the newer 5-lug layout. There are many ways you can go about doing a 5-lug conversion on an early Fox, from a low-buck junkyard swap to brand-new, full-race components. Late Model Restoration Supply has taken a lot of the guesswork out of doing the conversion with their 5-lug kits. You can find cheaper kits but they may not include all of the quality hardware that Late Model Restoration supplies. Late Model Resto offers a range of different kits, both with and without factory-style wheels included.

The kit we are using is the basic conversion kit that includes rotors, drums and axles. The rotors also come with new inner and outer bearings and seals. The Royal Purple gear lube and friction modifier are also included with the kit. The cheap kits you see on eBay don’t include these items and do not have the same quality rotors, drums and axles as the Late Model Restoration kit. The photo below shows the two rotors, two inner bearings, two outer bearings and two inner seals. The rotors included with the basic kit do not necessarily fit all wheels based off of production Ford wheels. There can be hub-to-wheel fitment issues, so be sure to check with them before buying wheels. Most aftermarket wheels with not have any problems.

The components for the rearend conversion include axles, drums, bearings and seals, studs, and Royal Purple gear lube with an additional bottle of friction modifier to keep the factory limited-slip diff working properly.We added the LMR part number AK-1563 bearing and seal kit (2 needed per car) while we were at it to replace our worn-out stock pieces.
The installation is pretty straight-forward and you’ve probably seen it before in the magazines, so I will just hit some of the highlights. I put the car up as high as I felt comfortable on four jack stands, so I could work on all four corners without any problems. Being able to move around the car and do both ends without moving the jack around and repositioning the stands saves a lot of time and effort.

Be sure to get a tool to remove the axle bearings. I was able to borrow one from a regional auto parts store. The slide hammer I borrowed worked great, and the adjustment nut was also the perfect size to tap the bearings into the axle. The bearings fit into the axle housing really tight, and it takes some work with the slide hammer to get them out. You need to make sure the car is supported very well before attempting to remove the bearings. When reinstalling the bearings, you want something solid that is as close to the outer diameter of the bearing as possible, while still being small enough to slide inside the axle housing. A big socket is the usual solution, but I found the adjustment nut off of the slide hammer was the correct diameter. You must make sure the bearing is square to the housing as you start to tap it in. With the bearing out, you can feel a step in the housing. You will tap the bearing back against that step. Be sure to check how close the bearing is, because you do not want to continue hitting it when it is in the correct place. You will use the same process to install the seal once the bearing is in place. I always apply a small amount of lube to the seal before sliding the axle into place.
Another important thing would be the installation and adjustment of the front wheel bearings. First, you need to make sure the bearings are packed completely full of grease. This is something that a few shops will do for a small charge, but I bought a $10 grease cone that is designed for putting grease in wheel bearings. You put the bearings in the cone and tighten it, then hook up a grease gun and pump away until you see grease coming out the other side of the bearings. Install the inner bearing in the rotor and then install the seal. The seal installation will be similar to the rear wheel bearing and seal installation. You will need something the same as the outer diameter of the seal to tap it into place. Once the seal is in place, put a small amount of lube on it before sliding the rotor in place. This will help keep the seal from getting damaged during installation. Slide the new rotor on the spindle with the outer bearing in place.

Once the rotor is in place, reinstall the washer and the nut. The nut controls how tight the front wheel bearings are, so you do not want it overtightened. I try to work the nut back and forth a few times while I spin the rotor to make sure everything is in place. Then I set the nut to where there is a small amount of tension as you spin the rotor by hand.

Once you have the bearings adjusted, you will need to reinstall the nut cover and the cotter key. The nut may need to be moved a little to get the hole lined up for the cotter key. Once you get the cotter key in place, bend it over with a pair of needle nose pliers.
In the photo below you can see the star-shaped Torx head on the caliper bolt and the socket required to remove it. This is another item you should be able to borrow from a local parts store if you don’t already own a set. When the caliper is removed, the pressure in the brake lines will push the piston out. When I was ready to install the caliper, I left the old brake pad in the caliper and used a pair of large channel-lock pliers to squeeze the piston back in.

When you’re doing the swap at home like I did, one of the hardest things to accomplish is filling the rear end up with gear lube. This time I found a way that was not as bad. First, I found the best way to slide the bottle in above the rear end before I opened the bottle. I had the car on jack stands and let the rear end down as far as the shocks would let it go to give me as much room as possible. Then I found a piece of rubber hose that would fit over the end of the lube. I had to trim the other end to fit inside the fill hole on the rear end. I slid the rubber hose into the fill hole after it was trimmed to fit. After opening the bottle of Royal Purple, I put my finger over the end to keep it from leaking. I slid the bottle up and over the axle from the rear of the car and moved my finger off as I pushed it into the rubber hose. Then, you just have to squeeze the bottle until all the lube is in the rear end. Don’t forget that you have another bottle of Royal Purple to do the same way. I added the friction modifier provided with the kit to one of the bottles of Royal Purple to make it easier.

I would recommend adding the brake upgrade kit when you are ordering as well, since it’s not included in the kit. You can also get brake pads and shoes from a local parts store also. If your budget will allow, Late Model Restoration has a stock brake upgrade kit that includes Hawk brake pads, MM High Performance rear shoes, stainless steel caliper sleeves, and stainless steel brake lines.
For those who want bigger and better brakes, you just need to figure out your budget and how big of a wheel you want to run. Late Model Restoration carries 5-lug kits and brake upgrades from manufactures like Ford Racing, Stainless Steel Brake Corporation, and AP Racing in addition to their own kits. They also carry brake pads and shoes from companies like EBC, Hawk SSBC, Stillen and Raybestos. The next step up from stock would be to upgrade to the sealed hubs and bearings off of a 1994 or newer Mustang. With these in place, you can upgrade to the bigger Cobra brakes for a moderate cost. LMR offers a full line of SSBC brake kits and components, like their brake upgrade shown below.

Late Model Resto also offers a complete SSBC 5-lug and brake upgrade kit. This kit is similar to the Ford Racing kit but larger 17-inch wheels are not required to clear the rotors. The Ford Racing kit would be the next step up in both performance and price. From there, you are looking at Baer Racing Brakes as the next run up on the ladder.

Then you can look at upgrades for the back of the car. A rear end upgrade could go along with a 5-lug kit also. The first step in upgrading would be to go with 31 spline axles and a matching differential. LMR carries diffs from several companies but Ford Racing has the most options. Another step in upgrading the rear end would be adding C-clip eliminators to keep your axles from coming out in case of breakage. Then, you could step up to a spool for race applications. Swapping in a 9-inch Ford rear end has also become very common for Fox-bodied cars. Moser offers bolt-in 9-inch Ford housings you can fill with the parts you like and not have to worry about the rear end again.
Now that you have upgraded to 5-lug hubs, it’s time to pick out your wheels! LMR has a wide selection of wheels to fit this application. Just check out their Wheel Pit. They offer drag wheels like Weld Pro Stars, Drag Lights and Rod Lights. They also offer the new Billet Specialty drag-style wheel, the Street Light. I will be looking at a set of Street Lights when I buy my set of drag race wheels. I ordered a set of the Saleen SC style wheels in 17×9 for my car. They sell a full set with tires, mounted, balanced and shipped for $915. They have 75 different photos of wheels in the Wheel Pit just in the 17-inch rim size with a 4.5 on 5 bolt circle alone. Be sure to check out LMR’s Wheel Pit for your wheel options.
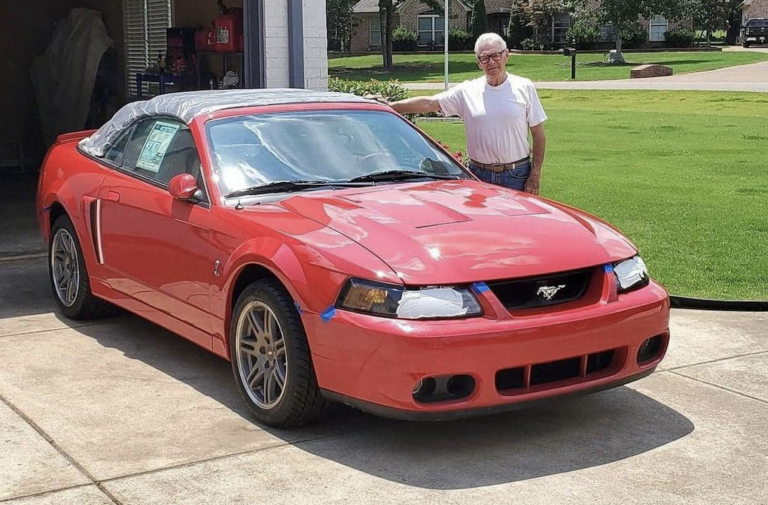
Here’s a final look at my car with the 5-lug conversion and new wheels. Not bad for an afternoon’s work, huh?